
This text illustrates how Moralis can simplify improvement for these occupied with constructing a dapp on Cronos. What’s extra, when using Moralis as your enterprise-grade API and SDK supplier, you possibly can construct a Cronos dapp in 5 steps. So, if that sounds attention-grabbing to you, comply with our lead by the outlined steps under as we create a decentralized Cronos software!
Full Boilerplate Documentation – https://github.com/ethereum-boilerplate/ethereum-boilerplate
If you do not need to comply with alongside throughout the entirety of this tutorial, you possibly can entry the whole code utilizing the hyperlink above. In any other case, be happy to affix, as we are going to cowl every step of the way in which in additional element. The accessibility of this course of stems from Moralis’ instruments, such because the Auth API, Ethereum boilerplate code, and extra. Therefore, due to Moralis, it is possible for you to to construct a Cronos dapp in simply 5 easy steps!
Nevertheless, you may ask your self, “how can I exploit an Ethereum boilerplate to construct a Cronos dapp?”. Nicely, that is potential due to Moralis’ cross-chain capabilities. You may have the choice to make use of the template for any EVM-compatible chains. This means that Moralis’ Ethereum boilerplate is the quickest option to construct a Web3 app of any type!
So, are you trying to construct a Cronos dapp or a venture for every other community? In that case, join with Moralis instantly! Creating an account solely takes a few seconds and is free!
What’s a Cronos Dapp?
To reply the “what’s a Cronos dapp?” query, we should delve deeper into the Cronos community and discover the intricacies of decentralized functions. As such, we are going to start this part by briefly explaining some fundamentals of what Cronos entails.

The launch of the Cronos community occurred in 2021 and has since been operating parallel with the Crypto.org blockchain. The aforementioned chain is intently associated to Crypto.com, because the blockchain powers its “Pay” characteristic. Furthermore, Crypto.com has been round since 2016 and is the group behind each the Cronos and Crypto.org blockchains. Moreover, the Cronos blockchain is EVM-compatible and helps inter-blockchain communications networks primarily based on the Cosmos SDK. This means that Cronos is appropriate with Ethereum and Cosmos-based ecosystems. Additionally, this interoperability makes it potential to port Ethereum dapps and sensible contracts simply.
So, with a short understanding of Cronos, we are going to proceed by explaining dapps additional. Dapps, or “decentralized functions”, are comparatively just like conventional Web2 functions. Nevertheless, the primary distinction between Web2 and Web3 functions is that Web3 apps are constructed on blockchain networks. Accordingly, because of this dapps come geared up with blockchain expertise and capabilities.
Blockchain tech makes dapps superior to conventional functions in some ways. Nevertheless, a distinguished and pervading attribute is decentralization. The decentralized facet of dapps removes the one level of failure usually present throughout the Web2 house. As such, it turns into a lot more durable to hack dapps as safety is considerably larger.
So, now that you’ve a greater understanding of the Cronos community and dapps, it turns into straightforward to reply the query, “what’s a Cronos dapp?”. In brief, a Cronos dapp is principally an software constructed on the Cronos blockchain!
Construct a Cronos Dapp in 5 Steps
With a extra profound understanding of what Cronos dapps are, we are going to proceed and present you learn how to construct one. Due to the accessibility of Moralis and the Ethereum boilerplate, it is possible for you to to perform this in solely 5 easy steps:
- Discover the EVM-Suitable Boilerplate
- Create a Moralis Account
- Clone the Boilerplate
- Configure Setting Variables
- Begin the Cronos Dapp
The Cronos dapp you’re about to construct will permit customers to sign up utilizing their MetaMask wallets. As soon as they authenticate, customers will have the ability to view info associated to their accounts. For instance, they’ll view transaction historical past, which might be displayed in a desk. Nevertheless, we are going to dive deeper into how the dapp works in step one of this tutorial, the place we are going to discover the Ethereum boilerplate.
Furthermore, in case you are extra of a video learner, you too can take a look at the next clip from the Moralis YouTube channel:
Within the video above, one in all Moralis’ builders illustrates how the Ethereum boilerplate works, together with a whole setup tutorial. Accordingly, you too can watch this video to learn to construct a Cronos dapp. In any other case, comply with alongside as we are going to dive deeper into the EVM-compatible boilerplate within the article’s subsequent part.
Step 1: Discover the EVM-Suitable Boilerplate
This part will cowl the small print of Moralis’ Ethereum boilerplate to point out you what we’re working in the direction of. To begin with, if you launch the Cronos dapp you’re about to construct, it’ll take you to the next touchdown web page:
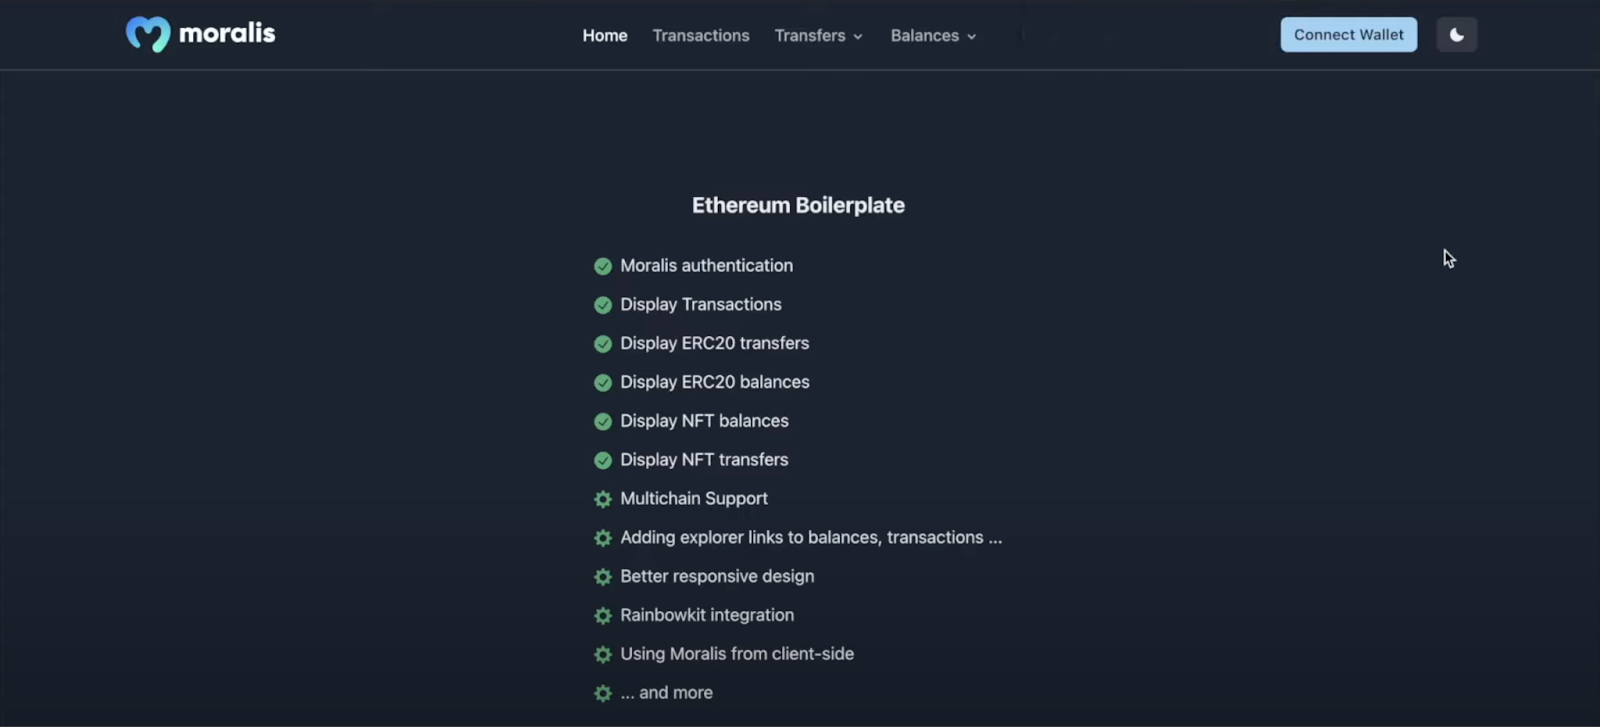
From there, you’ll discover a navigation menu on the high of the web page. This menu incorporates loads of choices resembling “Dwelling”, “Transactions”, “Transfers”, and so forth. These totally different tabs will show info concerning your Web3 pockets. Nevertheless, earlier than you authenticate utilizing the “Join Pockets” button on the high proper, these tabs is not going to be populated with on-chain knowledge:

When you click on this button, it’ll instantly immediate your MetaMask pockets and can help you signal a message. As quickly as you authenticate, the assorted tabs will refill with details about your pockets. Furthermore, MetaMask is just the default choice of Moralis, and you may simply implement extra Web3 authentication mechanisms. If you wish to be taught extra about auths, you possibly can, for instance, learn our article on learn how to add sign-in with Magic.Hyperlink.
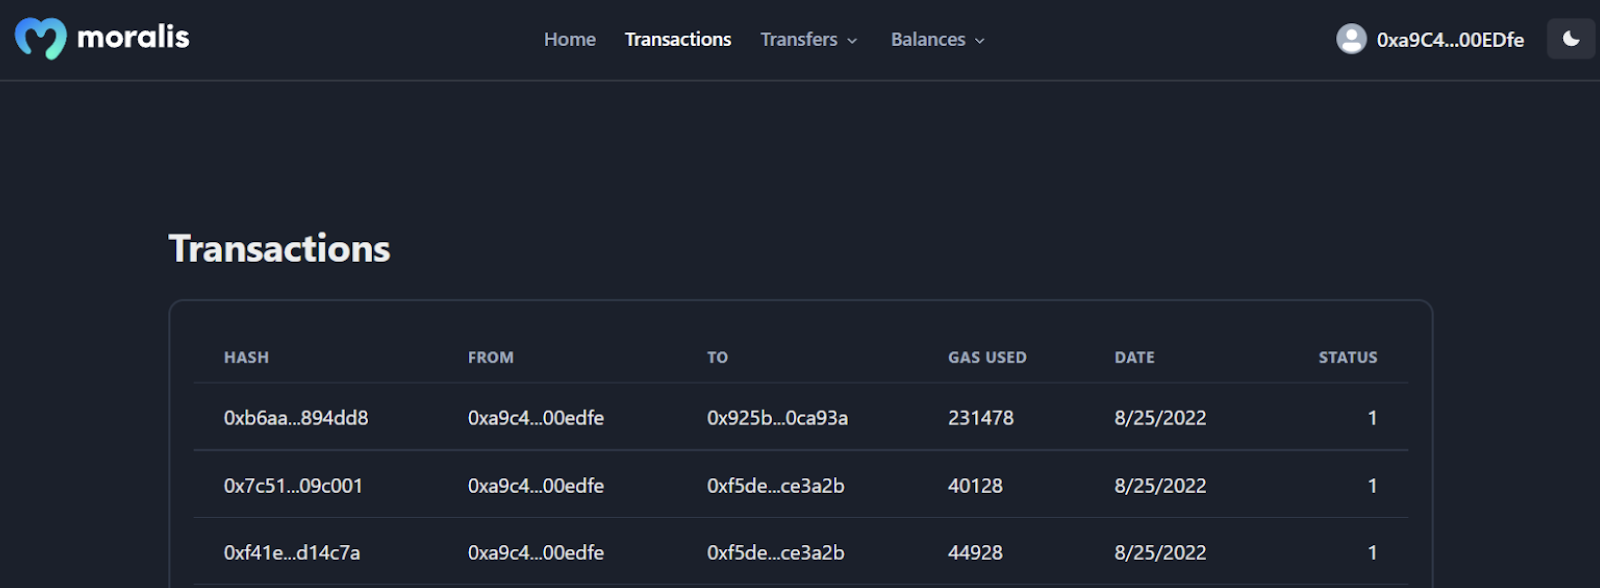
Nonetheless, if you happen to then have been to click on the ”Transactions” tab, as an example, it’ll show your transaction historical past in a neat desk:
Furthermore, each the ”Transfers” and ”Balances” tabs each characteristic a drop-down menu. As such, if you happen to click on on both of those alternate options, it is possible for you to to select from ”ERC-20” tokens and ”NFTs”:

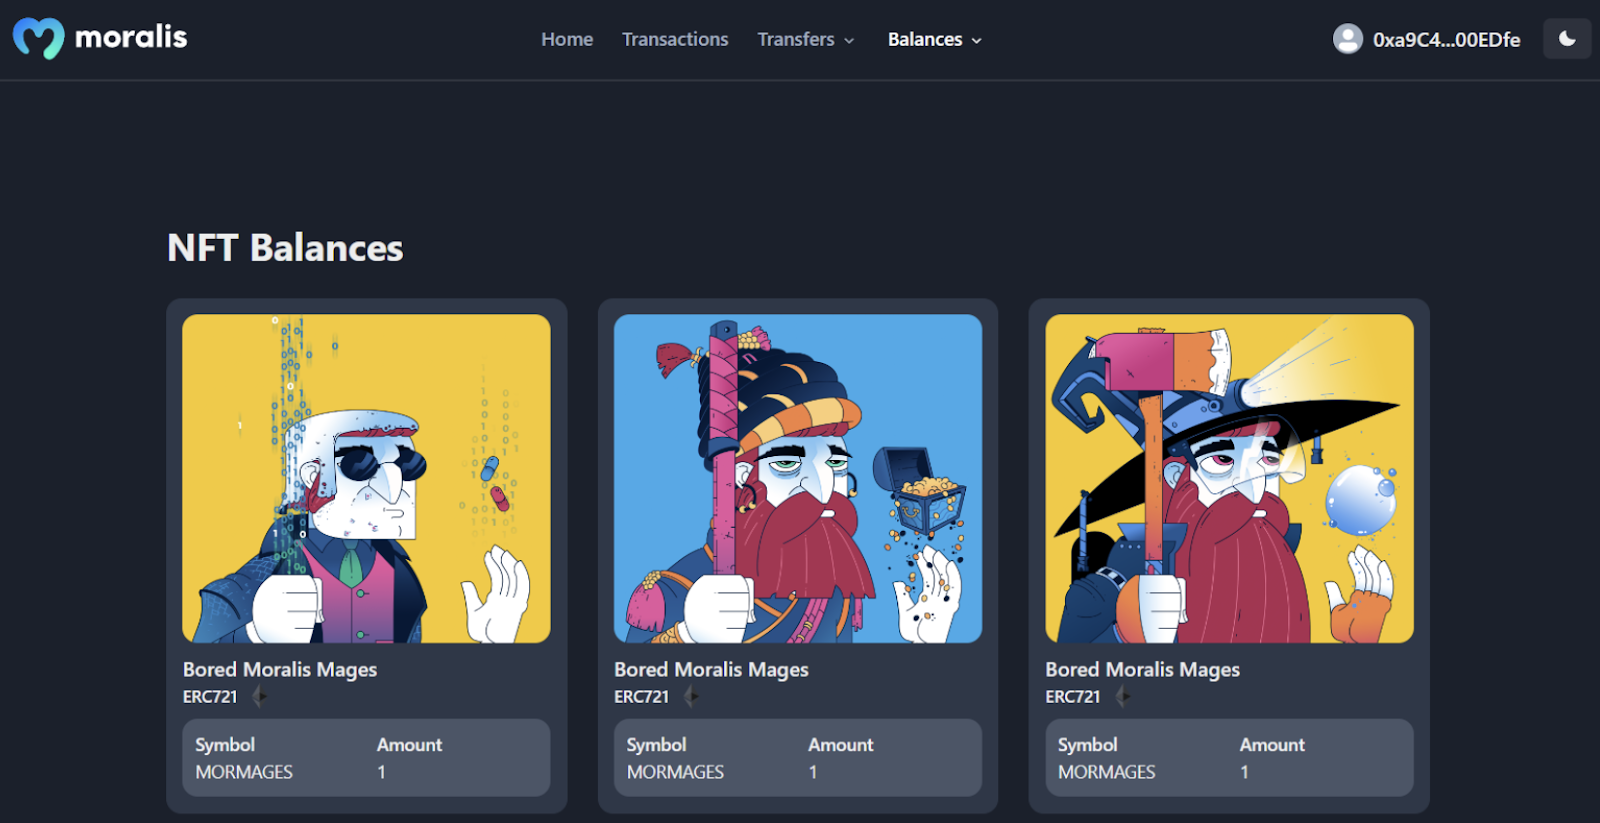
So, if you happen to, for instance, click on on ”Balances” after which ”NFTs”, it’ll show the NFTs of your pockets:
Lastly, the Ethereum boilerplate additionally options darkish and light-weight modes. As such, you might have the choice to toggle between these modes by the button on the far proper:

Step 2: Create a Moralis Account
Now that extra in regards to the boilerplate and what you’re working in the direction of, we are able to transfer on to the second step of this text. Additional, this part will present you learn how to purchase your personal Moralis account.
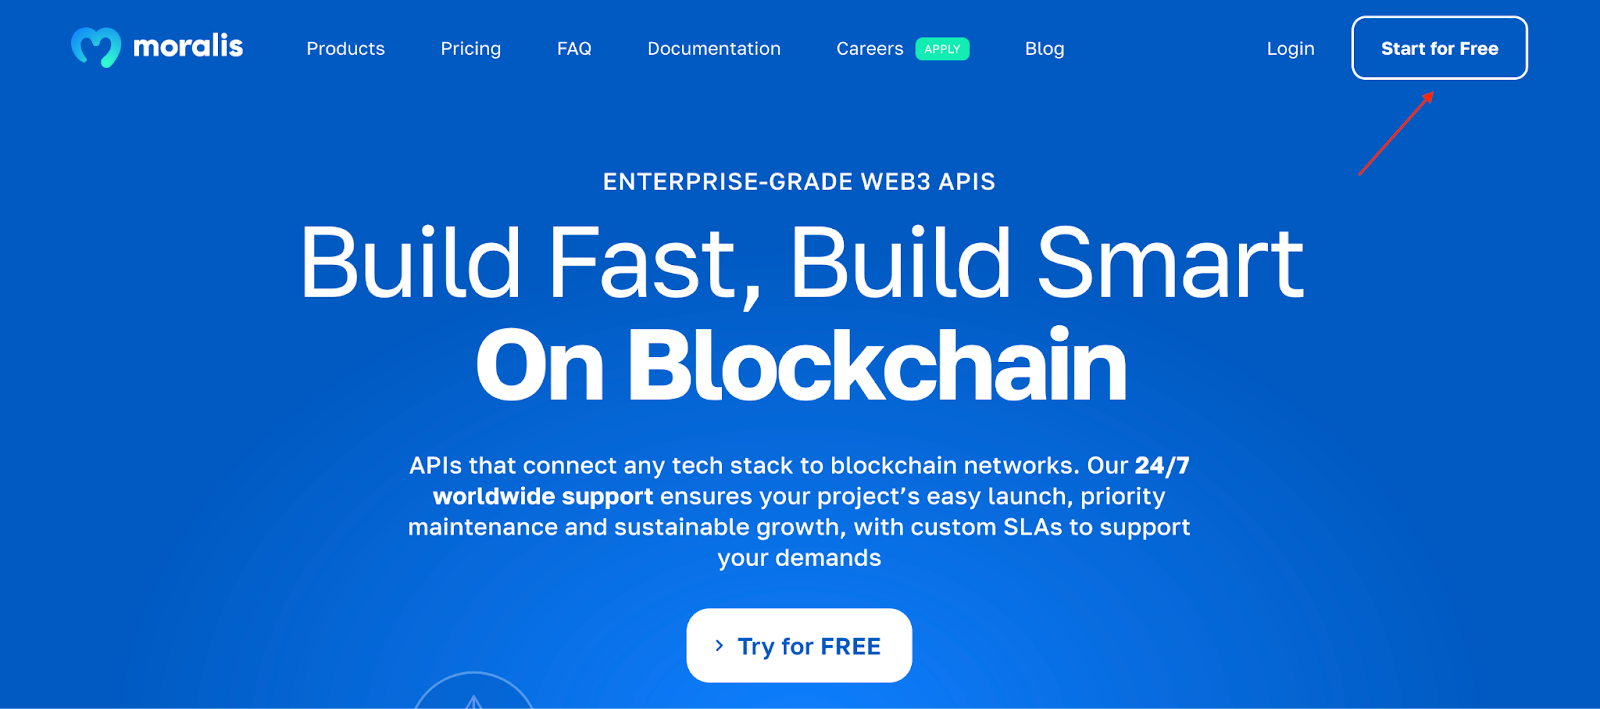
So, if in case you have not already, you have to click on on the “Begin for Free” button on the high proper of the Moralis web site:
From there, it’s essential to enter an electronic mail deal with, create a brand new password, click on on the ”I settle for…” field, and hit ”Signal Up”:
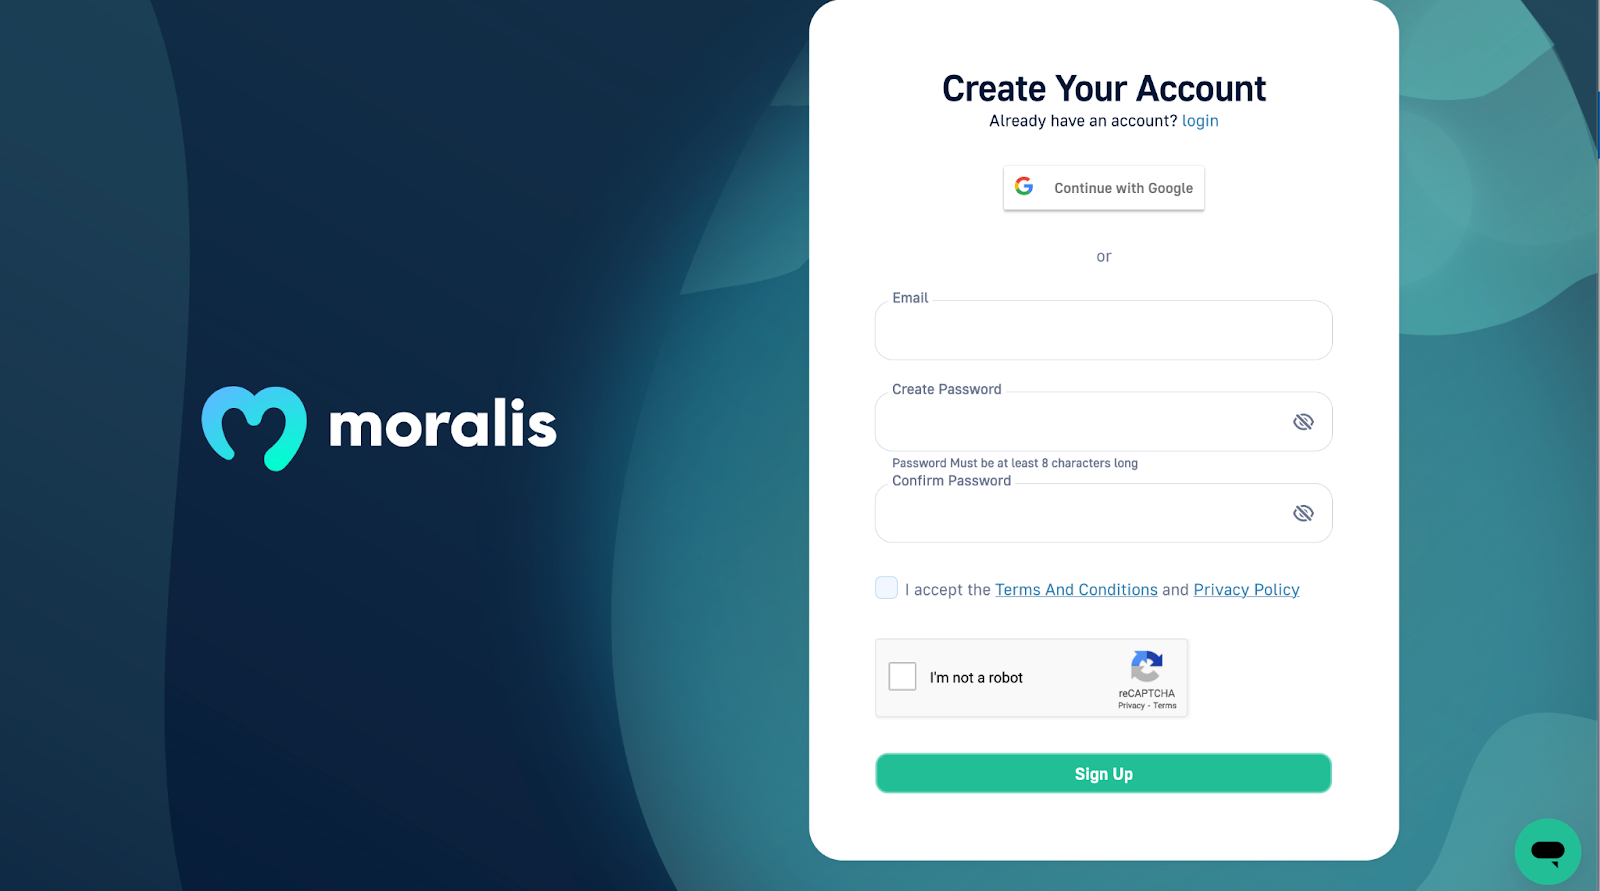
That’s it! Making a Moralis account is straightforward and solely takes a few seconds. What’s extra, it’s fully free!
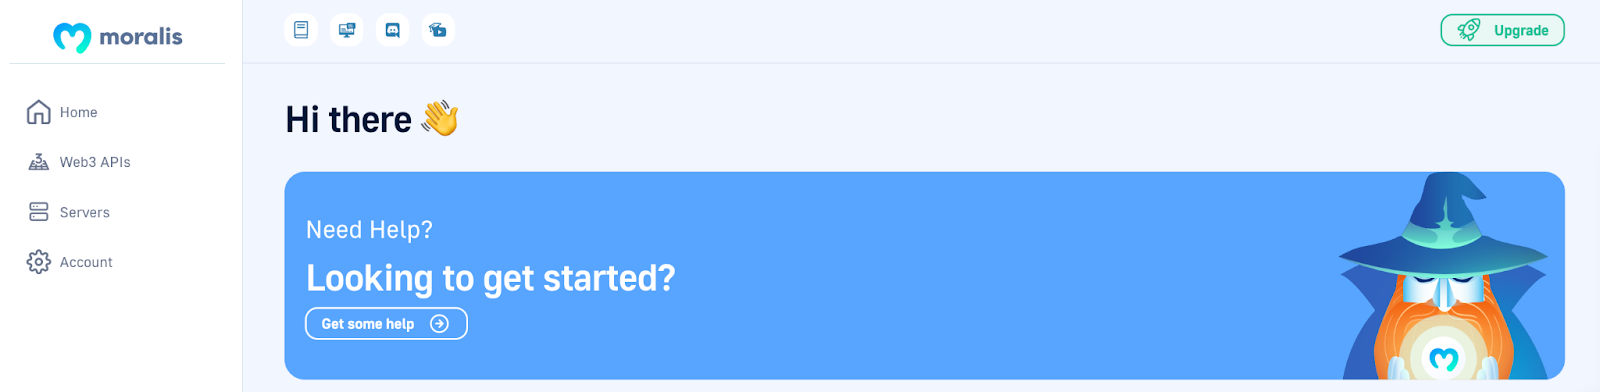
When you log into your account, you’ll have arrived on the Moralis admin panel. This can current you with a number of choices resembling “Dwelling”, “Web3 APIs”, and so forth. Nevertheless, we’re going to discover these additional within the fourth step, the place it’s essential to configure just a few variables.
Step 3: Clone the Boilerplate
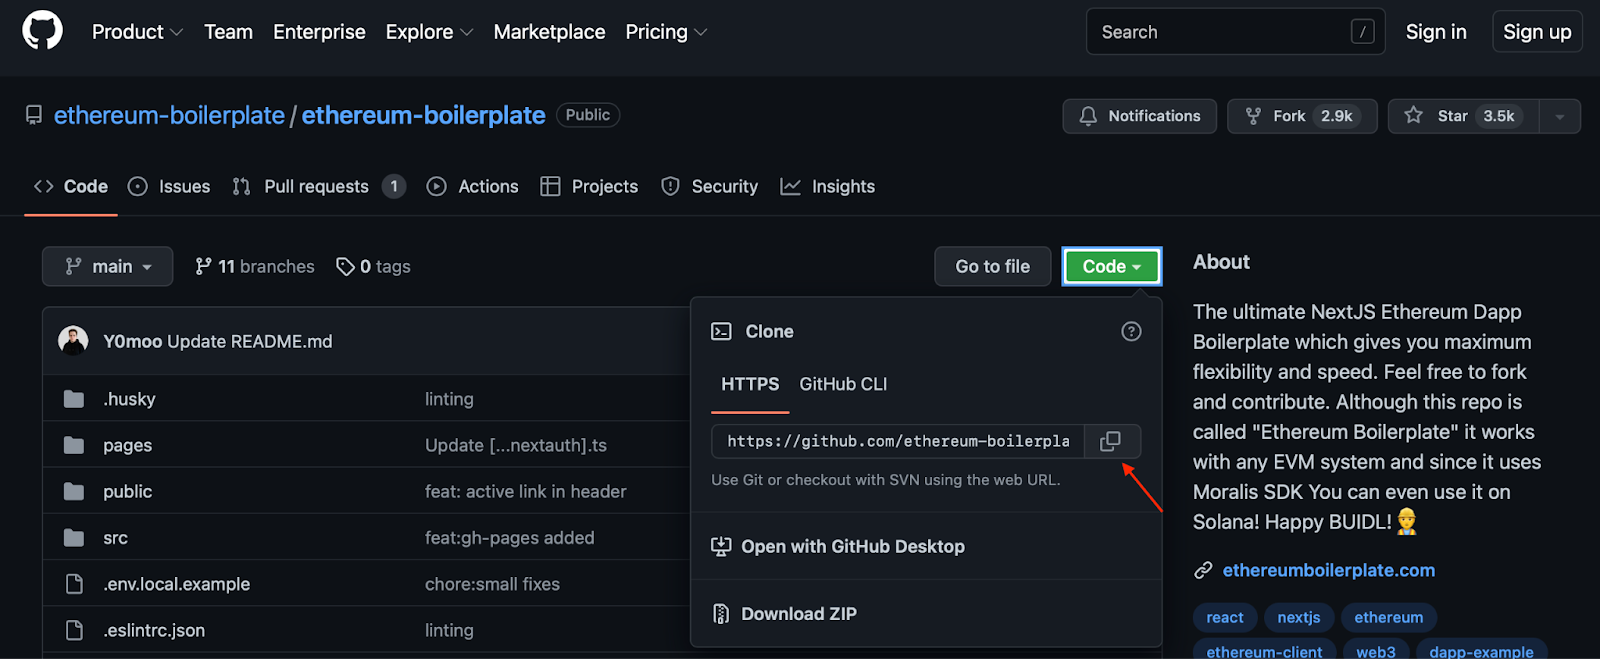
With a Moralis account, the following step is to clone the Ethereum boilerplate to your native listing. As such, it’s essential to go to the GitHub hyperlink that yow will discover within the introduction. From there, it’s essential to hit the inexperienced “Code” button to the precise. Following this, you possibly can go forward and replica the repo URL:
After getting the URL, you possibly can proceed to open your favourite IDE (built-in improvement setting). We’ll use VSC (Visible Studio Code); nonetheless, you’re free to make use of any IDE you like. Simply notice that the method may be barely totally different in case you are not utilizing VSC.
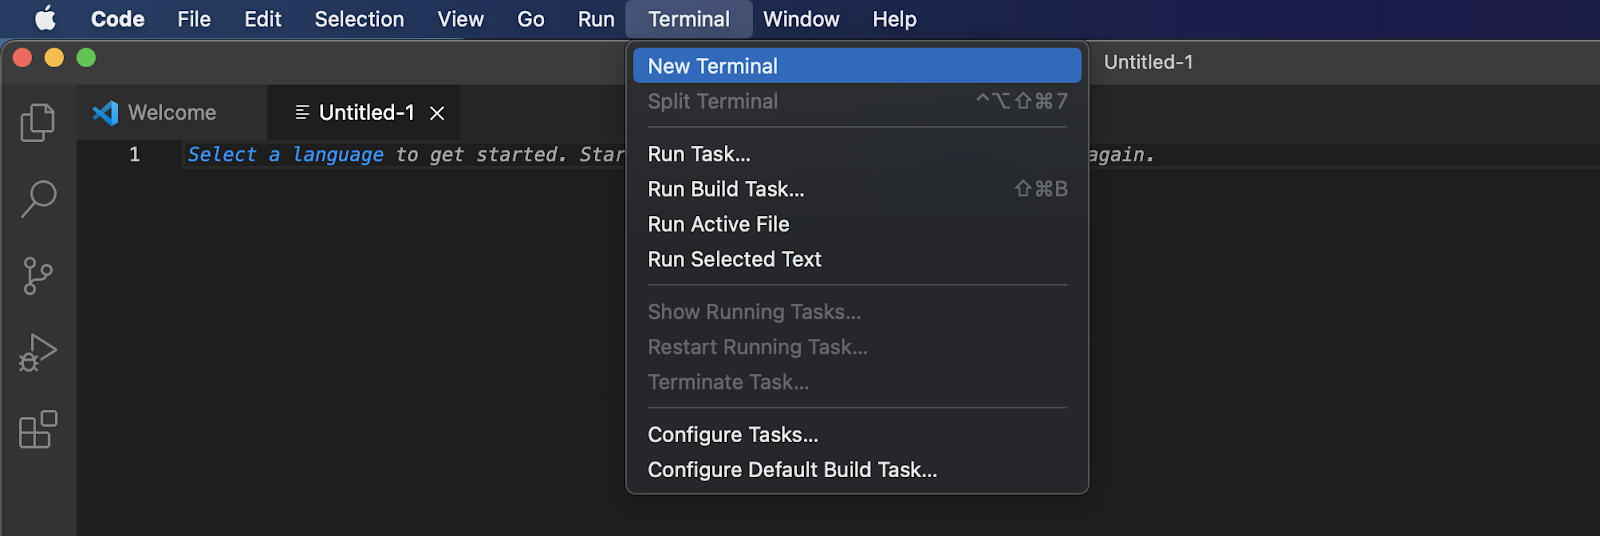
Along with your setting opened, it’s essential to create a brand new folder. We might be calling ours “BOILERPLATE”. With the brand new folder at hand, you possibly can proceed by opening a brand new terminal. In the event you use VSC like us, you are able to do so by clicking on the “Terminal” tab on the high, adopted by “New Terminal”:
Now, all that’s left is to enter the next command into the terminal utilizing the URL you beforehand acquired:
git clone “BOILERPLATE_URL”
Nevertheless, earlier than operating the command, it’s essential to guarantee you’re in the precise location of your laptop, which ought to be the folder you simply arrange. When you run the command above, you possibly can navigate to the proper folder once more by this enter:
cd ethereum-boilerplate
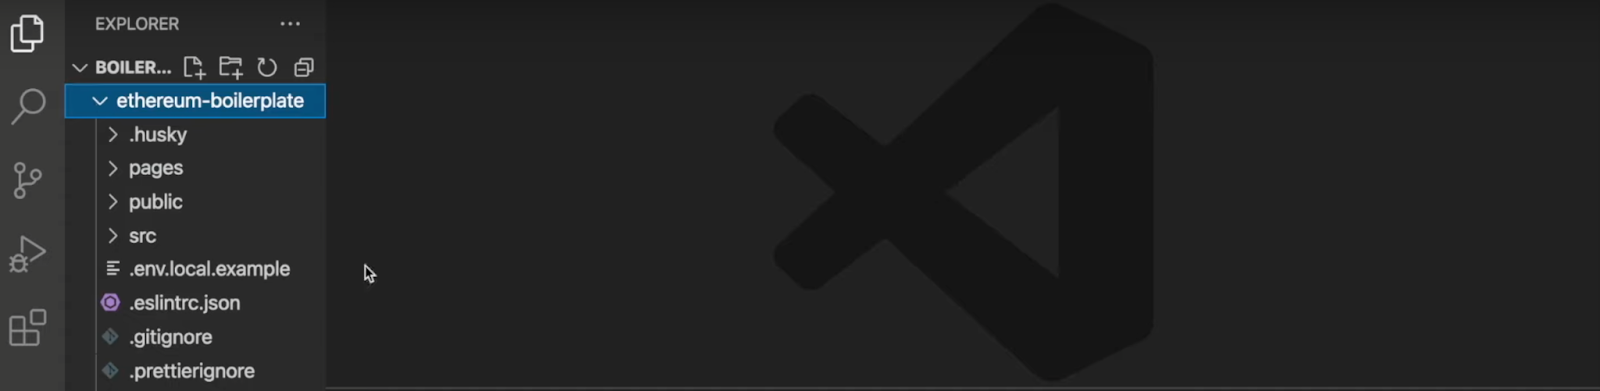
In the event you adopted the earlier steps of the article, your native listing ought to now have the next construction:
Step 4: Configure Setting Variables
Subsequent up, it’s essential to configure just a few setting variables. So, to proceed, it’s essential to navigate to the “.env.native.instance” file in your IDE:
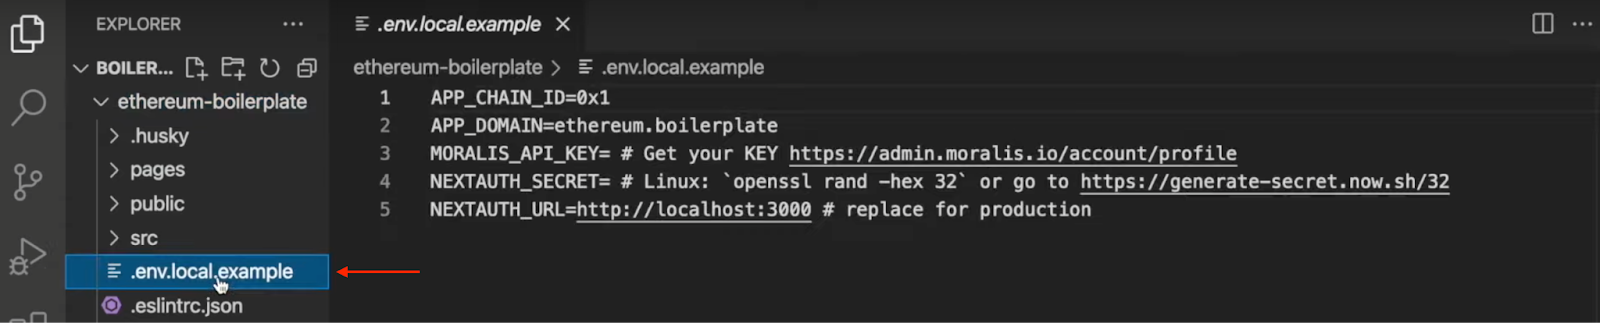
This file incorporates 5 setting variables, and for now, we have to give attention to “APP_CHAIN_ID“, “MORALIS_API_KEY“, and “NEXTAUTH_SECRET“. So, let’s kick issues off by configuring the previous.
Now, “APP_CHAIN_ID” is initially set to “0x1“, which is a reference to the Ethereum chain ID. Nevertheless, because you need to construct a Cronos dapp, you have to change this variable accordingly. Thus, you possibly can substitute “0x1” with “0x152“, which corresponds with the Cronos testnet.
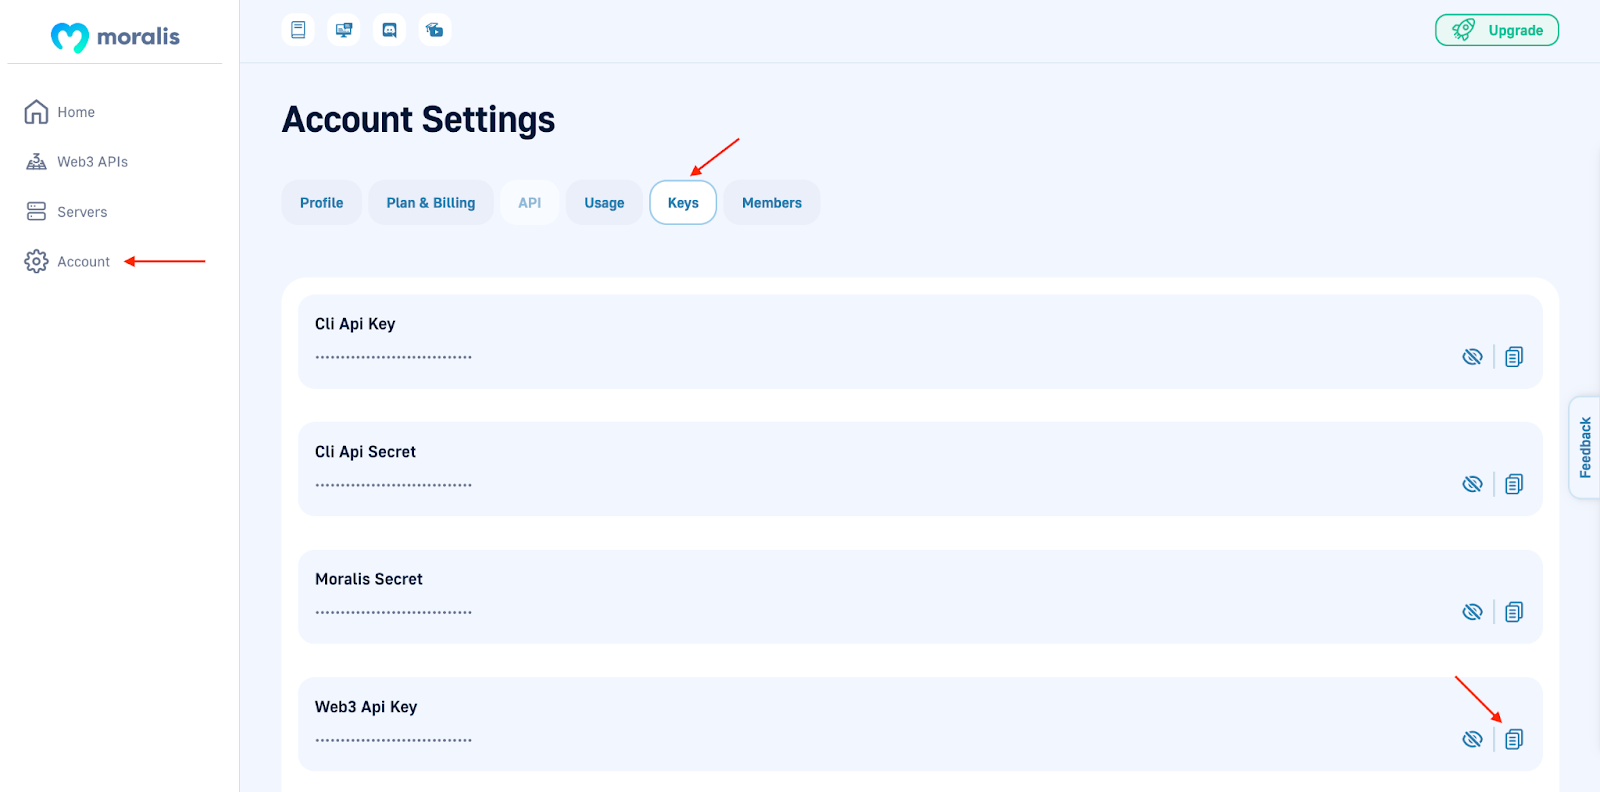
Subsequent, it’s essential to add your API key to the “MORALIS_API_KEY” variable. To accumulate your key, please navigate to the Moralis admin panel. From there, click on on “Account”, “Keys”, and replica “Web3 API Key”:
Lastly, you have to add one other key to the “NEXTAUTH_SECRET” variable. Furthermore, to make it straightforward for you, it’s potential to make use of the next hyperlink to generate a price: https://generate-secret.now.sh/32.
Additionally it is value inspecting “NEXTAUTH_URL” a bit additional. This variable is presently set to “http://localhost:3000“. You may go away this worth as is because it lets you take a look at your Cronos dapp domestically. Nevertheless, when you launch the dapp, this worth should suit your dapp’s URL.
You need to additionally change the file’s identify to ”.env.native” by eradicating ”.instance” on the finish. To summarize, the ultimate model of your file ought to look one thing like this:
APP_CHAIN_ID=0x152
APP_DOMAIN=ethereum.boilerplate
MORALIS_API_KEY= "YOUR_API_KEY"
NEXTAUTH_SECRET= b8e786967d7bcbc0f920d35bcc3f891c
NEXTAUTH_URL=http://localhost:3000
Step 5: Begin the Cronos Dapp
The ultimate step of the information will illustrate learn how to begin your Cronos dapp. Nevertheless, you have to set up particular dependencies previous to this. So, you possibly can open the terminal as soon as once more and enter both of those instructions (relying on in case you are utilizing “npm” or “yarn”):
npm i
yarn
When you’ve put in the dependencies, you can begin the dapp with both of the next inputs:
npm run dev
yarn run dev
Working one in all these instructions will begin the dapp on localhost 3000, which you specified within the previous step. As such, it is best to now have the ability to launch your Cronos dapp utilizing the next URL: “http://localhost:3000“.
Now, that is it for this tutorial! You now hopefully know learn how to construct a Cronos dapp in 5 steps. Nevertheless, if you happen to skilled bother at any level within the article, we advocate you look intently on the video embedded above. Furthermore, you possibly can moreover take a look at the official Moralis EVM API documentation.
In the event you discovered this text attention-grabbing and need to develop dapps for different networks alike, ensure to browse Moralis’ Web3 weblog additional. For instance, you possibly can simply learn to construct a Polygon dapp in solely three steps!
Find out how to Construct a Cronos Dapp – Abstract
Creating dapps doesn’t should be troublesome, particularly when working with Moralis. In truth, due to Moralis and the Ethereum boilerplate, you have been in a position to construct a Cronos dapp in solely 5 steps:
- Discover the EVM-Suitable Boilerplate
- Create a Moralis Account
- Clone the Boilerplate
- Configure Setting Variables
- Begin the Cronos Dapp
Together with the Ethereum boilerplate, Moralis’ APIs are one other important half contributing to the accessibility of this course of. We already talked about the EVM API; nonetheless, this is only one instance of many interfaces. You may moreover take a look at the NFT API and Solana API. These can help you create NFT-related tasks and Solana dapps simply.
Furthermore, if you happen to discovered the article attention-grabbing, take a look at different articles right here at Moralis. For instance, learn to construct a Solana NFT explorer or all there may be to know in regards to the EIP-4361 normal!
So, if you happen to attempt to change into a Web3 developer or just need to construct a Cronos dapp, it is best to join with Moralis. Organising an account is free, and you can begin your Web3 improvement journey immediately!


