
This tutorial seems at including safe authentication through Moralis and combine WalletConnect into your Web3 venture. By following alongside on this tutorial, you may have an authentication answer up and working in document time, as seen within the following illustrative picture showcasing WalletConnect integration:
For those who’re an skilled developer, go forward and entry the whole file construction and code on our documentation web page to get began instantly. Nonetheless, if you’d like a step-by-step information on combine WalletConnect, we advocate studying this text from begin to end!
Overview
Web3 authentication is the gateway to dapps (decentralized purposes), and with Moralis’ Web3 Auth API, you may add Web3 login to any dapp effortlessly. The API helps all main options, together with WalletConnect integration. For the reason that latter tends to be one of the best various for cell customers, as a developer, you will need to learn to combine WalletConnect. In any case, this open-source protocol helps greater than 170 crypto wallets, making it one of the user-friendly Web3 authentication strategies. Moreover, since Moralis is all about cross-chain interoperability, its Auth API allows you to implement WalletConnect to dapps throughout all main blockchains. Additionally, Moralis empowers you to combine it as a standalone Web3 login answer or mix it with different Web3 onboarding strategies.
The core part of at the moment’s article shall be all about exhibiting you add WalletConnect integration utilizing Moralis. That is the place you’ll have an opportunity to create a easy NextJS app and combine WalletConnect as an authentication answer. Nonetheless, earlier than we invite you to roll up your sleeves, we have to cowl some fundamentals. As such, we’ll first make sure you all know what WalletConnect is and what wallets are suitable with this neat answer. Nonetheless, in case you are already aware of these fundamentals, be happy to create your free Moralis account and soar to the “Add WalletConnect Integration” part.

WalletConnect – What’s it?
WalletConnect is an open-source protocol that can be utilized to ascertain a connection between a variety of crypto wallets and dapps. This protocol ensures that the connection between wallets, purposes, or units is protected. In any case, once you use WalletConnect to ascertain these connections, its protocol makes use of symmetric encryption through a shared key between two friends.
Primarily, WalletConnect is a decentralized Web3 messaging layer and a normal to attach blockchain wallets to dapps. Furthermore, the WalletConnect crew’s mission is to repeatedly increase the interoperability of the Web3 area. Therefore, it’s slightly protected to presume that WalletConnect will proceed to offer one of the best tooling and infrastructure for Web3 wallets and dapps. Furthermore, WalletConnect v2 is chain agnostic and suitable with any blockchain of your alternative. Consequently, it’s simple to ship an impressive consumer expertise when choosing this answer.
These are the three core WalletConnect options:
- Chain Agnostic – Like most Web3 tasks, WalletConnect is conscious that the long run will most probably be multi-chain oriented. Accordingly, it already helps numerous chains, together with Ethereum, Solana, and lots of others. Furthermore, they’re dedicated to persevering with so as to add help for extra chains.
- Multi-Chain – Due to WalletConnect’s multi-chain help, you may join any of the supported wallets to a number of chains concurrently.
- Platform Agnostic – WalletConnect helps completely different platforms. As such, you need to use WalletConnect’s protocol on the net or desktop, cell, and gaming apps.

Establishing Connections with WalletConnect – How Does It Work?
With regards to utilizing WalletConnect integration, customers have two methods to ascertain the connection between wallets and dapps. They will do it by scanning a QR code, which is the popular technique and provided by default. Nonetheless, customers can even use a deep hyperlink. In each instances, one peer (or dapp) sends out the code or hyperlink, whereas the opposite should scan or approve it. As such, once you combine WalletConnect into dapps, you allow customers to simply set up protected and dependable Web3 connections.
What Wallets are Suitable with WalletConnect?
In keeping with the official WalletConnect web site, their answer works with greater than 170 Web3 wallets. Since this quantity is extraordinarily excessive, it wouldn’t make a lot sense to checklist the entire supported wallets herein. Nonetheless, you may view all supported wallets by visiting WalletConnect’s official web site. As soon as there, scroll all the way down to the “On the lookout for a pockets?” part, and hit the “VIEW ALL WALLETS” button:

On the subsequent web page, you’ll really have the ability to view all supported crypto wallets:
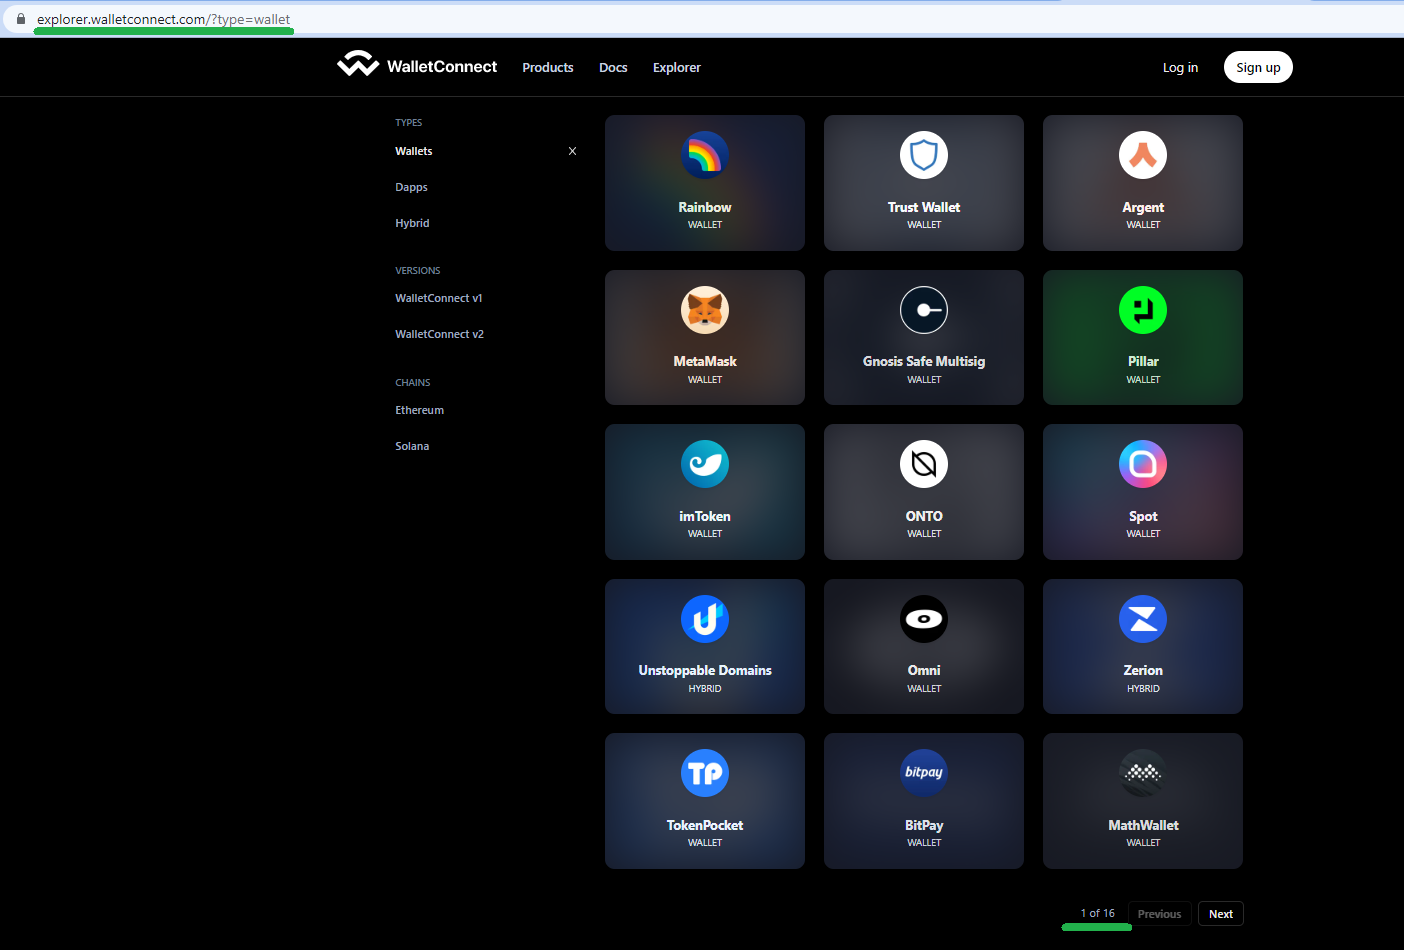
Furthermore, because the above screenshot signifies, all supported Web3 wallets are listed throughout sixteen pages. Since there are fifteen wallets per web page and there are fifteen complete pages, it looks as if WalletConnect already helps greater than 225 crypto wallets.
Add WalletConnect Integration
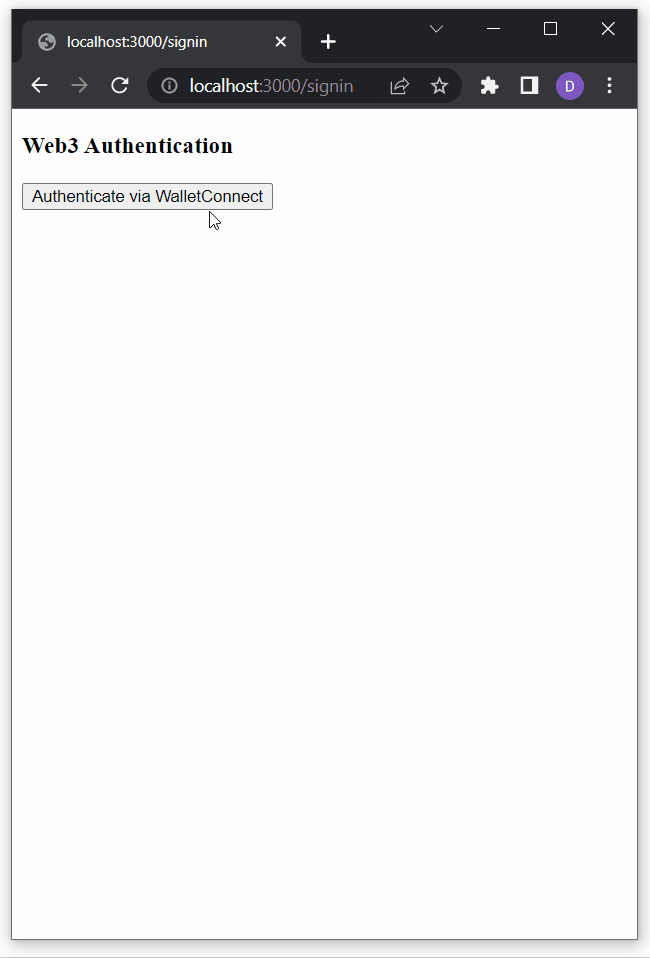
That is the part the place you’ll learn to add WalletConnect integration into your dapps. As talked about above, we’ll give attention to making a NextJS software and equip it with this answer utilizing the facility of Moralis’ Web3 Auth API. So, for those who resolve to observe our lead, you’ll have your dapp with WalletConnect integration added very quickly. In reality, right here’s a fast preview of what you’ll be constructing:

After clicking on the “Authenticate through WalletConnect” button, a QR code will pop up, enabling you (or your customers) to attach your Web3 pockets by scanning the code:

Lastly, after efficiently finishing the Web3 authentication course of, our dapp may also show some primary particulars in regards to the linked pockets:

Stipulations and the Preliminary Setup
If you wish to construct the above-demonstrated dapp following our lead, be sure to full these stipulations:
- Have your Moralis account prepared.
- Set up and arrange Visible Studio Code (VSC).
- Create your NextJS dapp. For those who need assistance with that, use the “Create Subsequent App” web page within the NextJS docs or full our “Utilizing NextJS” tutorial.
For those who took care of the above stipulations, proceed by putting in the required dependencies. Primarily, it is advisable to set up Moralis, NextAuth, and Axios. To do that, use one of many following instructions (relying on which bundle supervisor you might be utilizing:
npm set up moralis next-auth axios
yarn add moralis next-auth axios
pnpm add moralis next-auth axios
Subsequent, you want a Web3 library. After all, there are a number of choices at your disposal; nevertheless, we encourage you to observe our lead and use wagmi. Thus, set up the “wagmi” dependency utilizing one of many following instructions:
npm set up wagmi ethers
yarn add wagmi ethers
pnpm add wagmi ethers
Including Environmental Variables
With the above dependencies in place, it’s time so as to add the required surroundings variables in a “.env.native” file. Additionally, be sure to have that file in your app’s root. Listed below are the variables it is advisable to add:
- “APP_DOMAIN” – That is an “RFC 4501” DNS authority that’s requesting the signing.
- “MORALIS_API_KEY” – You may get hold of the important thing on the “Web3 APIs” web page of your Moralis admin space:

- “NEXTAUTH_URL” – That is your dapp tackle, and within the improvement stage, you’ll use “http://localhost:3000” or one other port.
- “NEXTAUTH_SECRET” – You employ this variable to encrypt the JWT tokens of customers. Furthermore, you may put any worth right here or generate one at “https://generate-secret.now.sh/32”.
Moreover, that will help you higher perceive the above surroundings variables, ensure to take a look at this instance:

Notice: Everytime you modify your “.env.native” file, it is advisable to restart your dapp.
Wrapping Your App
As you might know, NextJS makes use of the “App” part to initialize pages. Nonetheless, you may override that part and management the web page initialization. To realize that, you will need to wrap your pages with “WagmiConfig” and “SessionProvider“. So, create your “_app.jsx” file contained in the “pages” folder and populate this file with the next traces of code:
import { createClient, configureChains, defaultChains, WagmiConfig } from 'wagmi';
import { publicProvider } from 'wagmi/suppliers/public';
import { SessionProvider } from 'next-auth/react';

const { supplier, webSocketProvider } = configureChains(defaultChains, [publicProvider()]);

const consumer = createClient({
  supplier,
  webSocketProvider,
  autoConnect: true,
});

operate MyApp({ Element, pageProps }) {
  return (
    <WagmiConfig consumer={consumer}>
      <SessionProvider session={pageProps.session} refetchInterval={0}>
        <Element {...pageProps} />
      </SessionProvider>
    </WagmiConfig>
  );
}

export default MyApp;
Including the “requestMessage” Endpoint
So as to add the “requestMessage” endpoint, you will need to create a brand new API file. Name that file’s “request-message.js” and ensure to have it within the “auth” folder, which must be inside “pages/api”. You’ll use this endpoint to make requests to “Moralis.Auth“, which is able to generate a singular message. Then, you’ll signal that message on the consumer aspect. Listed below are the traces of code that you must use within the “request-message.js” file:
import Moralis from 'moralis';

const config = {
    area: course of.env.APP_DOMAIN,
    assertion: 'Please signal this message to verify your id.',
    uri: course of.env.NEXTAUTH_URL,
    timeout: 60,
};

export default async operate handler(req, res) {
    const { tackle, chain, community } = req.physique;

    await Moralis.begin({ apiKey: course of.env.MORALIS_API_KEY });

    attempt {
        const message = await Moralis.Auth.requestMessage({
            tackle,
            chain,
            community,
            ...config,
        });

        res.standing(200).json(message);
    } catch (error) {
        res.standing(400).json({ error });
        console.error(error);
    }
}
Making a Signal-In Web page with WalletConnect Integration
By this level, you’ve efficiently accomplished the preliminary setup. As such, it’s time you really combine WalletConnect. So, create a brand new web page file (contained in the “pages” folder) and name it “signin.jsx”. Furthermore, begin by populating this file with the next traces of code:
operate SignIn() {
    return (
        <div>
            <h3>Web3 Authentication</h3>
        </div>
    );
}

export default SignIn;
Subsequent, you wish to use the identical file to create a button that may allow Web3 authentication. As well as, you additionally wish to “console.log” customers’ particulars (as per the demo above). As such, it is advisable to increase the content material of the “signin.jsx” to match the next:
import { useConnect } from 'wagmi';
import { InjectedConnector } from 'wagmi/connectors/injected';
import axios from 'axios';

operate SignIn() {
    const { connectAsync } = useConnect();

    const handleAuth = async () => {
        const { account, chain } = await connectAsync({ connector: new InjectedConnector() });

        const userData = { tackle: account, chain: chain.id, community: 'evm' };

        console.log(userData)
    };

    return (
        <div>
            <h3>Web3 Authentication</h3>
            <button onClick={() => handleAuth()}>Authenticate through WalletConnect</button>
        </div>
    );
}

export default SignIn;
Extending the “handleAuth” Performance
The above traces of code already be sure that your Web3 authentication web page seems as offered above. Nonetheless, we nonetheless want so as to add the precise performance. Therefore, let’s first prolong the “handleAuth” performance to make use of it to name the above-created “requestMessage” endpoint. By doing so, your “signin.jsx” file ought to look as follows:
import { useAccount, useConnect, useSignMessage, useDisconnect } from 'wagmi';
import { InjectedConnector } from 'wagmi/connectors/injected';
import axios from 'axios';

operate SignIn() {
    const { connectAsync } = useConnect();
    const { disconnectAsync } = useDisconnect();
    const { isConnected } = useAccount();
    const { signMessageAsync } = useSignMessage();

    const handleAuth = async () => {
        // Disconnects the Web3 supplier if it is already lively
        if (isConnected) {
            await disconnectAsync();
        }
        // Enabling WalletConnect
               const { account, chain } = await connectAsync({
            connector: new WalletConnectConnector({
                choices: {
                    qrcode: true,
                },
            }),
        });


        const userData = { tackle: account, chain: chain.id, community: 'evm' };
        // Making a put up request to our 'request-message' endpoint
        const { knowledge } = await axios.put up('/api/auth/request-message', userData, {
            headers: {
                'Content material-Kind': 'software/json',
            },
        });
        const message = knowledge.message;
        const signature = await signMessageAsync({ message });

        console.log(signature)
    };

    return (
        <div>
            <h3>Web3 Authentication</h3>
            <button onClick={() => handleAuth()}>Authenticate through WalletConnect</button>
        </div>
    );
}

export default SignIn;
Configuring NextAuth
Contained in the “auth” folder (path: “pages/api/auth/”), create a “[…nextauth].js” file and populate it with the next traces of code:
import CredentialsProvider from 'next-auth/suppliers/credentials';
import NextAuth from 'next-auth';
import Moralis from 'moralis';

export default NextAuth({
    suppliers: [
        CredentialsProvider({
            name: 'MoralisAuth',
            credentials: {
                message: {
                    label: 'Message',
                    type: 'text',
                    placeholder: '0x0',
                },
                signature: {
                    label: 'Signature',
                    type: 'text',
                    placeholder: '0x0',
                },
            },
              async authorize(credentials) {
                try {
                  // "message" and "signature" are needed for authorization
                  // We described them in "credentials" above
                  const { message, signature } = credentials;

                  await Moralis.start({ apiKey: process.env.MORALIS_API_KEY });

                  const { address, profileId } = (
                    await Moralis.Auth.verify({ message, signature, network: 'evm' })
                  ).raw;

                  const user = { address, profileId, signature };
                  // Returning the user object and creating  a session
                  return user;
                } catch (e) {
                  console.error(e);
                  return null;
                }
              },
        }),
    ],
    // Including consumer data to the consumer session object
    callbacks: {
        async jwt({ token, consumer }) {
            consumer && (token.consumer = consumer);
            return token;
        },
        async session({ session, token }) {
            session.consumer = token.consumer;
            return session;
        },
    },
});
The above configures NextAuth in an effort to add it to the “signin.jsx” script. Furthermore, as you’ve most likely observed, the above configuration additionally makes use of the “MORALIS_API_KEY” variable created within the “.env.native” file above.
Securing Authentication
For this ultimate tweak to the “signin.jsx” file, you’ll be including NextAuth authentication. You additionally have to import “WalletConnectConnector” from wagmi, import “useRouter” from Subsequent, and increase the “SignIn” operate. In the end, that is what your “signin.jsx” script ought to seem like in its ultimate type:
import { signIn } from 'next-auth/react';
import { useAccount, useConnect, useSignMessage, useDisconnect } from 'wagmi';
import { useRouter } from 'subsequent/router';
import axios from 'axios';
import { WalletConnectConnector } from 'wagmi/connectors/walletConnect';

operate SignIn() {
    const { connectAsync } = useConnect();
    const { disconnectAsync } = useDisconnect();
    const { isConnected } = useAccount();
    const { signMessageAsync } = useSignMessage();
    const { push } = useRouter();

    const handleAuth = async () => {
        if (isConnected) {
            await disconnectAsync();
        }
        // Added WalletConnectConnector
        const { account, chain } = await connectAsync({
            connector: new WalletConnectConnector({
                choices: {
                    qrcode: true,
                },
            }),
        });

        const userData = { tackle: account, chain: chain.id, community: 'evm' };

        const { knowledge } = await axios.put up('/api/auth/request-message', userData, {
            headers: {
                'Content material-Kind': 'software/json',
            },
        });

        const message = knowledge.message;

        const signature = await signMessageAsync({ message });

        // Redirect consumer after success authentication to '/consumer' web page
        const { url } = await signIn('credentials', { message, signature, redirect: false, callbackUrl: '/consumer' });
        /**
         * as a substitute of utilizing signIn(..., redirect: "/consumer")
         * we get the url from callback and push it to the router to keep away from web page refreshing
         */
        push(url);
    };

    return (
        <div>
            <h3>Web3 Authentication</h3>
            <button onClick={() => handleAuth()}>Authenticate through WalletConnect</button>
        </div>
    );
}

export default SignIn;
Including Person Web page to Dapp with WalletConnect Integration
The ultimate step to finish this straightforward NextJS dapp with WalletConnect integration revolves across the “consumer” web page. As such, go to the “pages” folder and create the “consumer.jsx” file. These are the traces of code that it is advisable to add to this file:
import { getSession, signOut } from 'next-auth/react';

// Will get a prop from getServerSideProps
operate Person({ consumer }) {
    return (
        <div>
            <h4>Person session:</h4>
            <pre>{JSON.stringify(consumer, null, 2)}</pre>
            <button onClick={() => signOut({ redirect: '/signin' })}>Signal out</button>
        </div>
    );
}

export async operate getServerSideProps(context) {
    const session = await getSession(context);

    // Redirect if not authenticated
    if (!session) {
        return {
            redirect: {
                vacation spot: '/signin',
                everlasting: false,
            },
        };
    }

    return {
        props: { consumer: session.consumer },
    };
}

export default Person;
With all of the scripts in place, it’s time you check your dapp.
Testing the WalletConnect Connector
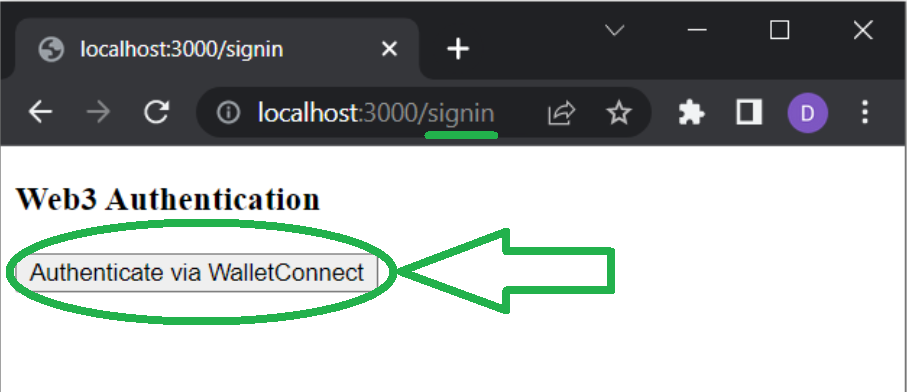
For those who used the “3000” port on your “NEXTAUTH_URL” variable, go to “http://localhost:3000/signin“. That is the place you’ll have the ability to check your dapp’s authentication stream. As soon as on the “signin” web page, click on on “Authenticate through WalletConnect”:
When the QR code seems, use your favourite Web3 pockets in your telephone to scan the code. For example, that is what you must see in your telephone for those who resolve to make use of Belief Pockets (the method is analogous for different crypto wallets):
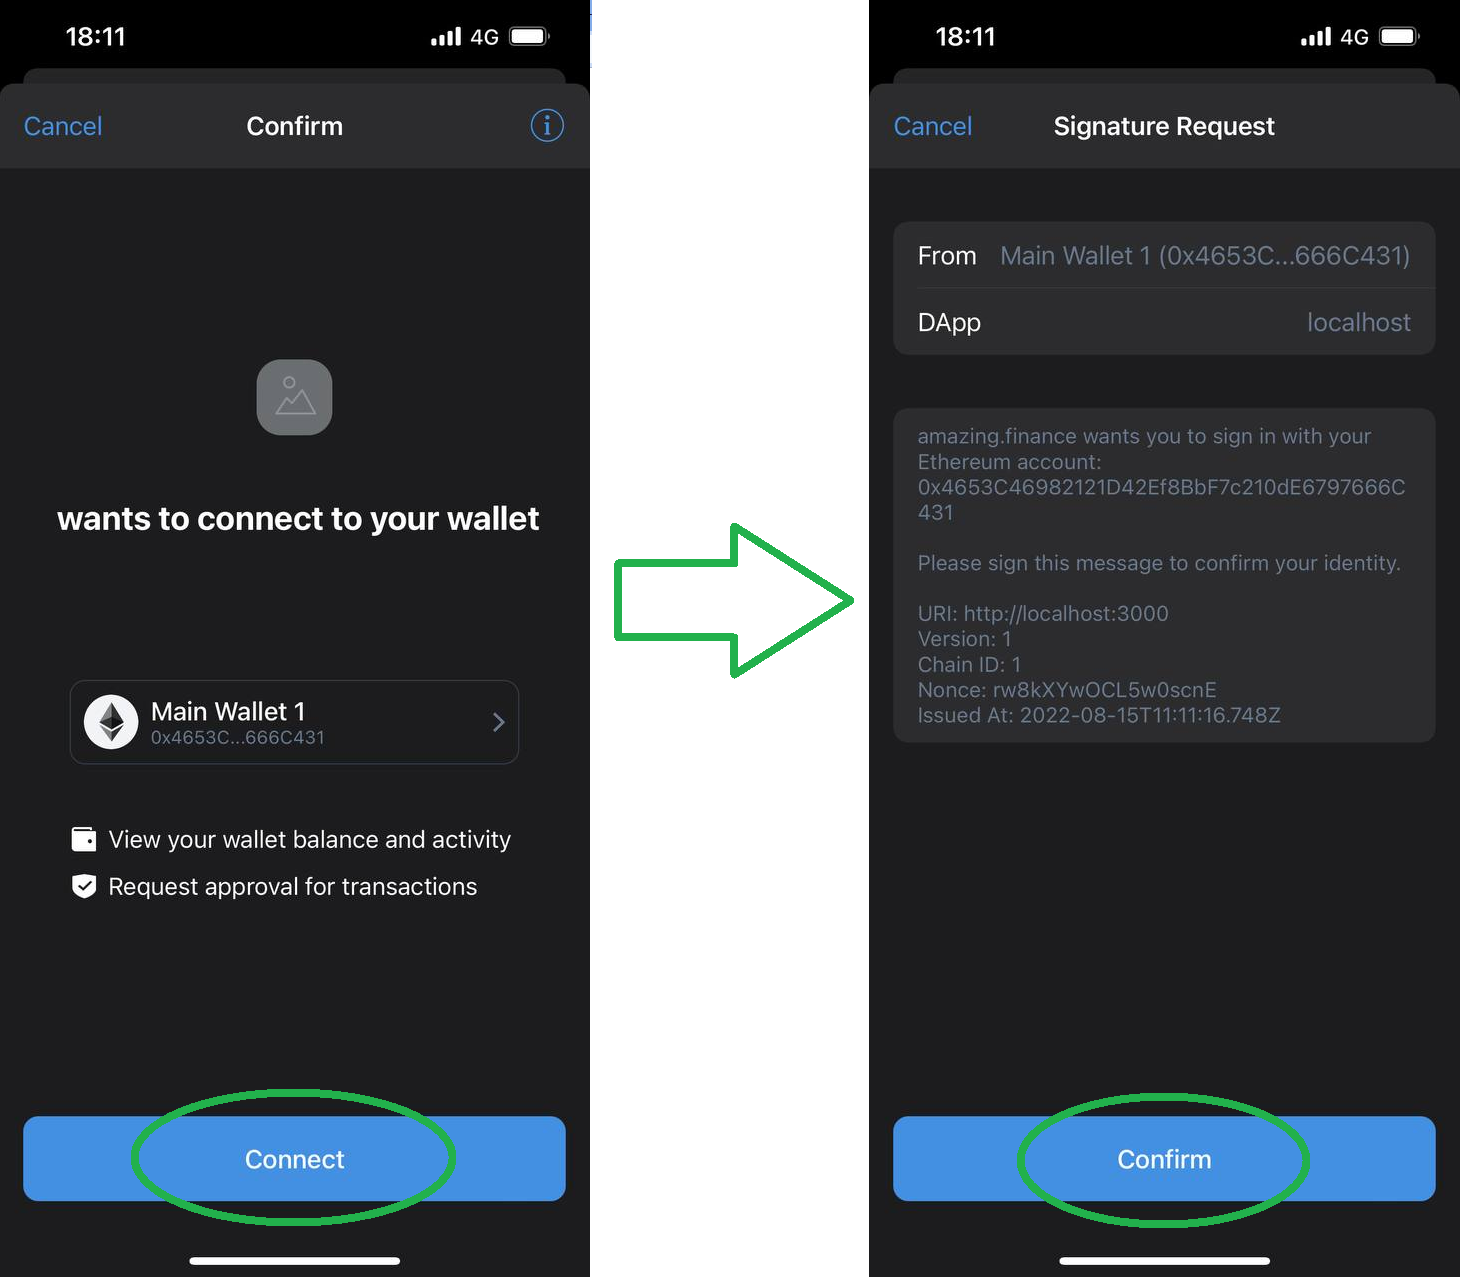
If the authentication is profitable, you must land on the “consumer” web page (“http://localhost:3000/consumer“). Nonetheless, if the authentication just isn’t profitable, you’ll be redirected again to the “signing” web page.
In case you might be going through any points, ensure to undergo the scripts. As such, use the next overview of at the moment’s progress. In the end, these are the recordsdata you created and populated by following at the moment’s tutorial:
- “.env.native” – That is the place you retailer all of the native variables, together with your Moralis Web3 API key.
- “_app.jsx” – You used this file to wrap your app with “WagmiConfig” and “SessionProvider“.
- “request-message.js” – This file serves as an endpoint for making requests to generate a singular message.
- “signin.jsx” – That is the file that covers the “signin” web page and permits customers to authenticate themselves utilizing the WalletConnect integration.
- “[…nextauth].js” – That is the place you configured NextAuth.
- “consumer.jsx” – You created this script to current efficiently authenticated customers with some primary consumer knowledge.
WalletConnect Integration – The right way to Combine WalletConnect – Abstract
We lined fairly a distance in at the moment’s article. First, you realized what WalletConnect is and what wallets are suitable with this open-source protocol. Therefore, you now know that there are considerably near 200 wallets you need to use to authenticate with WalletConnect. With the fundamentals beneath your belt, you had been able to observe our lead as we confirmed you combine WalletConnect right into a easy NextJS software. To do that, you accomplished some stipulations, put in correct dependencies, and took care of the preliminary setup. Then, you simply needed to copy-paste the traces of code supplied herein into the recordsdata we instructed you to create. Final however not least, you had a possibility to test-run your dapp.
For those who loved this tutorial, we encourage you to discover different tutorials and how-to guides within the Moralis documentation. For example, you may create dapps utilizing Moralis with different frameworks and dev platforms. Or, you may discover different Web3 authentication choices. Along with Moralis’ docs, ensure to increase your blockchain improvement information and abilities utilizing the Moralis YouTube channel and the Moralis weblog. In reality, you might use these two shops as your free ongoing blockchain improvement training. A few of the newest articles give attention to Dogechain, Aptos, the Sui blockchain, the final word blockchain tech stack, the main Web3 infrastructure answer, cross-chain bridging, and way more.
Alternatively, you may be concerned with going full-time crypto sooner slightly than later. In that case, you must turn out to be blockchain licensed by enrolling in Moralis Academy. If you wish to be a pacesetter in a promising Web3 venture, the “Blockchain Enterprise Masterclass” course undoubtedly deserves your consideration.


