
On this week’s Moralis Mission you’ll learn to purchase NFTs from an NPC Store and easy methods to create a full on-chain stock system with Unity and Moralis.
We’ll create after which retrieve some objects from an on-chain database and that may give us the power to switch them and even add new ones in actual time.
Then we are going to select and mint one of many objects as an NFT and switch it to our pockets. After 1 or 2 minutes of syncing, we could have the NFT in our stock. By clicking on it, the net browser will open and we’ll have the ability to see it on OpenSea.
PREREQUISITES
GET STARTED
Clone the youtube-tutorials GitHub Repository:
git clone https://github.com/MoralisWeb3/youtube-tutorials.git
As soon as downloaded, navigate to the unity folder and you can find all of the unity tutorials. Open unity-web3-nft-shop with Unity Hub and also you’re able to go!
VIDEO STRUCTURE
Alright so simply to summarize let’s see the construction that the video will comply with:
- First, I’m gonna present you the way the mission is structured so you have got a broader imaginative and prescient earlier than going into particular options
- Second, we’re gonna setup a Moralis Server and get the credentials we have to log into Web3
- Third, we’re gonna add some objects to the Moralis Database and we are going to learn to populate them into the store stock. (ShopInventory.cs)
- Then, we are going to deploy a sensible contract which can comprise the mint operate (Remix)
- After that, we are going to name that operate from Unity and truly mint the NFT. (PurchaseItemController.cs)
- And Lastly we are going to learn to retrieve the NFT and easy methods to see it on OpenSea.
1. Mission construction overview
First we will check out how the mission is structured:
If we take a look at the Belongings tab:
- Below _Project you can find all of the property created for this mission.
- Below Moralis Web3 Unity SDK → Sources you can find the MoralisServerSettings. We might want to fill this later.
- Below ThirdParty you can find all of the free property from the Unity Asset Retailer.
There’s just one scene on this mission, positioned below _Project → Scenes → Sport.unity so open it.
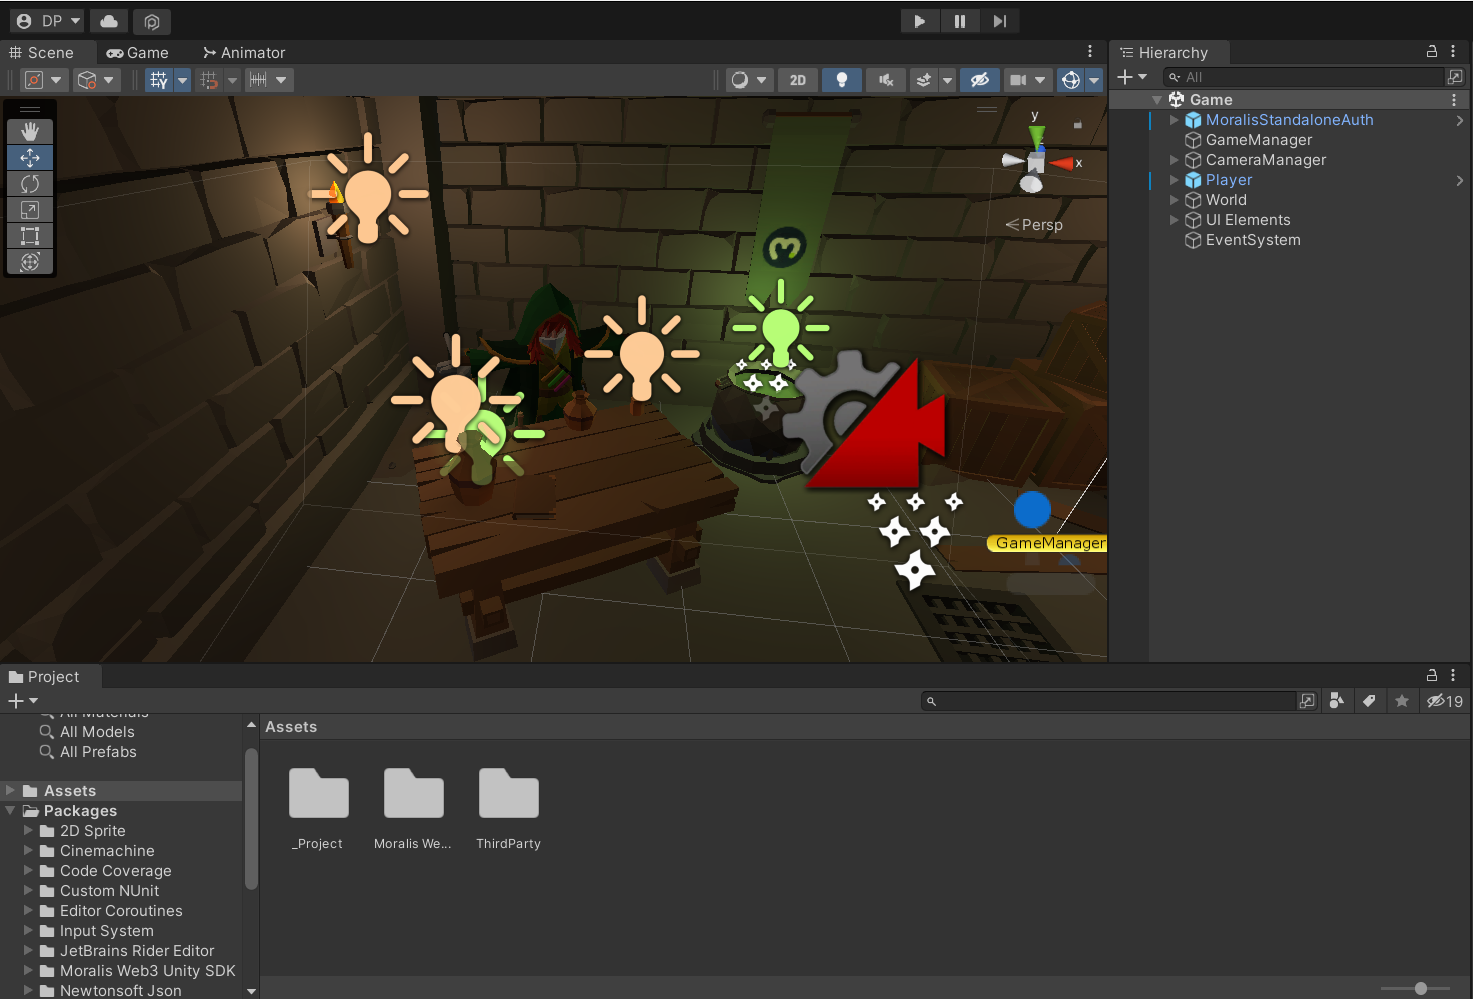
If we take a look at the Hierarchy tab:
- MoralisStandaloneAuth: Takes care of the authentication to Moralis and Web3.
- GameManager: Listens to many of the occasions within the sport and manages sport states.
- CameraManager: Manages the PlayerCamera and the NpcCamera.
- Participant: All character associated elements and scripts are inside this prefab.
- World: All of the room surroundings property are contained right here, however there’s one which has performance other than ornamentation:
- Room → ShopCounter: Triggers an occasion when the participant collides with it.
- UI Parts: Now we have 3 essential objects right here:
- ShopInventory: It’s going to populate the objects from the Moralis Database.
- PlayerInventory: It’s going to populate the NFTs owned by the participant.
- PurchaseItemManager: It takes care of the minting/shopping for strategy of the objects.

2. Setup Moralis Server
Earlier than going proper into Unity, let’s create a Moralis Server.
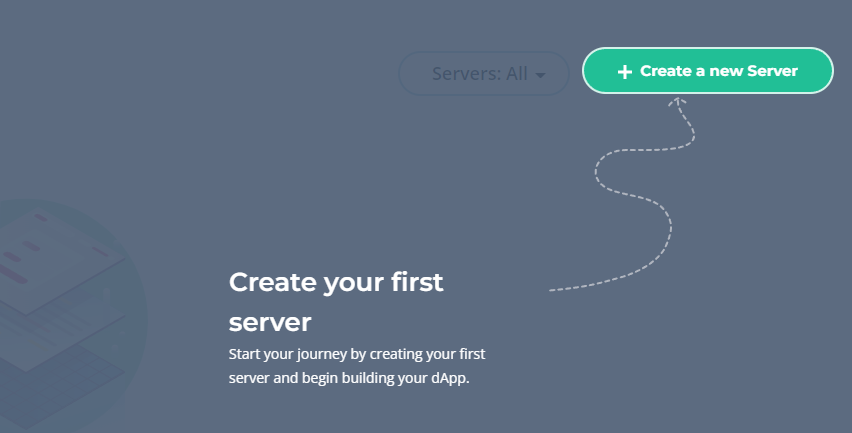
Go to https://admin.moralis.io/login and log in (enroll if you’re not already registered). Click on on Create a brand new Server:
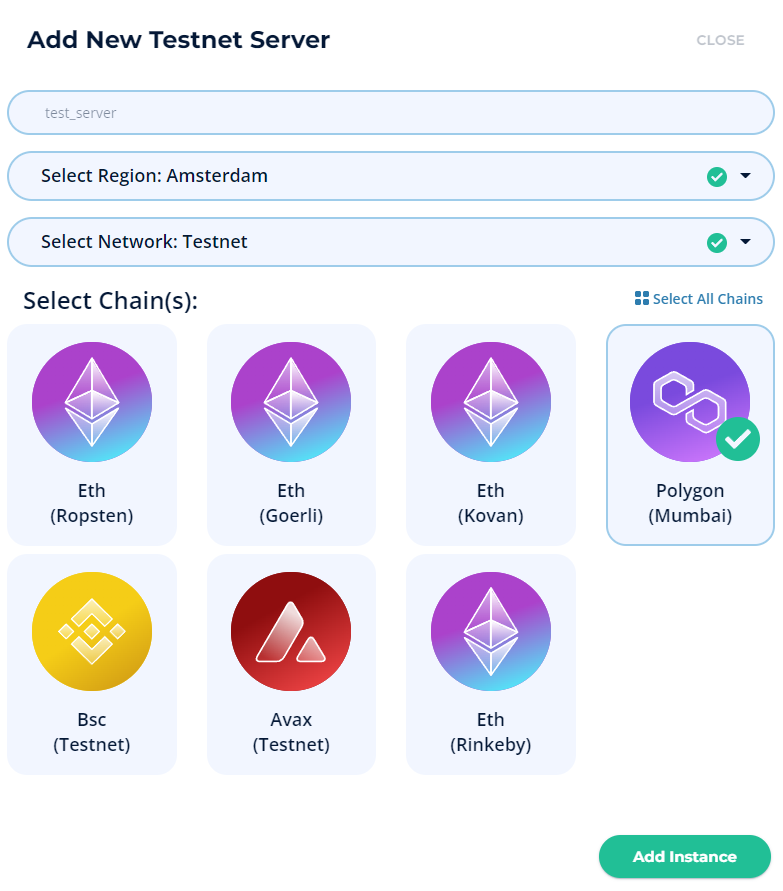
Click on on Testnet Server:
Choose no matter title you need and likewise your closest area. Then choose Polygon (Mumbai), as we’re going to be deploying the good contract to this chain. Lastly, click on on Add Occasion:
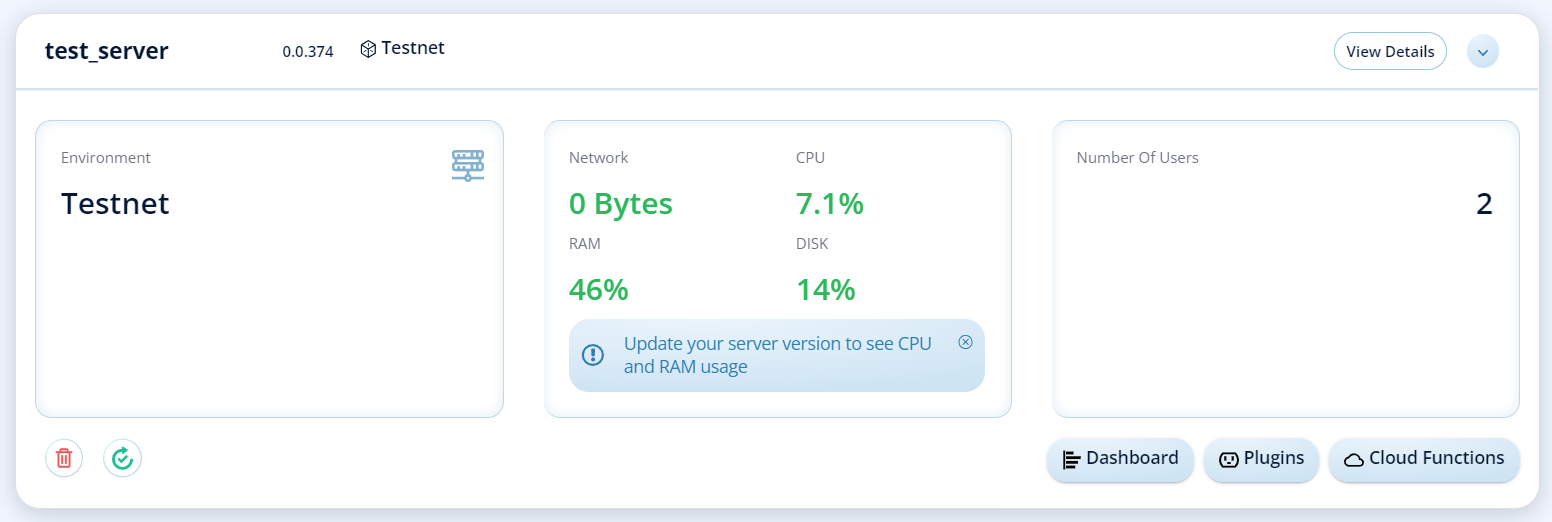
The server might be created so in the event you click on on View Particulars you can find the Server URL and the Utility ID so simply begin by copying the Server URL (you’ll need to do the identical for Utility ID):
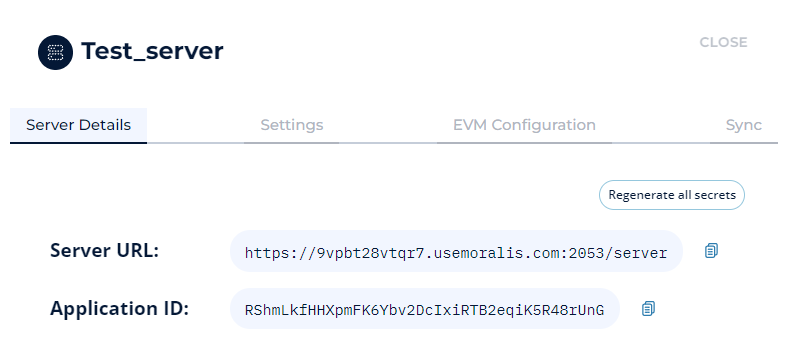
Go to Unity and now it’s a must to choices:
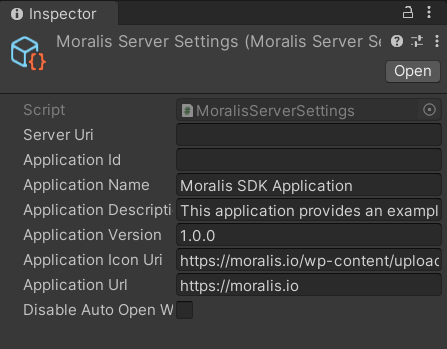
- Within the Belongings tab go to Moralis Web3 Unity SDK → Sources and fill the MoralisServerSettings with each Server URL and Utility ID:
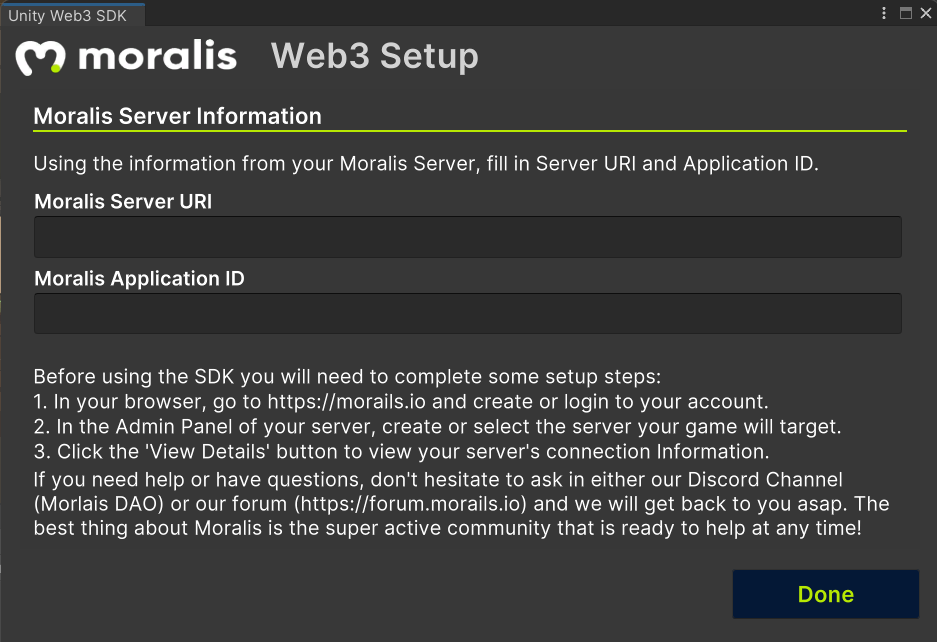
- Within the Unity Menu Bar go to Window → Moralis → Web3 Unity SDK → Open Web3 Setup and paste Server URL and Utility ID utilizing the wizard:
Hit on Executed and you’ll have the Moralis Server arrange. Good!
3. Put together store objects
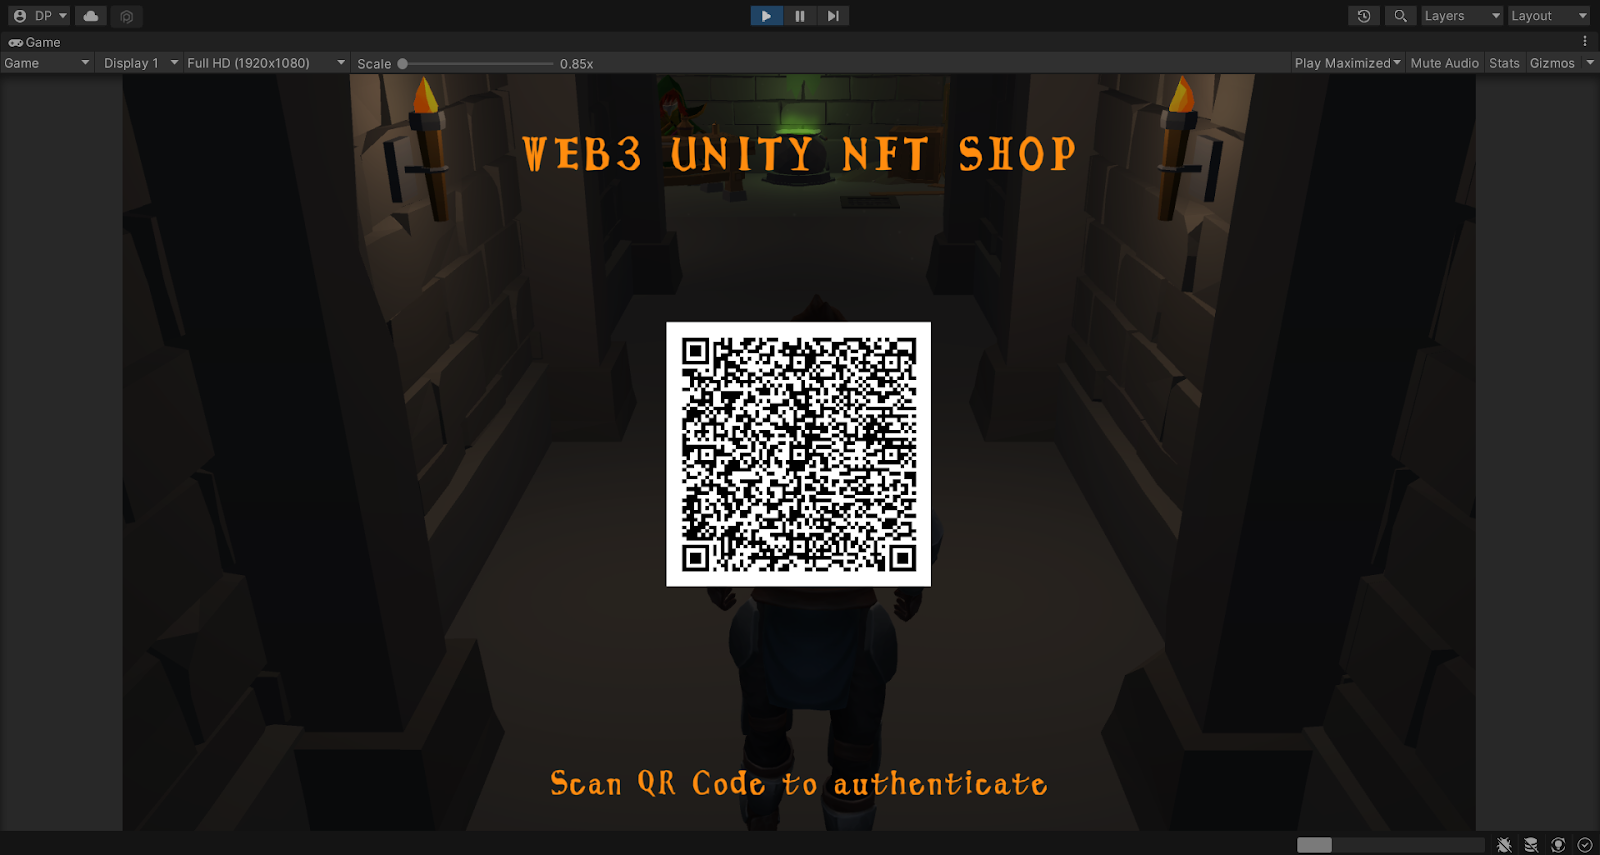
So after organising the Moralis Server, once we hit play MoralisStandaloneAuth will maintain the authentication course of. Should you scan the QR code together with your MetaMask pockets and also you authenticate efficiently, MoralisStandaloneAuth.cs will set off an occasion referred to as Authenticated.
As a result of MoralisStandaloneAuth.cs inherits from MoralisAuthenticator.cs, to take heed to this occasion from some other we might want to sort it like this:
MoralisAuthenticator.Authenticated +=
One of many scripts that listens to that occasion and after that, takes care of the method that pursuits us on this part is ShopInventory.cs and is positioned below ShopInventory prefab:
So if we open the script we’ll see that on OnEnable() we take heed to the occasion and we name SubscribeToDatabaseEvents():
non-public void OnEnable()
{
   MoralisAuthenticator.Authenticated += SubscribeToDatabaseEvents;
   ShopCounterCollider.PlayerEnteredShop += OpenShop;
   ShopItem.Chosen += OnItemSelectedHandler;
   PurchaseItemManager.PurchaseCompleted += DeletePurchasedItem;
   PurchaseItemManager.ItemPanelClosed += OpenShop;
}
Earlier than going by means of this operate, it’s essential to see what non-public variables ShopInventory.cs has:
non-public MoralisQuery<ItemData> _getAllItemsQuery;
non-public MoralisLiveQueryCallbacks<ItemData> _callbacks;
We’ll use _getAllItemsQuery and _callbacks within the SubscribeToDatabaseEvents() to, like the tactic describes, subscribing to the occasions of the ItemData desk within the Moralis Database:
non-public async void SubscribeToDatabaseEvents()
{
   // 1. We create a brand new MoralisQuery focusing on ItemData
   _getAllItemsQuery = await Moralis.GetClient().Question<ItemData>();

   // 2. We set a brand new MoralisLiveQueryCallbacks and we subscribe to occasions
   _callbacks = new MoralisLiveQueryCallbacks<ItemData>();
   _callbacks.OnConnectedEvent += (() => { Debug.Log("Connection Established."); });
   _callbacks.OnSubscribedEvent += ((requestId) => { Debug.Log($"Subscription {requestId} created."); });
   _callbacks.OnUnsubscribedEvent += ((requestId) => { Debug.Log($"Unsubscribed from {requestId}."); });
   _callbacks.OnCreateEvent += ((merchandise, requestId) =>
   {
       Debug.Log("New merchandise created on DB");
       PopulateShopItem(merchandise);
   });
   _callbacks.OnUpdateEvent += ((merchandise, requestId) =>
   {
       Debug.Log("Merchandise up to date");
       UpdateItem(merchandise.objectId, merchandise);
   });
   _callbacks.OnDeleteEvent += ((merchandise, requestId) =>
   {
       Debug.Log("Merchandise deleted from DB");
       DeleteItem(merchandise.objectId);
   });

   // 3. We add a subscription to ItemData desk utilizing MoralisLiveQueryController and passing _getAllItemsQuery and _callbacks
   MoralisLiveQueryController.AddSubscription<ItemData>("ItemData", _getAllItemsQuery, _callbacks);
}
So, detailing the method:
- We create a brand new MoralisQuery focusing on ItemData
- We set a brand new MoralisLiveQueryCallbacks and we subscribe to occasions
- We add a subscription to ItemData desk utilizing MoralisLiveQueryController and passing _getAllItemsQuery and _callbacks
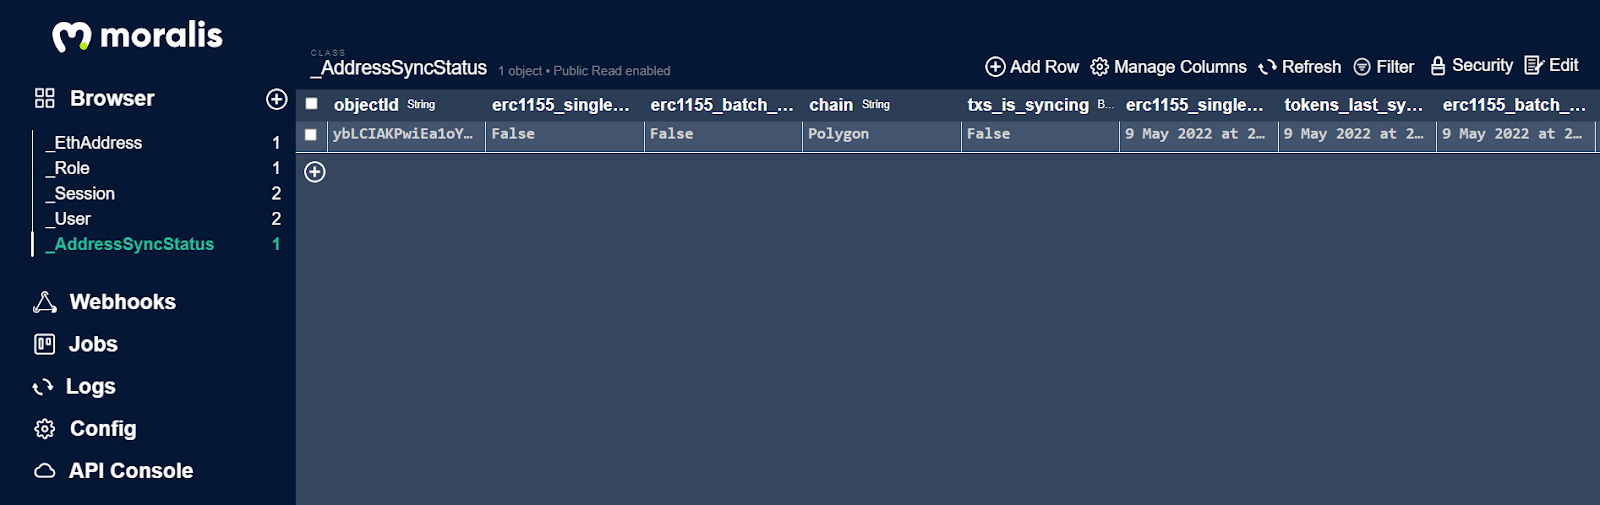
Now what we have to do is creating the ItemData desk to the Moralis Database so to try this return to https://admin.moralis.io and in your server, broaden it by clicking on the arrow after which click on on Dashboard:
This may carry you to the dashboard (database):
On the left sidebar, subsequent to Browser, click on on the plus button to create a brand new class (desk). Name this class ItemData and click on on Create Class:

Earlier than including some parts (rows) to the newly created class, we have to add some columns to match the fields that we set in our ItemData class in Unity.
So if we go to Unity and open InventoryItem.cs we are going to discover the ItemData class:
public class ItemData : MoralisObject
{
   public string title { get; set; }
   public string description { get; set; }
   public string imageUrl { get; set; }

   public ItemData() : base("ItemData") {}
}
It inherits from MoralisObject and we’ve set 3 string properties for it:
So now it’s time so as to add three columns to the ItemData class within the dashboard utilizing these similar names. As soon as within the dashboard, click on on Add a brand new column, name it title and click on on Add column & proceed. Do the identical for the description and the imageUrl columns:
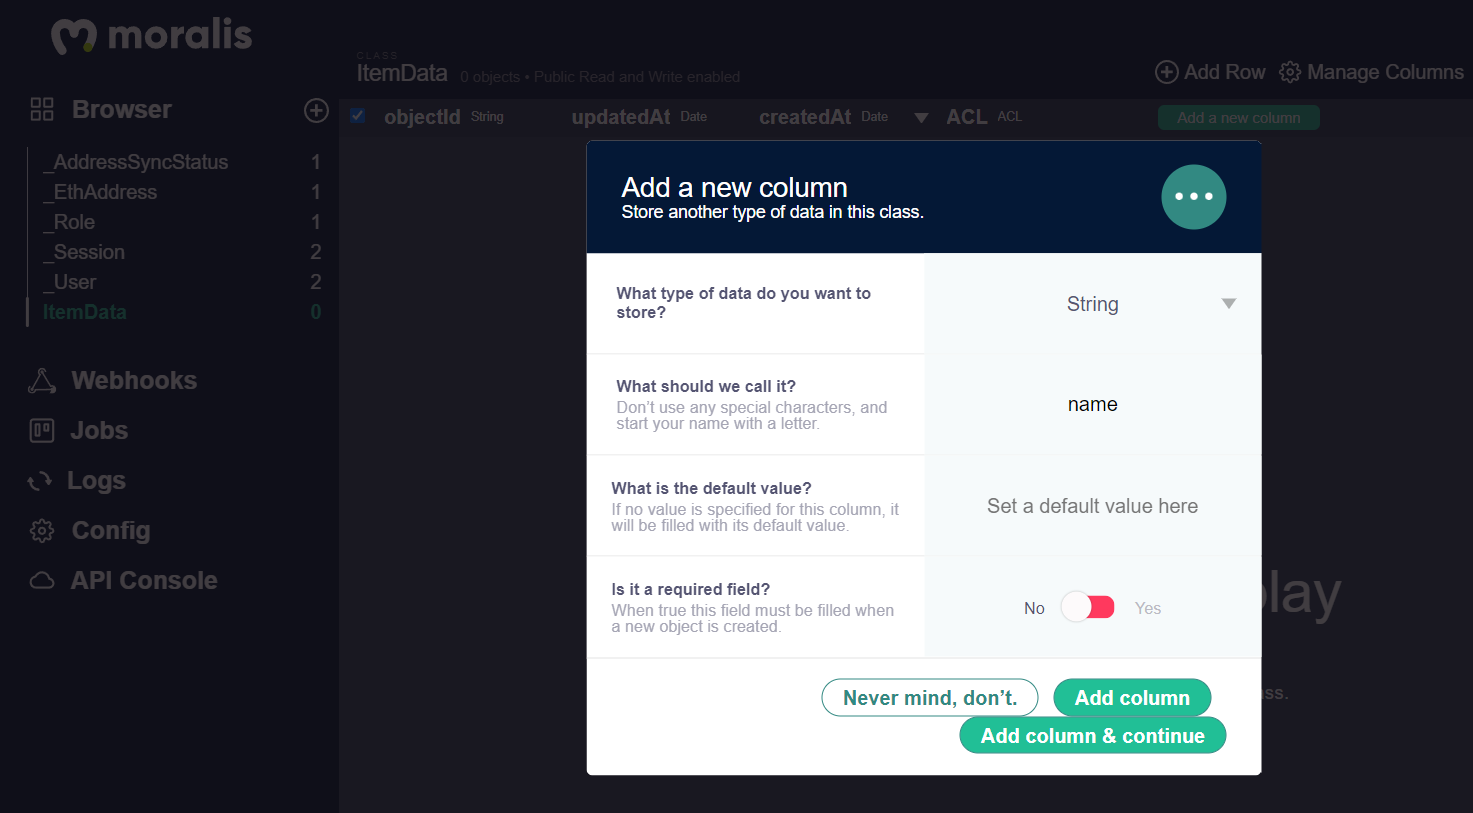
When including the final column (imageUrl) simply click on on Add column and you need to see the three columns added to the category:

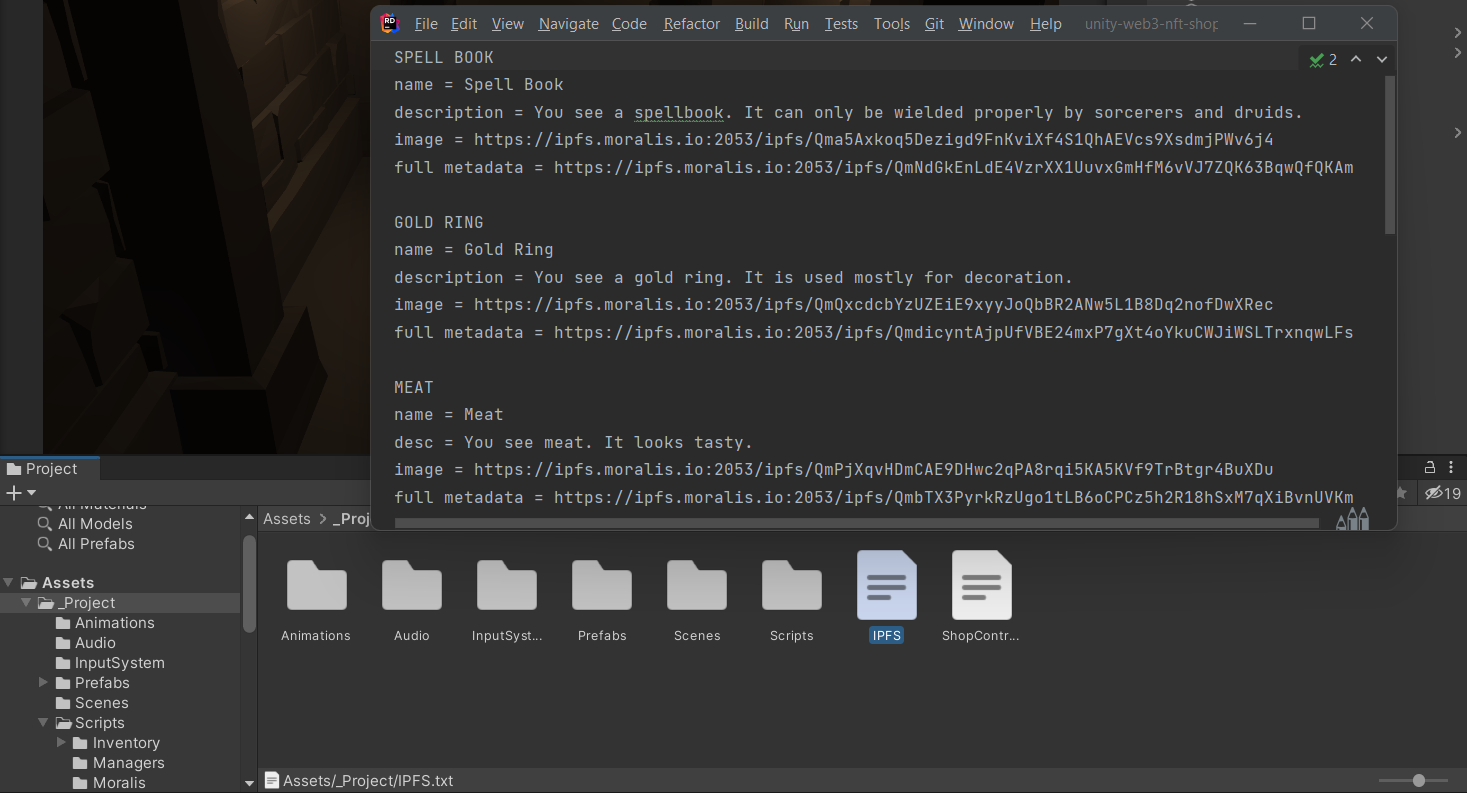
Now return to Unity and on the Belongings tab, go to _Project and open IPFS.txt. Right here you can find some merchandise information already ready for you (you received’t want full metadata url for this mission but it surely’s there anyhow):
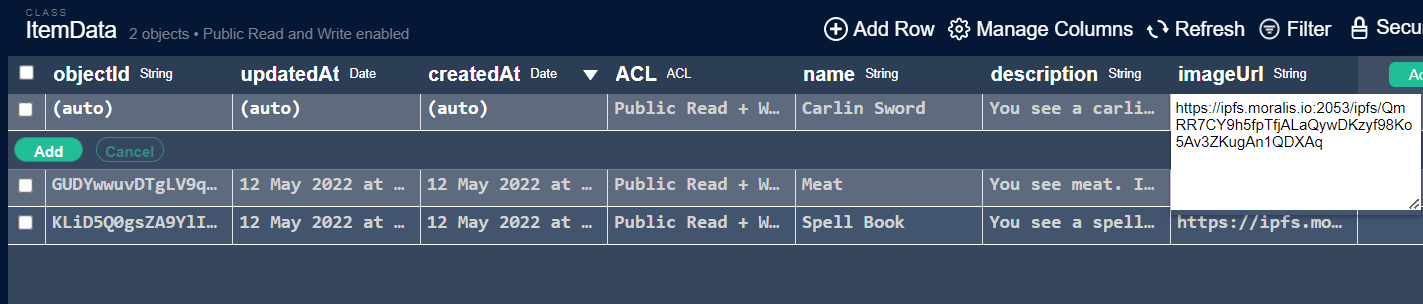
So now go to the dashboard, add a brand new row and duplicate and paste the knowledge you need. Repeat the method so you find yourself having at the very least 3 rows:
So to check this, return to Unity and hit play. Scan the QR code together with your MetaMask pockets. An indication message will pop up in your pockets so affirm it:
As soon as logged in efficiently, stroll to the store counter and you need to see the three objects we simply added to the Moralis Database. Good!

Programmatically, what occurred right here is that ShopInventory.cs listened to the occasion triggered by ShopCounterCollider.cs named PlayerEnteredShop and it referred to as OpenShop():
non-public void OnEnable()
{
   MoralisAuthenticator.Authenticated += SubscribeToDatabaseEvents;
   ShopCounterCollider.PlayerEnteredShop += OpenShop;
   ShopItem.Chosen += OnItemSelectedHandler;
   PurchaseItemManager.PurchaseCompleted += DeletePurchasedItem;
   PurchaseItemManager.ItemPanelClosed += OpenShop;
}
And OpenShop() itself calls the operate GetItemsFromDB(), which is the operate answerable for retrieving the objects that we simply added to the Database.
Foreach ItemData retrieved from the database utilizing _getAllItemsQuery.FindAsync() we are going to name PopulateShopItem() passing ItemData as a parameter:
non-public async void GetItemsFromDB()
{
   IEnumerable<ItemData> databaseItems = await _getAllItemsQuery.FindAsync();

   var databaseItemsList = databaseItems.ToList();
   if (!databaseItemsList.Any()) return;

   foreach (var databaseItem in databaseItemsList)
   {
       PopulateShopItem(databaseItem);
   }
}
PopulateShopItem() will then instantiate an InventoryItem and can name the Init() operate on this class, additionally passing the ItemData:
non-public void PopulateShopItem(ItemData information)
{
InventoryItem newItem = Instantiate(merchandise, itemsGrid.rework);
newItem.Init(information);
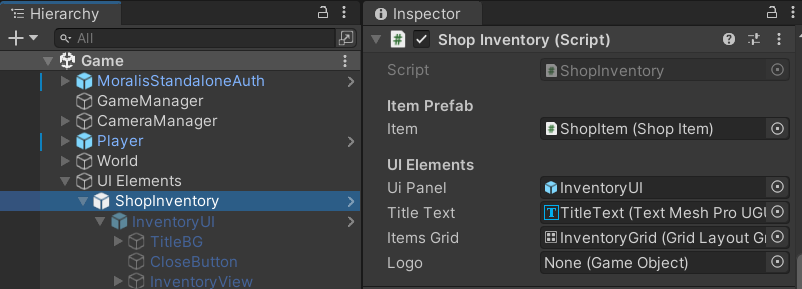
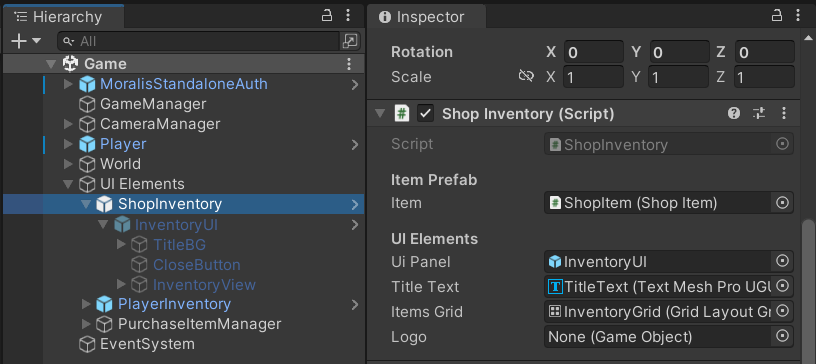
}If we go to the Editor Hierarchy and we click on on ShopInventory we are going to see the prefab that we’re instantiating, referred to as ShopItem:
So if we open ShopItem.cs we see that it inherits from InventoryItem.cs. If we navigate to that class we are going to then have the ability to see the Init() operate which will get the ItemData coming from the database and units it as a personal variable:
public void Init(ItemData newData)
{
   _itemData = newData;

   StartCoroutine(GetTexture(_itemData.imageUrl));
}
After that it makes use of its imageUrl to retrieve the feel that may turn into the merchandise icon:
non-public IEnumerator GetTexture(string imageUrl)
{
   utilizing UnityWebRequest uwr = UnityWebRequestTexture.GetTexture(imageUrl);
   _currentWebRequest = uwr;

   yield return uwr.SendWebRequest();

   if (uwr.consequence != UnityWebRequest.Outcome.Success)
   {
       Debug.Log(uwr.error);
       uwr.Dispose();
   }
   else
   {
       var tex = DownloadHandlerTexture.GetContent(uwr);
       myIcon.sprite = Sprite.Create(tex, new Rect(0.0f, 0.0f, tex.width, tex.top), new Vector2(0.5f, 0.5f), 100.0f);

       //Now we're in a position to click on the button and we are going to go the loaded sprite :)
       myIcon.gameObject.SetActive(true);
       myButton.interactable = true;

       uwr.Dispose();
   }
}
So that is how we create, retrieve and populate our objects within the store stock. Additionally keep in mind that as a result of we’ve subscribed to the occasions on the ItemData desk within the database, if we add, delete, or modify any merchandise there, the store stock will get routinely up to date. Good!
4. Deploy Sensible Contract
Now it’s time to learn to mint this stuff as NFT and switch them to the participant. However first, we are going to deploy the good contract that may allow us to do this.
We’re going to make use of the net browser MetaMask pockets to deploy the contract (not your cellular MetaMask) so make it possible for earlier than we proceed, you have got imported the Mumbai Testnet and you’ve got some funds on it like we said within the pre-requisites:
Having MetaMask put in each in your browser and your cellular system, with the Mumbai Testnet imported and a few funds in each:
https://moralis.io/mumbai-testnet-faucet-how-to-get-free-testnet-matic-tokens/
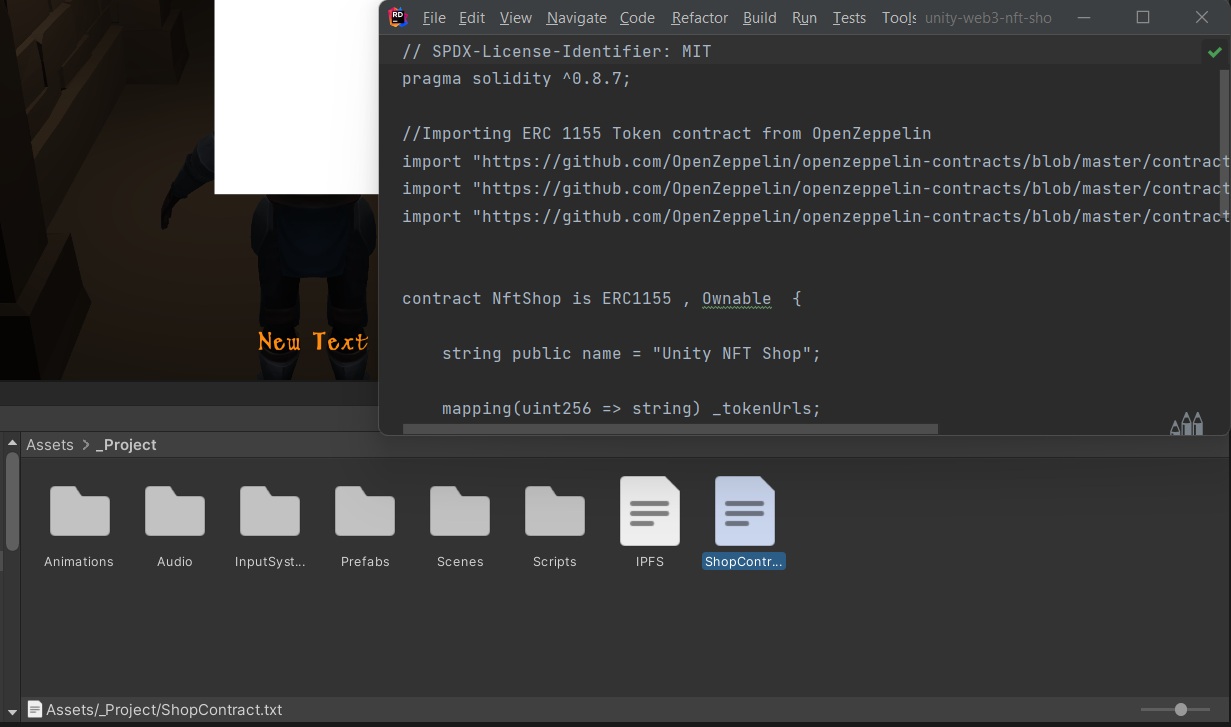
When you’re prepared, go to Belongings → _Project → ShopContract.txt and duplicate the code inside:
// SPDX-License-Identifier: MIT
pragma solidity ^0.8.7;

//Importing ERC 1155 Token contract from OpenZeppelin
import "https://github.com/OpenZeppelin/openzeppelin-contracts/blob/grasp/contracts/token/ERC1155/ERC1155.sol";
import "https://github.com/OpenZeppelin/openzeppelin-contracts/blob/grasp/contracts/entry/Ownable.sol";
import "https://github.com/OpenZeppelin/openzeppelin-contracts/blob/grasp/contracts/utils/Strings.sol";


contract NftShop is ERC1155 , Ownable  {

   string public title = "Unity NFT Store";

   mapping(uint256 => string) _tokenUrls;

   constructor() ERC1155("")  {}

   operate buyItem(uint256 _tokenId, string reminiscence _tokenUrl, bytes reminiscence information) public /*onlyOwner*/{

       //IMPORTANT Implement personal safety (set possession to customers). Not manufacturing prepared contract

       _tokenUrls[_tokenId] = _tokenUrl;
       _mint(msg.sender, _tokenId, 1, information);
   }

   operate uri(uint256 id) public view digital override returns (string reminiscence) {
       return _tokenUrls[id];
   }
}
IMPORTANT – NOT PRODUCTION READY CONTRACT
As you may see, the buyItem operate is public so it’s possible you’ll want so as to add some type of safety/entry management to it and be sure you limit what addresses are in a position to name the operate. You may verify https://docs.openzeppelin.com/contracts/2.x/access-control to know extra about it.
As the target of this part is to learn to name a sensible contract operate from Unity utilizing Moralis, we are going to go forward and go away the operate public.
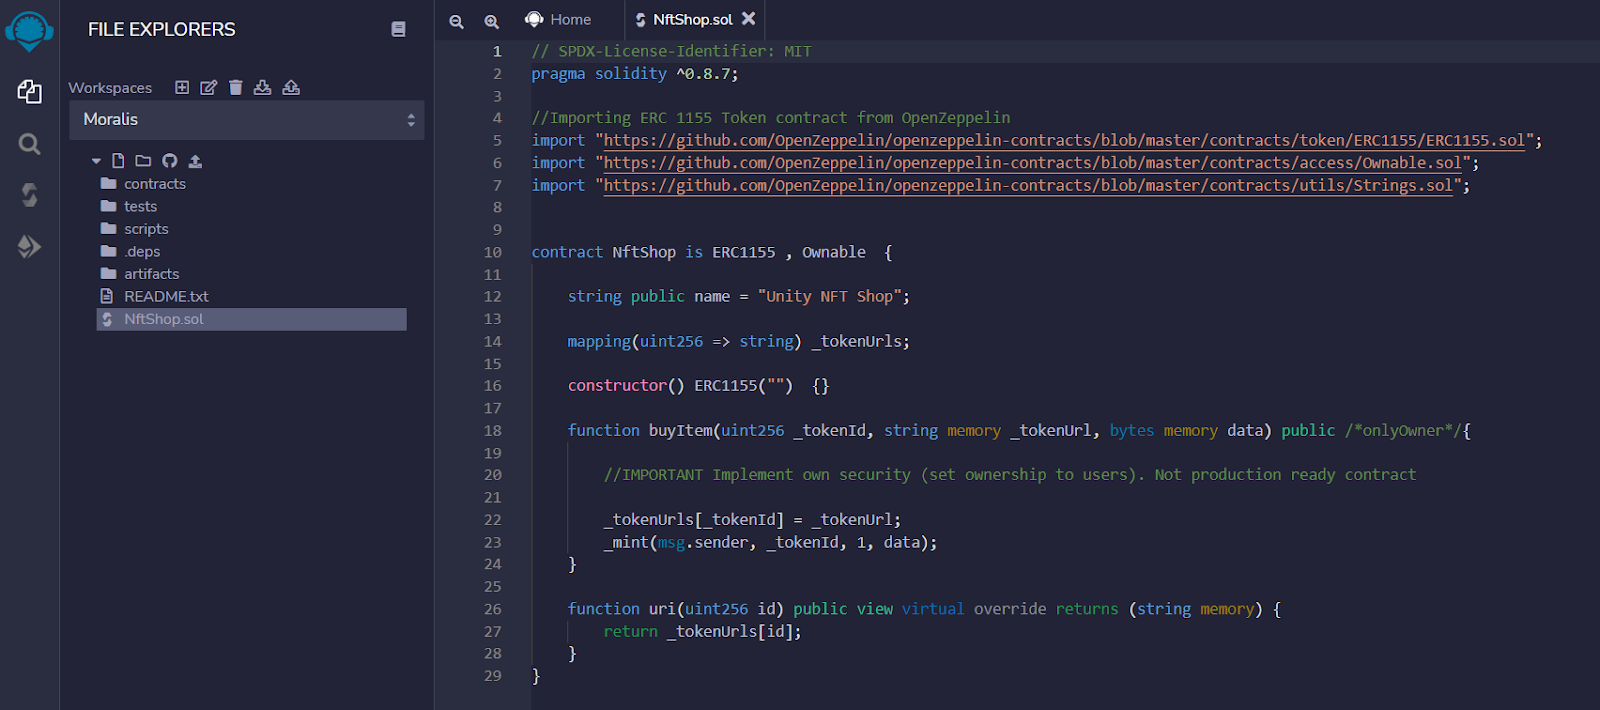
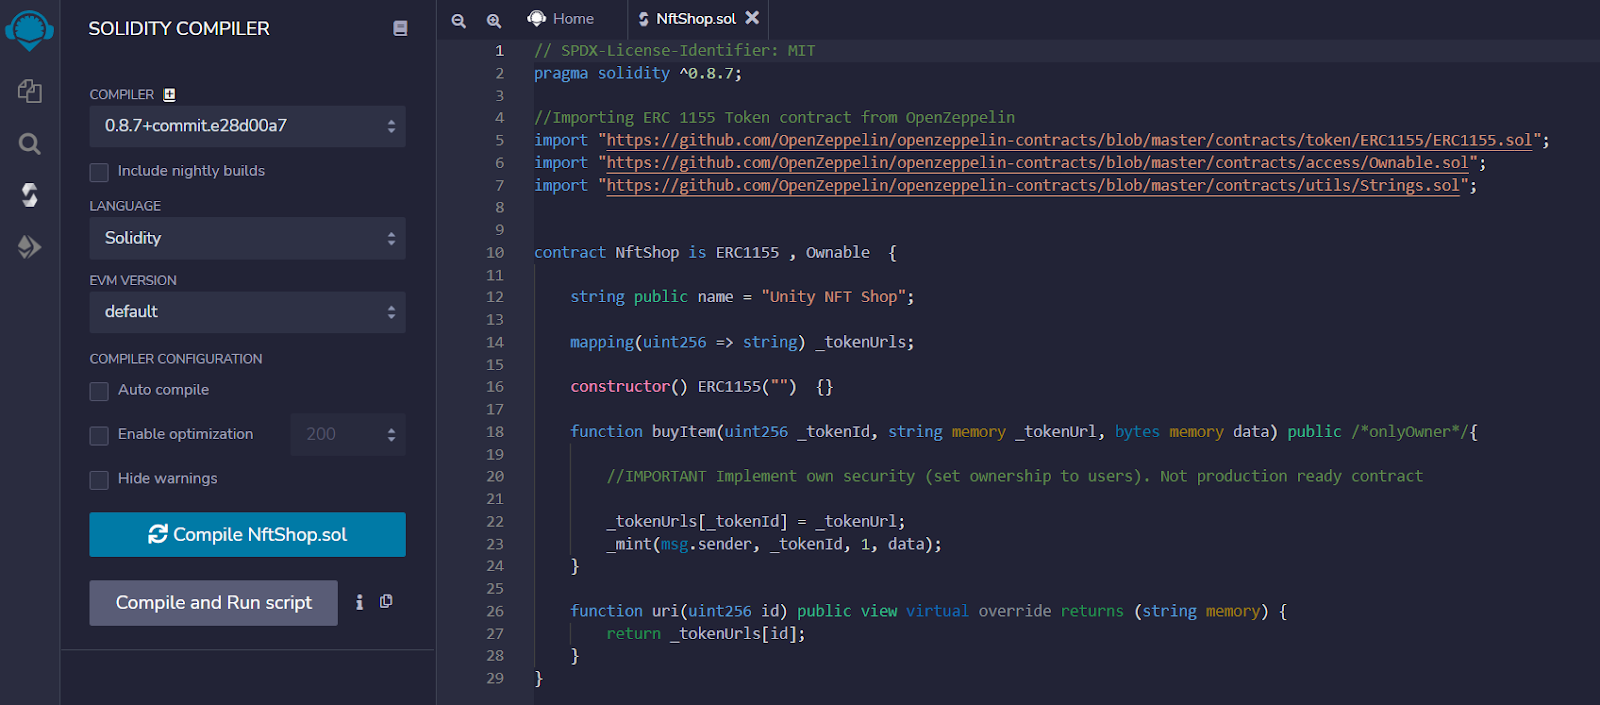
So go to https://remix.ethereum.org/, create a brand new file referred to as NftShop.sol and paste the copied contract:
On the left sidebar, go to the Solidity Compiler and click on on Compile NftShop.sol:
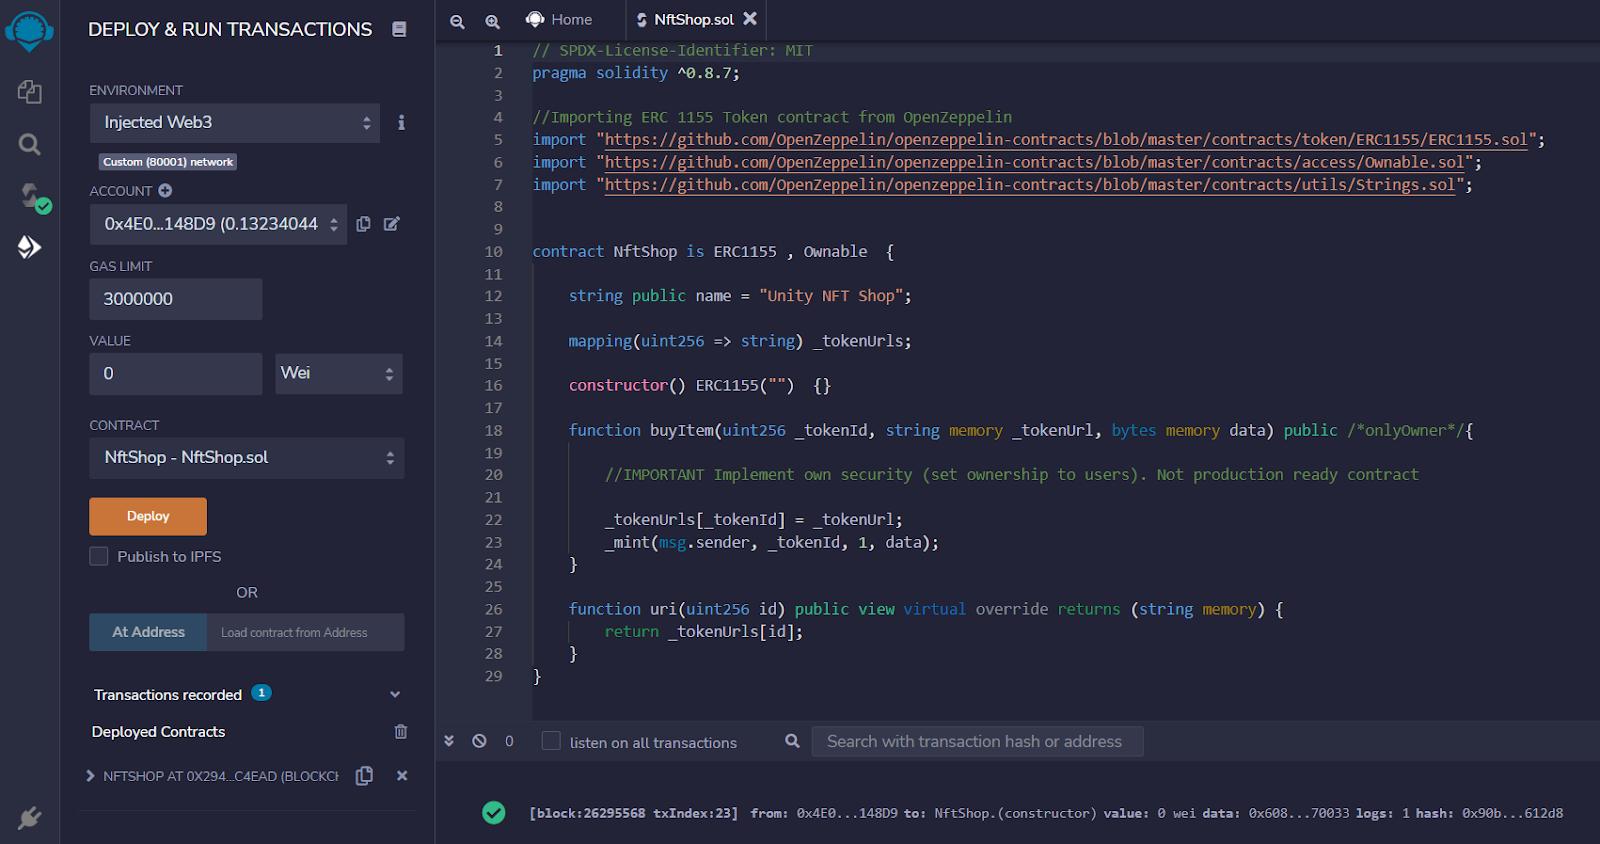
Under the solidity compiler on the left sidebar, go to the Deployer. Below ENVIRONMENT choose Injected Web3. MetaMask will pop up and you’ll need to sign up.
Then, be certain NftShop.sol is chosen below CONTRACT. Click on on Deploy and you’ll need to substantiate the transaction on MetaMask (be sure you are below the mumbai community):

That’s it! You may have deployed your contract to the Mumbai Testnet and below Deployed Contracts you can find the contract tackle:
Copy the contract tackle, go to GameManager.cs in Unity and paste it on ContractAddress:

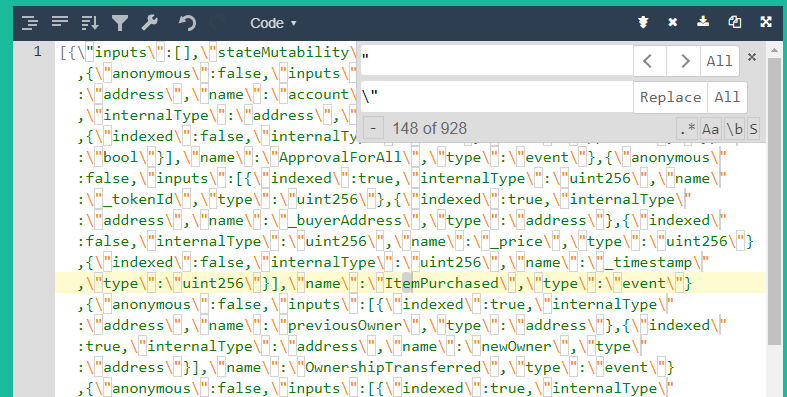
Alright! Now we want the ABI so return to Remix → Solidity Compiler and duplicate the contract ABI beneath Compilation Particulars:

Earlier than pasting the worth in GameManager.cs, we have to format it. So go to https://jsonformatter.org/ and paste the ABI on the left aspect. Then click on on Minify/Compact:

After this, click on on the proper aspect, press to Ctrl + F and sort “
We have to exchange “ for ”
Click on on All to switch it in all of the textual content:
Copy the formatted ABI, return to GameManager.cs and paste it on ContractAbi:

ContractChain is already appropriate as a result of we simply deployed the contract to mumbai.
Alright, contract deployed and configured!
5. Mint objects as NFTs
The script that takes care of changing this stuff to NFTs is PurchaseItemManager.cs and we discover it right here:

Open the script and also you’ll see that it listens to the Chosen occasion triggered by ShopItem.cs:
non-public void OnEnable()
{
   ShopItem.Chosen += ActivateItemPanel;
}
This occasion triggers once we choose any merchandise on the store stock. ActivateItemPanel() will get the InventoryItem and its information and shows a UI panel with the title, the outline and the sprite of the merchandise:
non-public void ActivateItemPanel(InventoryItem selectedItem)
{
   _currentItemData = selectedItem.GetData();

   _currentItemData.objectId = selectedItem.GetId();

   itemName.textual content = selectedItem.GetData().title.ToUpper();
   itemDescription.textual content = selectedItem.GetData().description;
   itemIcon.sprite = selectedItem.GetSprite();

   itemPanel.SetActive(true);
}
And right here comes the fascinating half; once we click on on Purchase we are going to name PurchaseItem() which is among the essential capabilities of this part. Let’s undergo it step-by-step:
public async void PurchaseItem()
{
   PurchaseStarted?.Invoke();

   itemPanel.SetActive(false);

   transactionInfoText.gameObject.SetActive(true);
   transactionInfoText.textual content = "Creating and saving metadata to IPFS...";

   var metadataUrl = await CreateIpfsMetadata();

   if (metadataUrl is null)
   {
       transactionInfoText.textual content = "Metadata could not be saved to IPFS";
       StartCoroutine(DisableInfoText());

       PurchaseFailed?.Invoke();
       return;
   }
First it triggers an occasion referred to as PurchaseStarted to let know all the opposite scripts that buy is beginning (GameManager.cs will use that to vary the sport state). After closing the itemPanel and updating the transactionInfoText we proceed to name CreateIpfsMetadata().
That operate, utilizing the title, description and imageUrl obtained from the InventoryItem handed on the Chosen occasion, will save the knowledge to IPFS in a JSON format and can return a URL pointing to that JSON information.
If that operation fails for some purpose and the URL returned is null, we are going to set off the PurchaseFailed occasion.
Quite the opposite, if we get a legitimate URL we are going to name PurchaseItemFromContract() passing a transformed tokenId and the metadataUrl:
transactionInfoText.textual content = "Metadata saved efficiently";

// I am assuming that that is creating a unique tokenId from the already minted tokens within the contract.
// I can do this as a result of I do know I am changing a singular objectId coming from the MoralisDB.
lengthy tokenId = MoralisTools.ConvertStringToLong(_currentItemData.objectId);

transactionInfoText.textual content = "Please affirm transaction in your pockets";

var consequence = await PurchaseItemFromContract(tokenId, metadataUrl);
Let’s go to PurchaseItemFromContract() earlier than persevering with with the present operate, as that is the tactic that calls the buyItem operate from the good contract:
non-public async Activity<string> PurchaseItemFromContract(BigInteger tokenId, string metadataUrl)
{
   byte[] information = Array.Empty<byte>();

   object[] parameters = {
       tokenId.ToString("x"),
       metadataUrl,
       information
   };

   // Set fuel estimate
   HexBigInteger worth = new HexBigInteger("0x0");
   HexBigInteger fuel = new HexBigInteger(0);
   HexBigInteger gasPrice = new HexBigInteger("0x0");

   string resp = await Moralis.ExecuteContractFunction(GameManager.ContractAddress, GameManager.ContractAbi, "buyItem", parameters, worth, fuel, gasPrice);

   return resp;
}
First we create an object referred to as parameters with the tokenId, the metadataUrl and an empty byte’s array referred to as information.
Then we set a fuel estimate and for this easy case we do this by setting the worth, fuel and gasPrice to a zero-value HexBigInteger.
Then, the magic occurs once we name Moralis.ExecuteContractFunction() passing:
- The ContractAddress and the ContractAbi saved on GameManager.cs
- The title of the contract operate → buyItem
- The article parameters. These are the parameters that the contract buyItem operate requires.
- The gas-related variables worth, fuel and gasPrice.
Relying on the transaction consequence, going again to PurchaseItem(), we are going to set off the PurchaseFailed or PurchaseCompleted occasions:
if (result's null)
{
   transactionInfoText.textual content = "Transaction failed";
   StartCoroutine(DisableInfoText());

   PurchaseFailed?.Invoke();
   return;
}

transactionInfoText.textual content = "Transaction accomplished!";
StartCoroutine(DisableInfoText());

PurchaseCompleted?.Invoke(_currentItemData.objectId);
That is the message that you need to see within the sport whereas this operate is working:
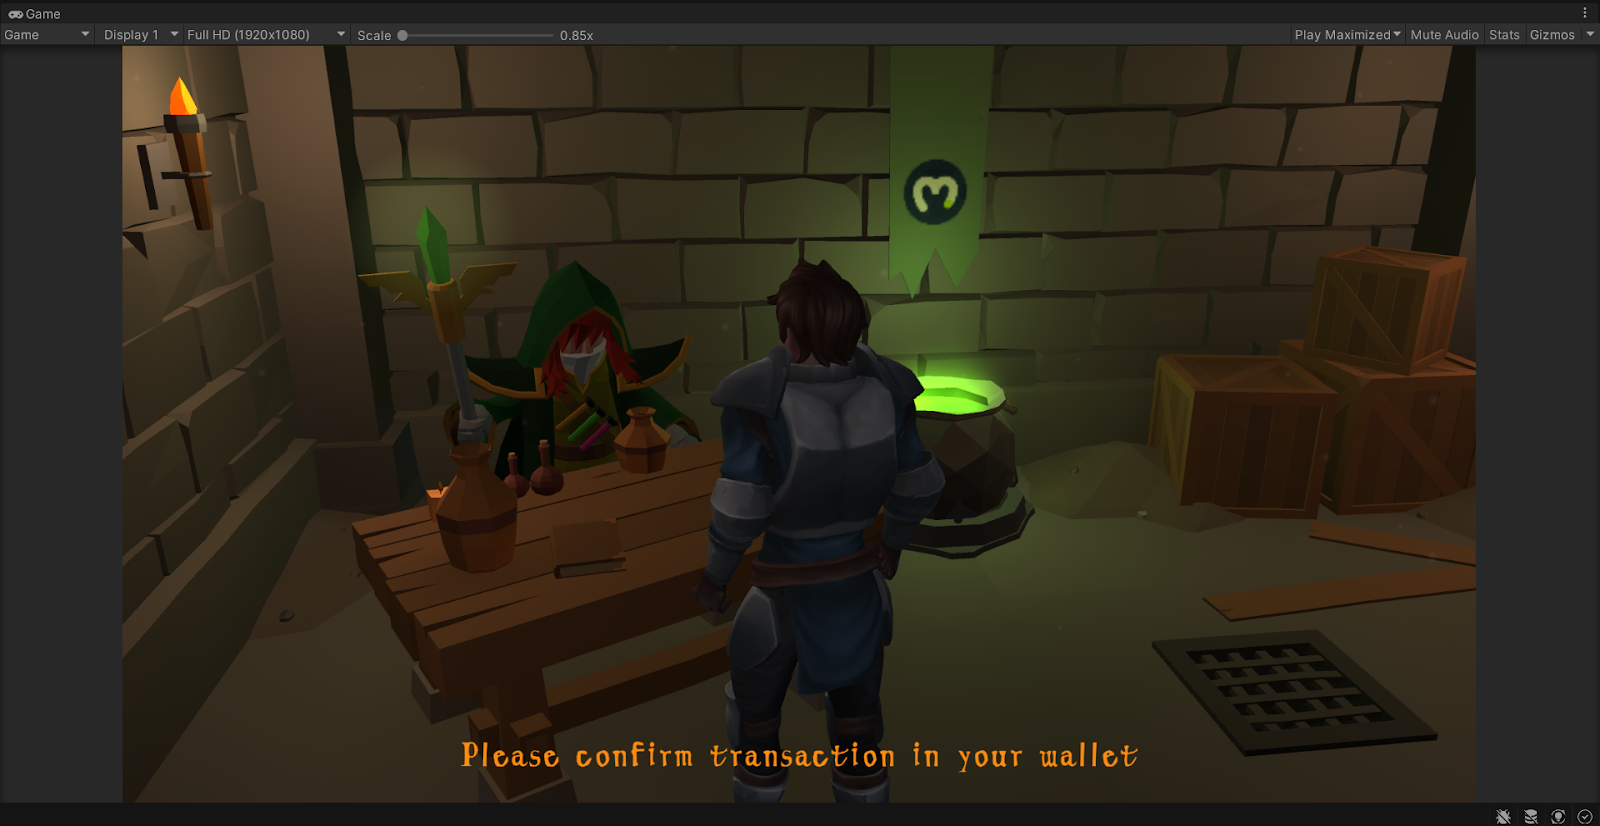
Should you affirm the message in your MetaMask pockets, the transaction will succeed and we could have minted the merchandise as an NFT!
Earlier than studying easy methods to retrieve it, it’s essential to know that ShopInventory.cs is listening to the PurchaseCompleted and can delete this merchandise from the database which can then not be within the sport store stock anymore:
non-public async void DeletePurchasedItem(string purchasedId)
{
   MoralisQuery<ItemData> purchasedItemQuery = _getAllItemsQuery.WhereEqualTo("objectId", purchasedId);
   IEnumerable<ItemData> purchasedItems = await purchasedItemQuery.FindAsync();

   var purchasedItemsList = purchasedItems.ToList();

   if (!purchasedItemsList.Any()) return;

   await purchasedItemsList.First().DeleteAsync();
}
That is the operate that ShopInventory.cs calls when listening to the PurchaseCompleted occasion.
As a result of we’re the purchaseId we will create a MoralisQuery choosing the database objects that comprise that purchasedId. As this id is exclusive we are going to solely discover one aspect which we are going to delete utilizing DeleteAsync().
The merchandise received’t seem subsequent time we open the store stock. Superior!
6. Get minted NFTs
After shopping for the merchandise and ready for about 1-2 minutes for the NFT to sync, let’s open the participant stock by urgent the “I” key on the keyboard. You must see the merchandise that you simply simply purchased there:

That’s as a result of PlayerInventory.cs takes care of it:

If we open it, we see that LoadPurchasedItems() is the operate that does the magic. Let’s undergo it step-by-step:
To start out, we the present logged person and its pockets tackle:
non-public async void LoadPurchasedItems()
{
   //We get our pockets tackle.
   MoralisUser person = await Moralis.GetUserAsync();
   var playerAddress = person.authData["moralisEth"]["id"].ToString();
Then we attempt to get all of the NFTs that the pockets tackle owns from a particular contract tackle by calling GetNFTsForContract(), a magic Moralis operate:
strive
{
   NftOwnerCollection noc =
       await Moralis.GetClient().Web3Api.Account.GetNFTsForContract(playerAddress.ToLower(),
           GameManager.ContractAddress,
           GameManager.ContractChain);

   Listing<NftOwner> nftOwners = noc.Outcome;
If we get some, we could have entry to the TokenId and to the Metadata and with that we are going to populate a brand new participant merchandise:
if (!nftOwners.Any())
       {
           Debug.Log("You do not personal any NFT");
           return;
       }

       foreach (var nftOwner in nftOwners)
       {
           var nftMetaData = nftOwner.Metadata;
           NftMetadata formattedMetaData = JsonUtility.FromJson<NftMetadata>(nftMetaData);

           PopulatePlayerItem(nftOwner.TokenId, formattedMetaData);
       }
   }
   catch (Exception exp)
   {
       Debug.LogError(exp.Message);
   }
}
PopulatePlayerItem() works very comparable than PopulateShopItem() however right here we’re passing an NftMetadata object as parameter as a substitute of an ItemData one:
non-public void PopulatePlayerItem(string tokenId, NftMetadata information)
{
   InventoryItem newItem = Instantiate(merchandise, itemsGrid.rework);

   newItem.Init(tokenId, information);
}
The great factor is that instantiating a PlayerItem is similar to instantiating a ShopItem as a result of each inherit from InventoryItem.cs. So when calling Init(), a PlayerItem might be created in a really comparable method than a ShopItem could be.
In order that’s nearly it however now that we’ve retrieved the NFT, we will learn to verify it on OpenSea.
Tremendous easy, go to PlayerItem.cs and there we’ve OnItemClicked(). This operate might be referred to as once we click on on the merchandise within the participant stock and it’ll name MoralisTools.CheckNftOnOpenSea() passing the ContractAddres, the ContractChain and the id of the merchandise:
public void OnItemClicked()
{
   MoralisTools.CheckNftOnOpenSea(GameManager.ContractAddress, GameManager.ContractChain.ToString(), GetId());
}
CheckNftOnOpenSea will use that parameters to fill the OpenSea Testnets URL:
public static void CheckNftOnOpenSea(string contractAddress, string contractChain, string tokenId)
{
   string url = $"https://testnets.opensea.io/property/{contractChain}/{contractAddress}/{tokenId}";
   Utility.OpenURL(url);
}
With the URL set, Utility.OpenURL(url) will maintain opening our default internet browser and displaying the NFT on OpenSea:

Congratulations, you accomplished the Buy NFTs from a NPC Store Moralis Mission and now you understand how to create a full on-chain stock system with Unity.
See you on the following one, Moralis Mage!


