
If customers wish to enter the Web3 realm and work together with a blockchain, every person should authenticate themselves utilizing a verification device. Whereas most customers authenticate with MetaMask when interacting with Ethereum dapps (decentralized purposes), the primary pockets to authenticate Solana customers with is Phantom. That’s additionally the case when constructing Web3 apps. If you determine to construct Ethereum dapps, you make the most of MetaMask for builders, however when creating Solana dapps, you make the most of the Phantom pockets to authenticate customers. Since Solana may be the first contender to all programmable blockchains, we’ve determined to offer an easy authentication resolution to those that wish to make the most of its community. Thus, comply with alongside as we uncover how one can authenticate Solana customers with the Phantom pockets!
Within the upcoming tutorial, we’ll present you how one can use Moralis to make Web3 growth a complete lot less complicated. When utilizing Moralis’ SDK, it can save you time and worthwhile assets. This final Web3 backend platform is all about cross-chain and cross-platform interoperability. Thus, you need to use this pinnacle of the present Web3 tech stack for Ethereum, EVM-compatible chains, and even Solana. Moreover, Moralis enables you to change into a Web3 developer utilizing your JavaScript or Unity proficiency.
Herein, we’ll use Subsequent.js to create a Moralis dapp that may authenticate Solana customers. Nonetheless, earlier than we dive into this text’s instance venture, let’s undergo some fundamentals. We’ll first discover Solana authentication and canopy the fundamentals of the Phantom pockets. Furthermore, to prepare for the upcoming tutorial, create your free Moralis account!

Exploring Solana Authentication
In case you are new to Web3, you may surprise, “why is it essential to authenticate customers?”. With out digging too deep into the performance of blockchain know-how, it’s essential know that cryptography performs a significant function within the crypto realm. Additional, there must be some form of gateway that determines who will get to work together with any explicit chain. That is the place customers’ pockets addresses come into the image.
Web3 or crypto wallets are available in many types, though primarily, they’re break up into two classes: cold and hot wallets. Each varieties of wallets retailer a group of keys and are used to obtain, ship, and monitor possession of cryptocurrencies. When creating a brand new pockets, a key pair of a non-public key and a public secret is securely generated. So, a pockets offers the means to work together with these keys. Moreover, you should know that public keys are often known as “pockets addresses”. The phrase “public” means that these addresses could be shared and displayed freely. As an illustration, you’d share this tackle with somebody if you need them to ship you some SOL tokens. As well as, public addresses are additionally what blockchain apps use to authenticate customers. As such, you will need to use a pockets that helps the chain you wish to work together with.
It’s important to level out that not all wallets assist all chains. As an illustration, you may’t authenticate with MetaMask on Solana. If you wish to discover Solana authentication choices, it’s essential try Solana’s ecosystem. Furthermore, in the case of utilizing crypto wallets to authenticate customers for devs, wallets that provide browser extensions are the way in which to go. With that stated, Phantom is at the moment the most well-liked device to authenticate Solana customers.

What’s the Phantom Pockets?
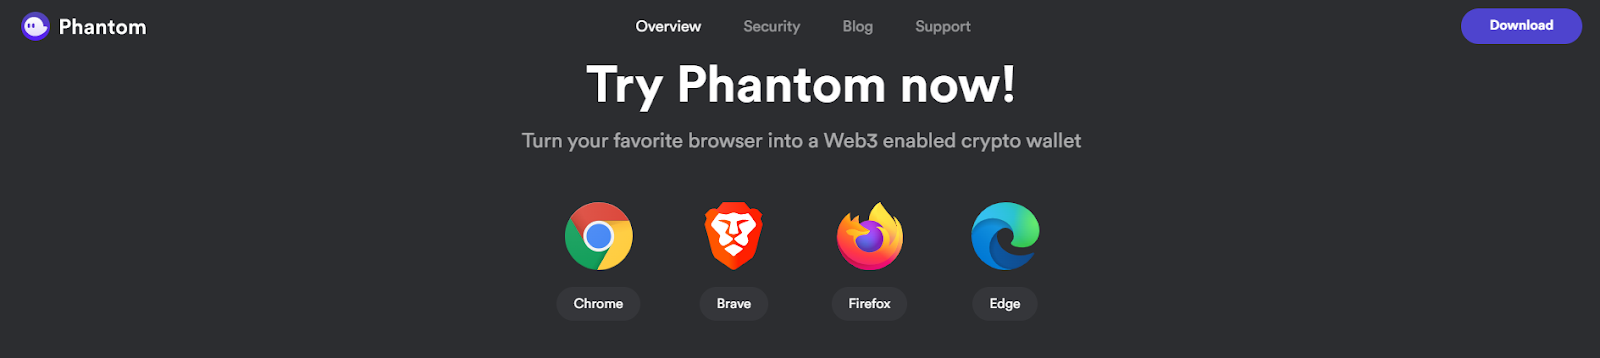
Phantom is likely one of the hottest Solana crypto wallets. It’s the go-to device to retailer, purchase, ship, and obtain SPL tokens (SPL vs ERC20 tokens). Therefore, additionally it is a device to make use of to authenticate Solana customers. Like MetaMask, Phantom can also be obtainable as a cellular utility and a browser extension. That manner, customers can select their most popular possibility. Nonetheless, so far as builders go, utilizing the browser extension possibility tends to be the proper alternative. Presently, Phantom helps Chrome, Courageous, Firefox, and Edge:
Moreover, these are the important thing features of Phantom:
- Non-Custodial – Phantom ensures that the workforce behind it by no means has entry to any of your information or funds.
- Ledger Assist – For extra safety, Phantom lets you join your {hardware} (chilly) pockets.
- Privateness – Phantom ensures that it doesn’t monitor any personally identifiable data, customers’ account addresses, or asset balances.
- Biometric Authentication – With Phantom, you get to guard your property on the go along with the comfort of utilizing your biometrics.
In case you are concerned with rolling up your sleeves and following our result in tackle the upcoming instance venture, be sure that to obtain your Phantom pockets now. Simply go to the official Phantom web site (phantom.app) and comply with the on-site directions.

Authenticate Solana Customers with the Phantom Pockets – Moralis and Subsequent.js Instance Undertaking
We’re completely happy to have you ever be a part of us as we tackle our instance venture. To get essentially the most out of the next sections, we encourage you first to learn the content material after which undergo it once more, solely this time to take motion your self. We’ll use Phantom, Moralis, and Visible Studio Code (VSC) as instruments. As such, we advocate getting these instruments prepared earlier than shifting ahead.
Authenticate Solana Customers – The Preliminary Undertaking Setup
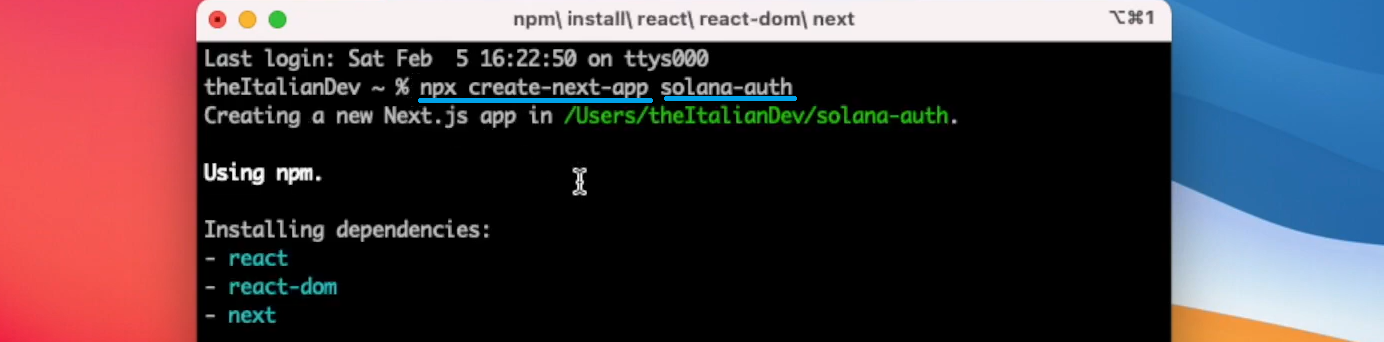
We’ll begin our instance venture by creating a brand new Subsequent.js utility. To do that, use your terminal window and kind in “npx create-next-app [project name]“:
As soon as all dependencies are put in, we will clear the terminal. Then, we navigate to the beforehand created folder (venture identify) utilizing “cd” and open it in VSC:

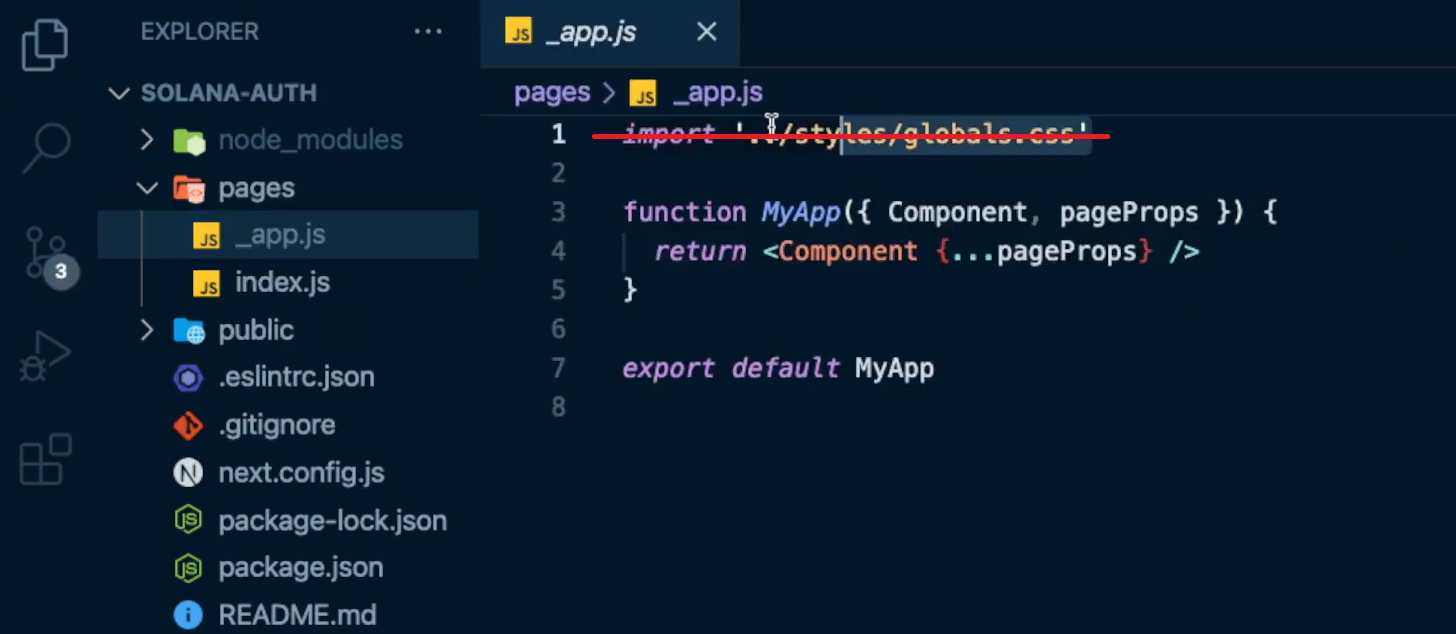
Now that we’re inside VSC, we wish to clear up our venture folder by deleting a few of the information and subfolders that we don’t want. As such, we go forward and delete the “types” and the “api” (inside “pages”) folders. Subsequent, we open the “app.js” file and delete the highest “import” line:
The above screenshot reveals what our venture construction seems to be like at this stage. So far as the “_app.js” and the “index.js” information go, that is what we wish to begin with:


With the preliminary venture setup accomplished, we wish to be certain that our Subsequent.js app is working easily. As such, we use VSC’s terminal to run it:
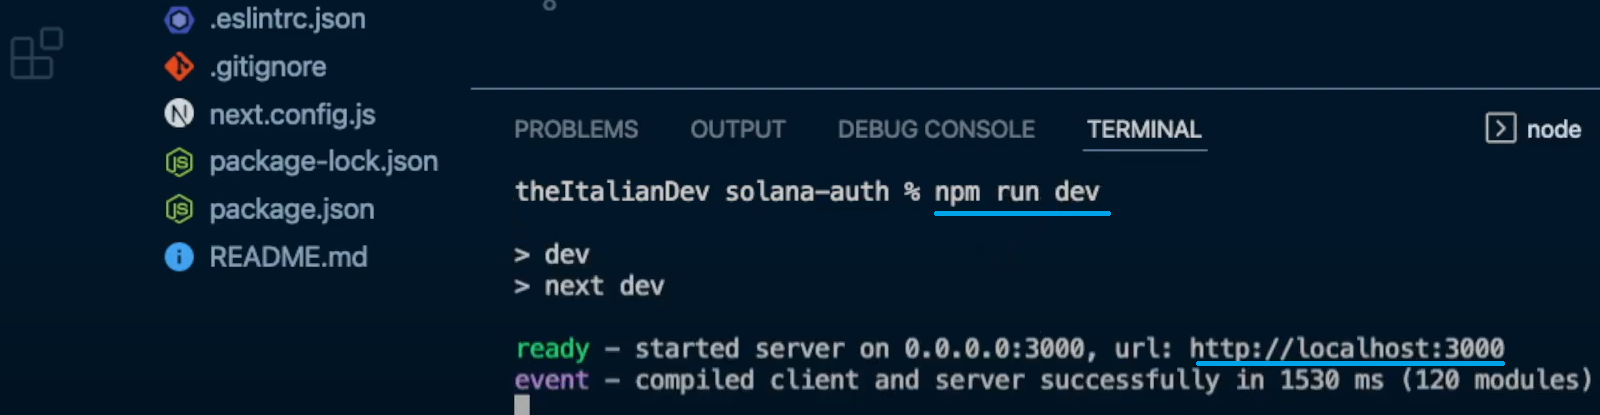
Therefore, we will now use our browser and paste within the above URL to preview our app domestically:

Getting Began with Moralis
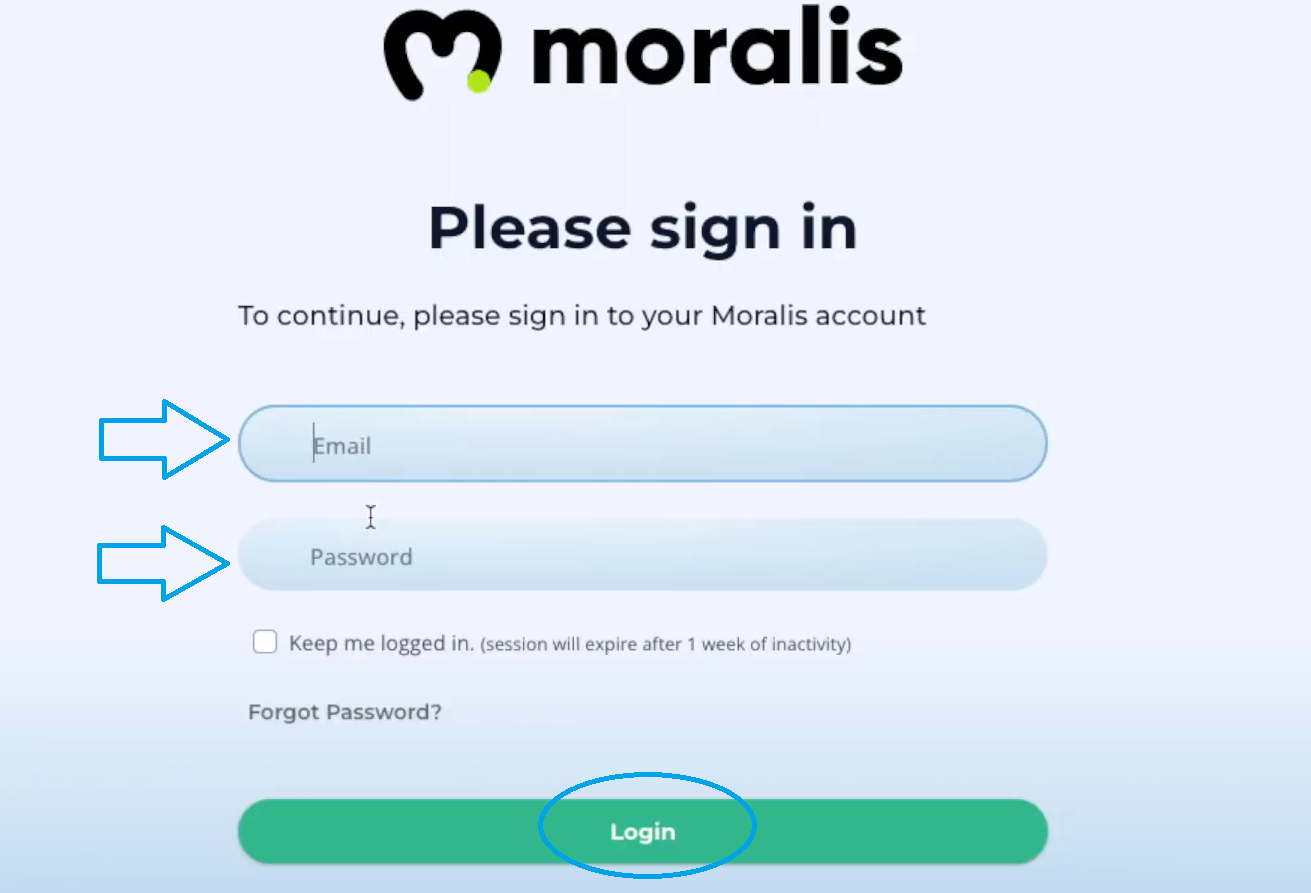
Now that our Subsequent.js app (in its preliminary kind) is working correctly, it’s time to finish the preliminary Moralis setup. At this level, you most likely have your free Moralis account prepared. So, log in to your Moralis admin space by getting into your credentials:
Nonetheless, in case you haven’t created your free Moralis account but, accomplish that now. As a brand new person, you will notice this display as soon as inside your admin space:

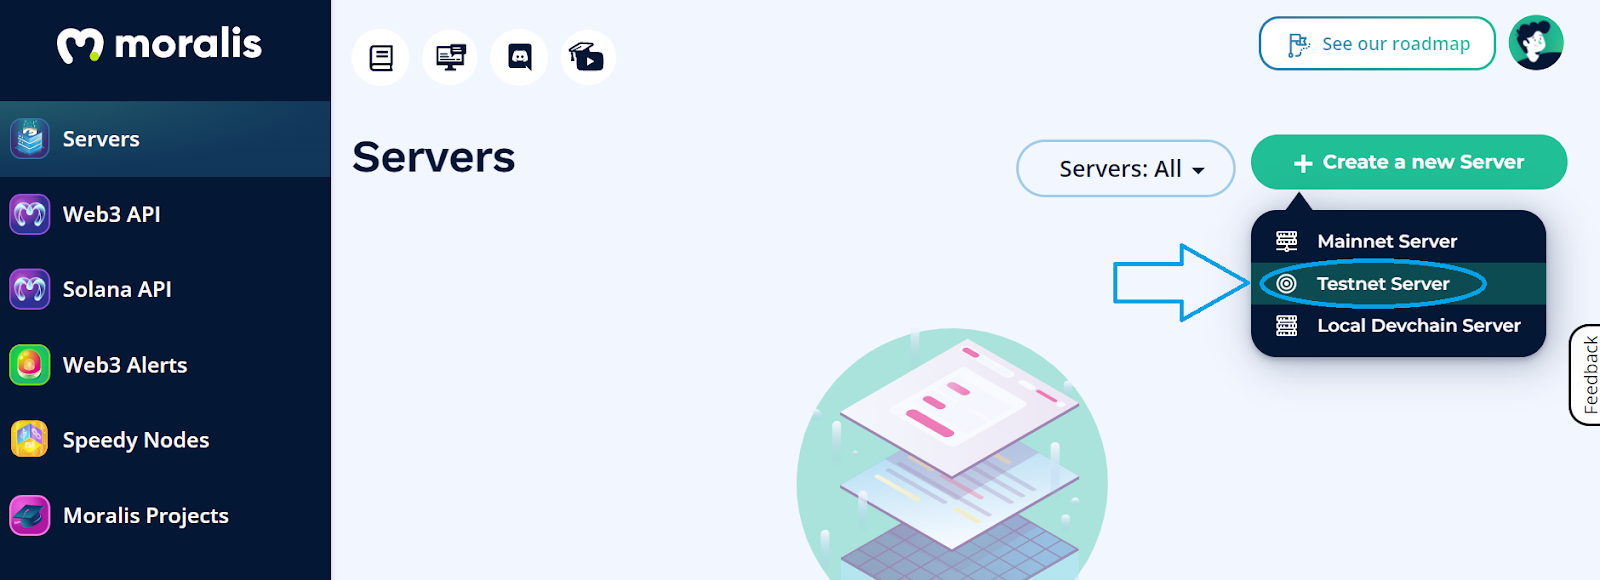
Observe the directions and click on on “+ Create a brand new Server”. From the drop-down menu, choose the “Testnet Server” possibility:
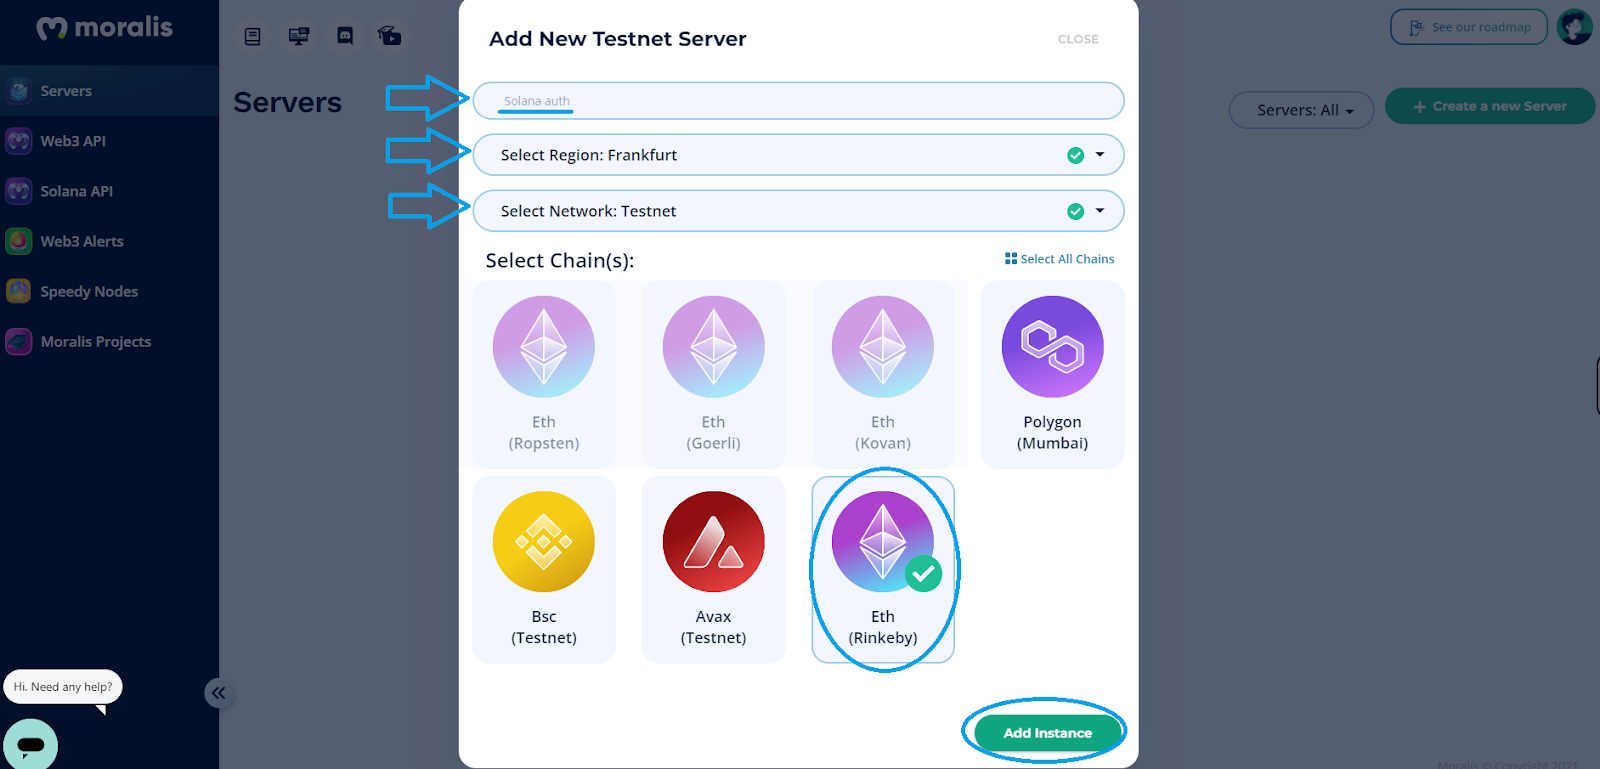
Subsequent, enter your server’s particulars. The identify could be something you need. Choose the situation closest to you and click on on the chain you favor (we’re going with Rinkeby, one of many Ethereum testnets). Lastly, spin up your server with the “Add Occasion” button:
It gained’t take lengthy earlier than your server is up and working. You then get to entry its particulars by way of the “View Particulars” button:

The Key to Authenticate Solana Customers Simply – Connecting to Moralis’ SDK
To attach the Moralis backend with the above-created Subsequent.js app, we should paste the above particulars into our code. Nonetheless, we should first set up “react-moralis” utilizing VSC’s terminal:

Subsequent, we open the “_app.js” file and import the above-installed element. We do that with the “import {MoralisProvider} from ‘react-moralis’” line of code:

Then, we wrap our element inside “MoralisProvider”:
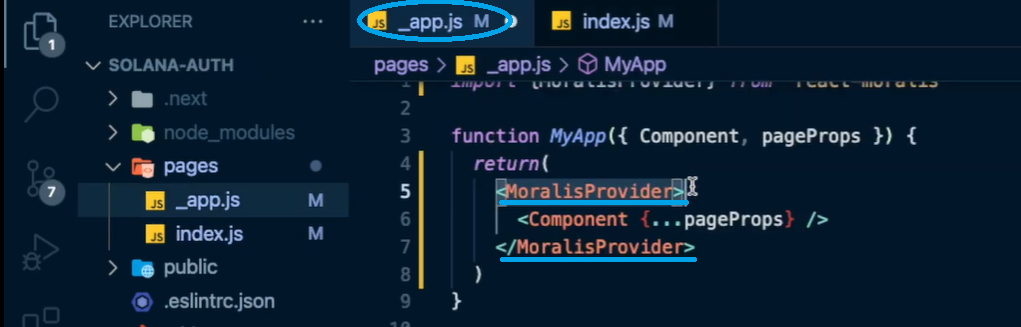
We should additionally create “appId” and “serverURL” props to retailer our server’s particulars. Nonetheless, as a substitute of instantly pasting the values contained in the “_app.js” file, we wish to present you a cleaner possibility that gives extra consistency. As such, we create a brand new file, “.env.native”, the place we retailer our surroundings variables:

Word: Make certain to make use of your server’s particulars, not those displayed within the picture above.
Lastly, we should level “appId” and “serverUrl” to the variables inside “.env.native”:

Nonetheless, we should additionally load the variables into our utility utilizing the “npm run dev” command inside VSC’s terminal:

Word: If the console returns a warning concerning the necessity to set up the “Web3Connector” bundle, you may ignore it. We won’t want this bundle for the sake of our tutorial.
The Code to Authenticate Solana Customers
Now that we’ve efficiently accomplished the preliminary setup and linked our app to the Moralis SDK, we will create our dapp. Let’s remind you that the primary function of this tutorial is to indicate you how one can authenticate Solana customers. Thus, we’ll maintain issues easy and persist with fairly primary UI styling. So, to cowl the logic associated to our dapp’s Web3 authentication, we’ll use the “index.js” file.
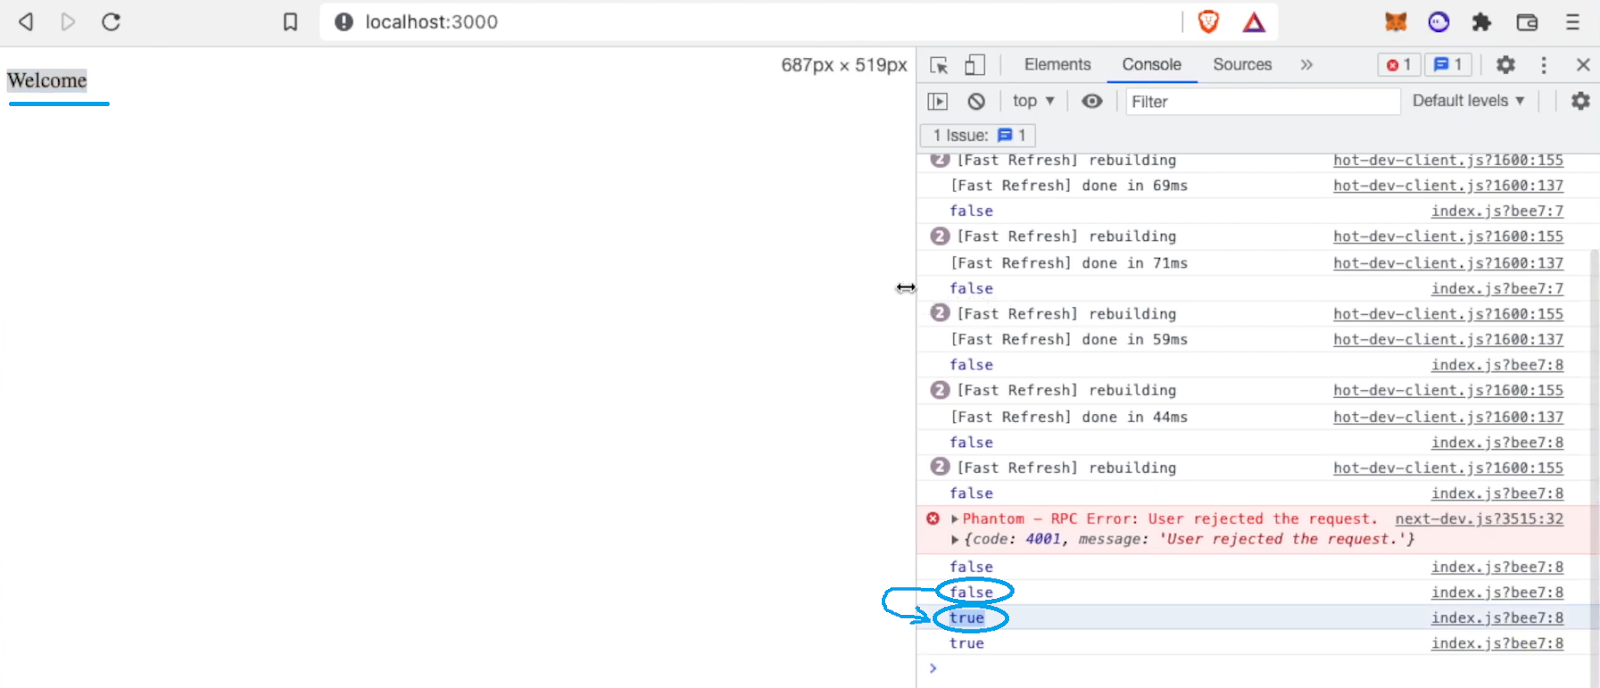
First, we verify for any authenticated customers. Thankfully, the “useMoralis” hook makes this as easy. It allows us to make use of the “isAuthenticated” technique. Furthermore, if customers are usually not authenticated, we wish them to see the “Auth” button. Nonetheless, we wish authenticated customers to see the “Welcome” message.
So as to give the “Auth” button the precise energy to authenticate Solana customers, we get to make use of Moralis’ “authenticate” technique. We use “sol” on this technique, informing it to give attention to Solana. The latter ensures that customers’ Web3 wallets are prompted once they click on the button.
Right here’s the complete code we use within the “index.js” file:
	import {useMoralis} from “react-moralis”

	export default perform Residence() {
	    const {
	        isAuthenticated,
	        authenticate
	    } = useMoralis()
	   if(!isAuthenticated) {
	        return(
	           <button onClick={() => authenticate({
	              sort: “sol”
           })}>Auth</button>
	        )
	    }
	    return (
	       <div>
	           <p>Welcome</p>
	       </div>
	    )
}
These few easy traces of code give our “Auth” button the ability to authenticate Solana customers utilizing the Phantom pockets. Let’s do a fast demo that may present you this function in motion.
Our Dapp – Preview
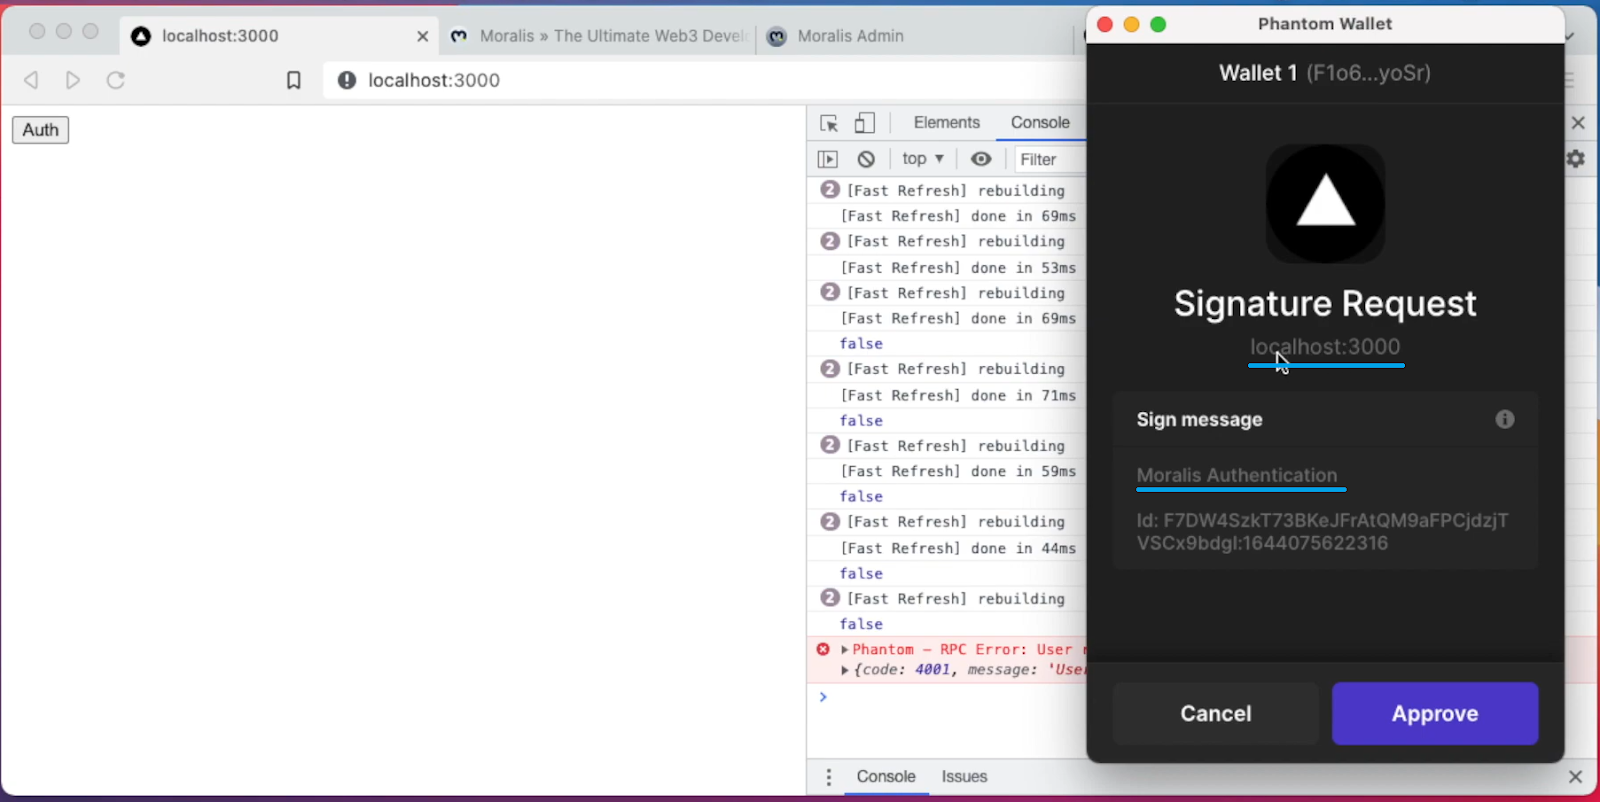
So, if we return to “localhost”, we will take a look at our dapp. We begin by clicking on the “Auth” button, which triggers our Phantom extension:

Since our pockets is locked, we should first enter our password and click on on the “Unlock” button. As quickly as we do that, Phantom prompts us with a signature request. The latter was initiated by our click on on the “Auth” button:
As soon as we approve the above signature request, our instance dapp greats us with the “Welcome” message:
Taking Solana Programming Additional
If you happen to loved the above instance venture and wish to take issues additional, we advocate watching the video beneath. There, you’ll have an opportunity to look over the shoulders of a Moralis professional taking up a extra superior venture. He’ll first present you how one can create a Solana token in minutes. Then, the professional will present you how one can construct a Solana token dashboard. Additionally, you’ll use React if you happen to tackle the instance venture beneath. Alongside the way in which, you’ll get to make use of and follow the abilities acquired from this tutorial!
The right way to Authenticate Solana Customers with the Phantom Pockets – Abstract
At the moment, you realized every little thing there may be to learn about how one can authenticate Solana customers. You now know that you may have your Solana dapp working in minutes through the use of the Phantom pockets and Moralis. Moreover, you additionally had an opportunity to take your Solana programming additional. As such, you might need created your personal SPL token and a Solana token dashboard. Nonetheless, you need to use the data acquired from this text to develop killer dapps on different common chains. After all, if you happen to determine to give attention to Ethereum or different EVM-compatible chains, you’ll be utilizing MetaMask as a substitute of Phantom. So, in case you wish to discover different blockchain growth tutorials, be sure that to go to the Moralis YouTube channel and the Moralis weblog.
Except for varied instance initiatives, these two shops additionally give you easy explanations of varied crypto matters. Therefore, they could function a supply of your steady free blockchain growth training. As an illustration, a few of the newest matters embody a Solidity good contracts tutorial, a decentralized Twitter, a Web3 sport that permits gamers to purchase NFTs in-game, an EIP 1559 instance, the total decentralized finance information, how one can mint sport property as NFTs, constructing a decentralized autonomous group (DAO), creating your personal metaverse, and all it’s essential learn about a BNB NFT. Nonetheless, if you’re decided to change into a blockchain developer with confidence, you need to take into account taking a extra skilled method. Due to this fact, enrolling in Moralis Academy may be the proper path for you.


