With the beginning of social media, the best way folks work together, talk and current themselves has modified. As such, the notice of how a lot these platforms influence day by day dwelling is growing, and as customers of centralized social media behemoths fall sufferer to privateness breaches, individuals are turning their consideration to blockchain, the place decentralized social media profiles reign. Nevertheless, since Web3 is simply in its infancy, many are unfamiliar with how you can construct a decentralized social media profile. Luckily, with Moralis and Lens Protocol, you may create a decentralized social media profile in about 20 minutes. Comply with alongside herein as we discover the steps on how you can accomplish this!
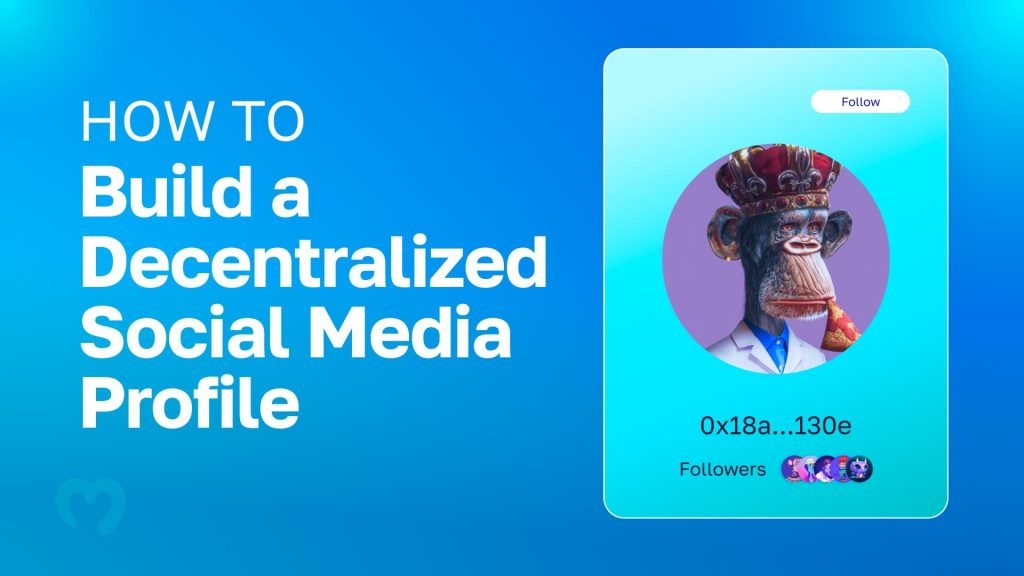
If you happen to tackle at this time’s problem, you’ll learn to use NextJS to create a improbable social media dapp. Alongside the best way, you’ll learn to use the last word enterprise-grade Web3 API supplier – Moralis – to fetch on-chain knowledge. In fact, additionally, you will learn to work with Lens Protocol – a composable and decentralized social graph. Primarily, Lens Protocol is a backend answer for storing social media knowledge in a decentralized method. This wonderful instrument lets you construct a decentralized social media profile, and lets customers personal their knowledge and content material. Furthermore, since customers get to personal their social media parts, they will make the most of them additional. As an illustration, they will assign charges to followers or present them with prizes, reminiscent of distinctive NFTs (non-fungible tokens).
So, in the event you imagine in a decentralized future and the appropriate to personal your content material, create your free Moralis account and observe our lead. We’ll begin with a fast demo of our completed decentralized social media profile. Therefore, you’ll know what to anticipate from at this time’s tutorial.

Our Decentralized Social Media Profile Demo
Right here’s the preliminary display screen of our instance social media dapp:

As you may see, we considerably “modeled” Twitter. On the prime of every profile web page, you’ll see a banner. Following is a profile image on the bottom-left facet of the banner. Beneath the profile image are some particulars concerning the profile at hand. That is the place our dapp shows person names, “Lens” addresses, statuses, and numbers of followers and following.
The screenshot above represents our dapp when deciding on the “I’m Following” web page. This web page shows animated NFTs of profiles that “alunm.eth” follows. Nevertheless, let’s say an instance person needs to observe the “alunm.eth” profile. In that case, they should go to the “Comply with Me” tab and click on on the “Comply with Me” button. By following this profile, followers obtain a “good” NFT (displayed within the bottom-right nook of the display screen):
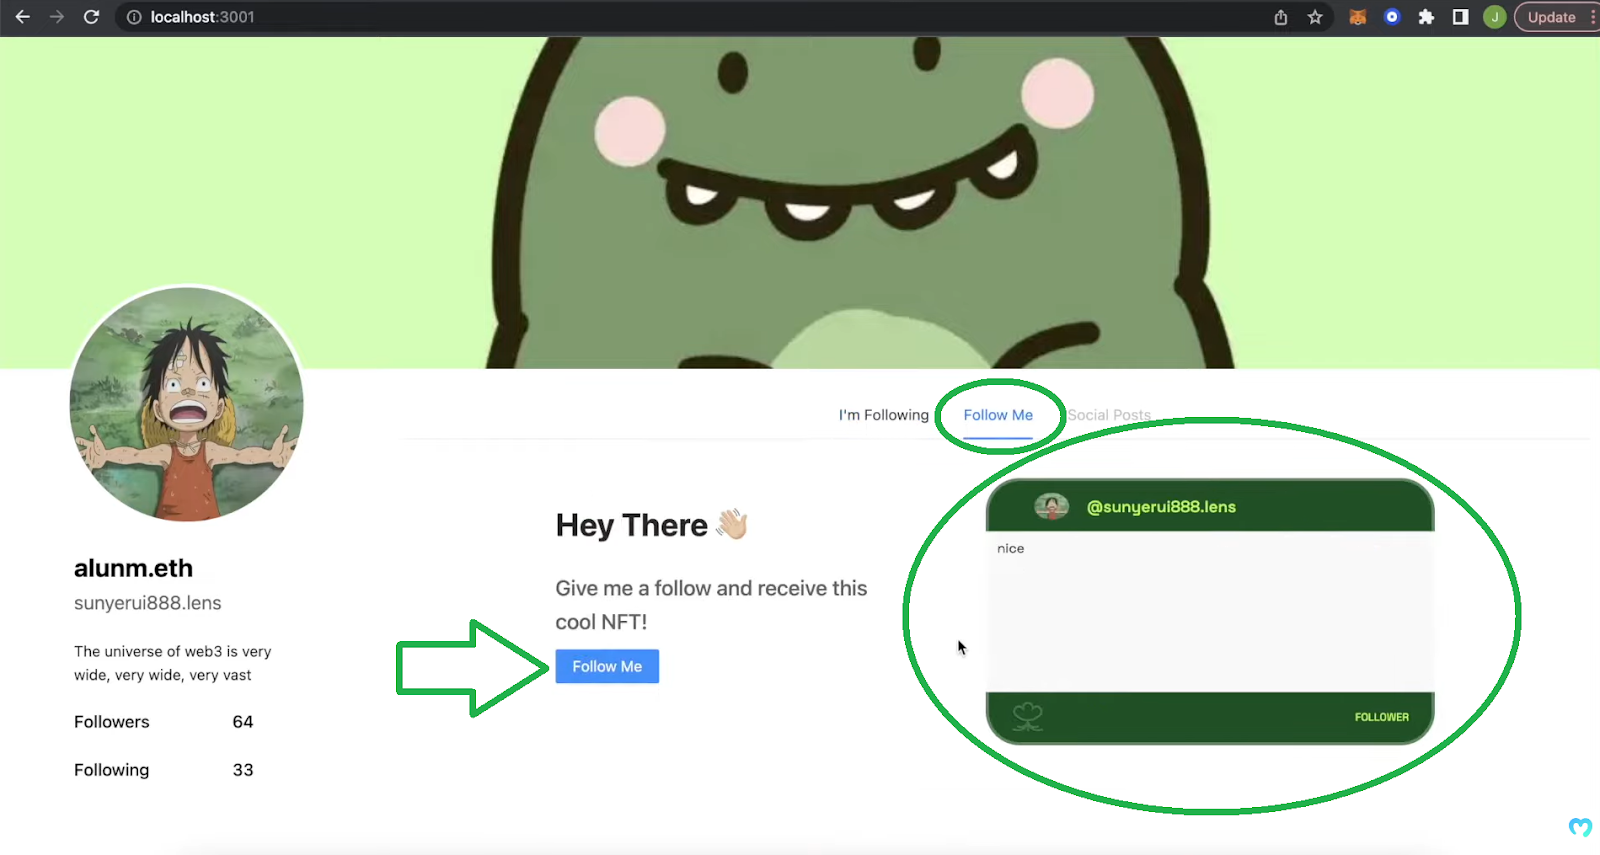
When customers truly click on on the “Comply with Me” button, their MetaMask extension pops up. Furthermore, it asks them to substantiate the transaction and pay the associated gasoline payment.

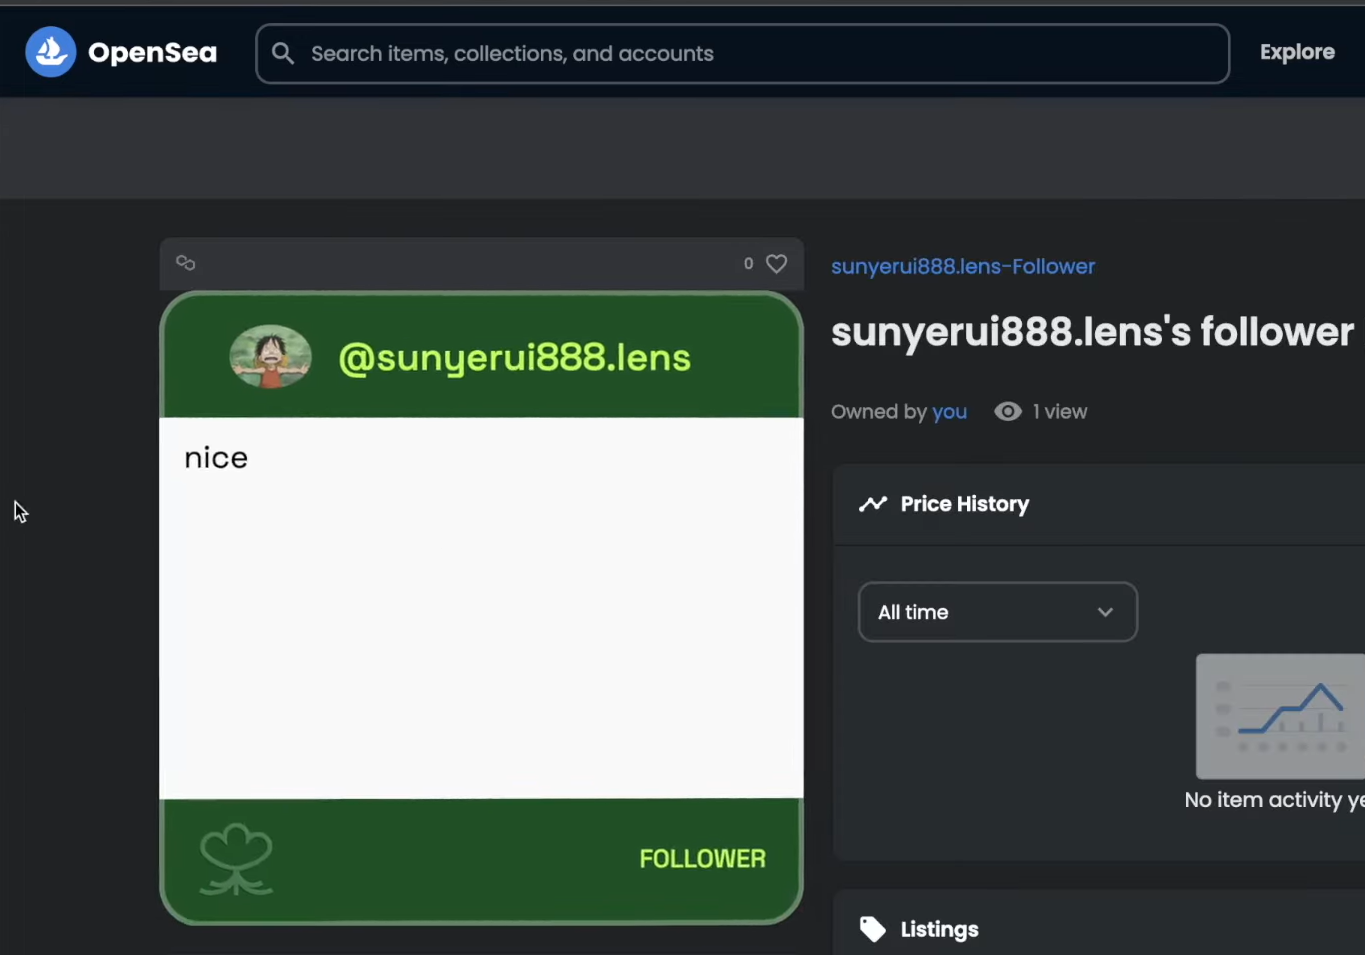
As soon as they affirm the transaction, the “good” NFT has been despatched to their pockets. As such, they will use an NFT platform, reminiscent of OpenSea, to view their new “follower” NFT:
If you happen to assume our instance dapp is cool, bounce to the subsequent part. There, you’ll begin constructing your individual occasion of this decentralized social media profile dapp. To make issues as simple as doable, we are going to give you the starter code you may clone. Nonetheless, you can too go for the completed code and easily use our tutorial as a code walkthrough.
Constructing a Decentralized Social Media Profile with Lens Protocol and Moralis
As talked about above, our directions presume you begin by cloning the “web3profile-starter” code, which awaits you on GitHub. So, be certain to go to that repository and get our code first:

Subsequent, open the mission in your favourite code editor. For further comfort, we suggest you observe our lead and use Visible Studio Code (VSC). Utilizing VSC’s terminal, you want to set up all dependencies utilizing the “npm i” command:
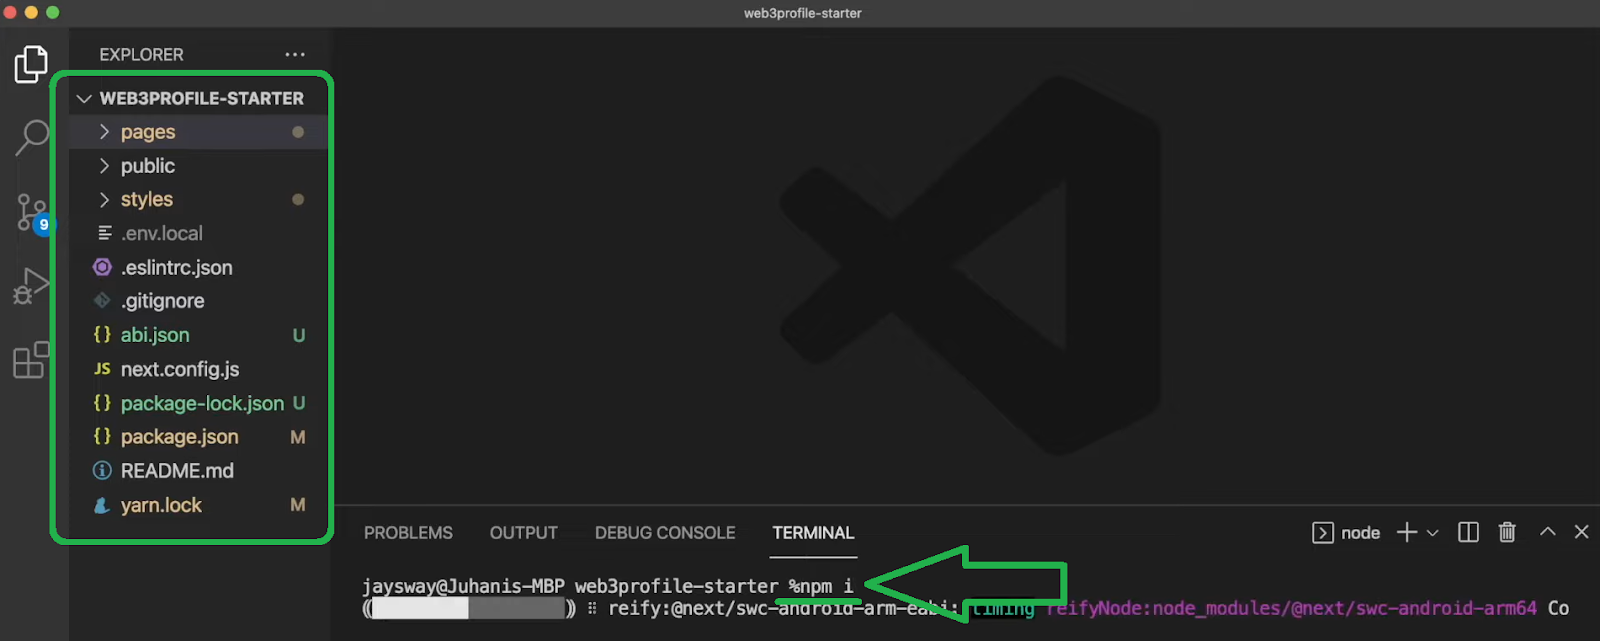
With all dependencies put in, you should use the “npm run dev” command to run an area server. Then, you should use your browser to view the preliminary state of our social media dapp. Furthermore, that is what you need to be seeing:
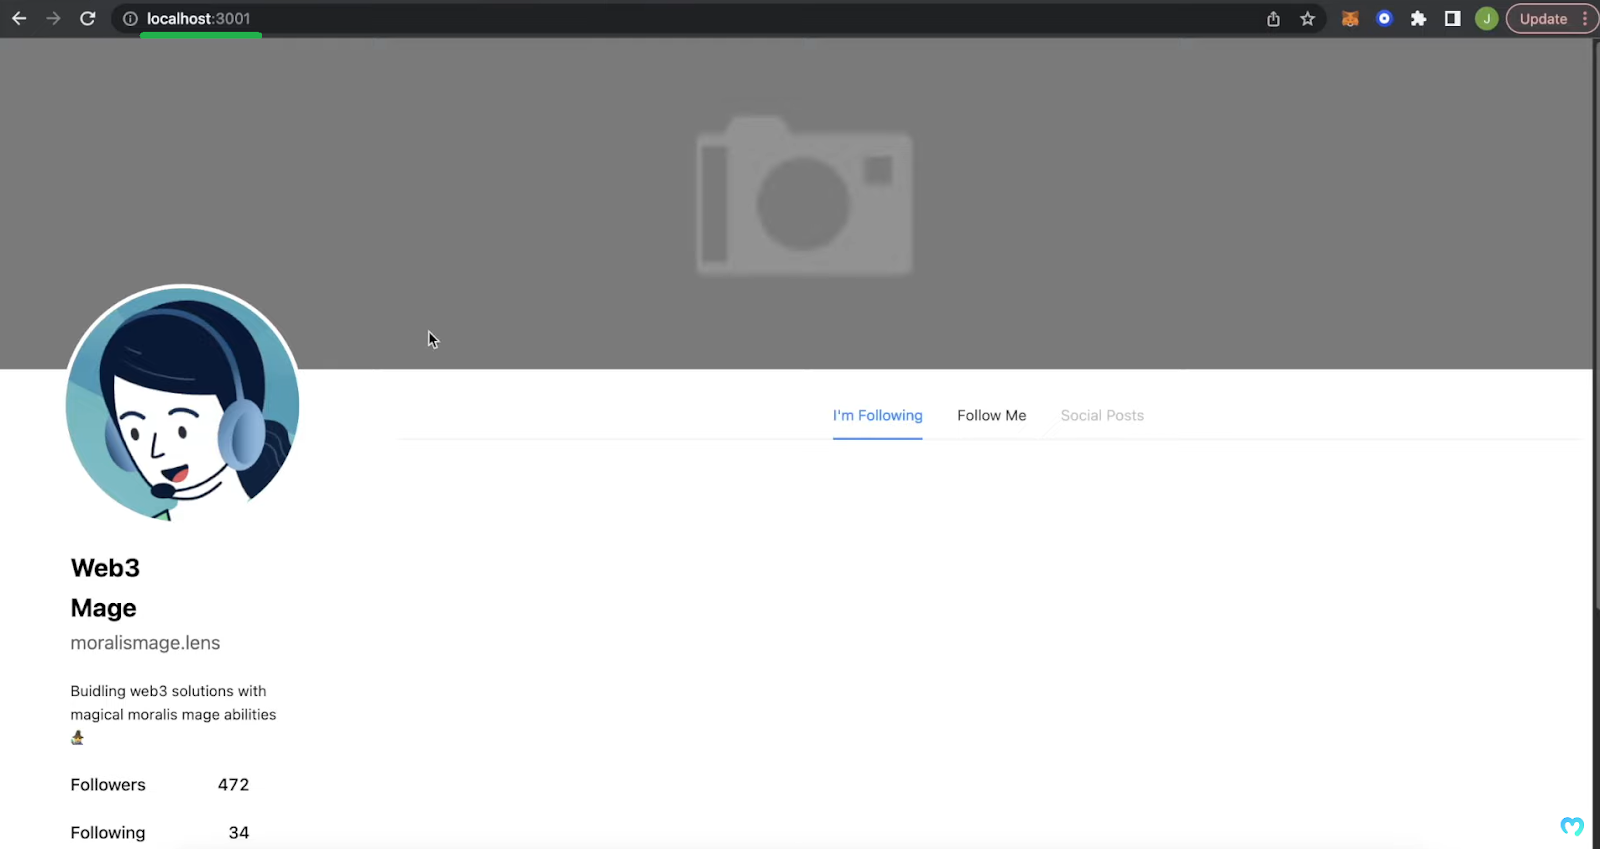
Trying on the screenshot above, you’ll discover that our code supplies the structure you want. Additionally, it already contains the banner template, the default profile picture, and default profile particulars. The structure additionally already contains the “I’m Following”, “Comply with Me”, and “Social Posts” tabs.
Therefore, it is a excellent place to begin so that you can deal with implementing Web3 functionalities. Moreover, as talked about earlier, we are going to use Lens Protocol to cowl decentralized social media profile functionalities. Furthermore, Moralis will assist us fetch all of the on-chain knowledge we want with single strains of code.

The best way to Use Lens Protocol to Construct a Decentralized Social Media Profile
We’ll use the Lens API to construct a decentralized social media profile. Moreover, based on the Lens Protocol documentation, we should first be certain we are able to question from our dapp. Since we’ll be utilizing URQL, we have to deal with putting in and utilizing that GraphQL consumer:

As such, we have to observe the directions supplied by Lens’ docs, and we’ll be good to go. We are able to copy the strains from the “Exposing the consumer” part. Then we return to VSC, the place we create the “lensCalls.js” file contained in the “pages/api” folder. Inside that file, we paste the copied code:
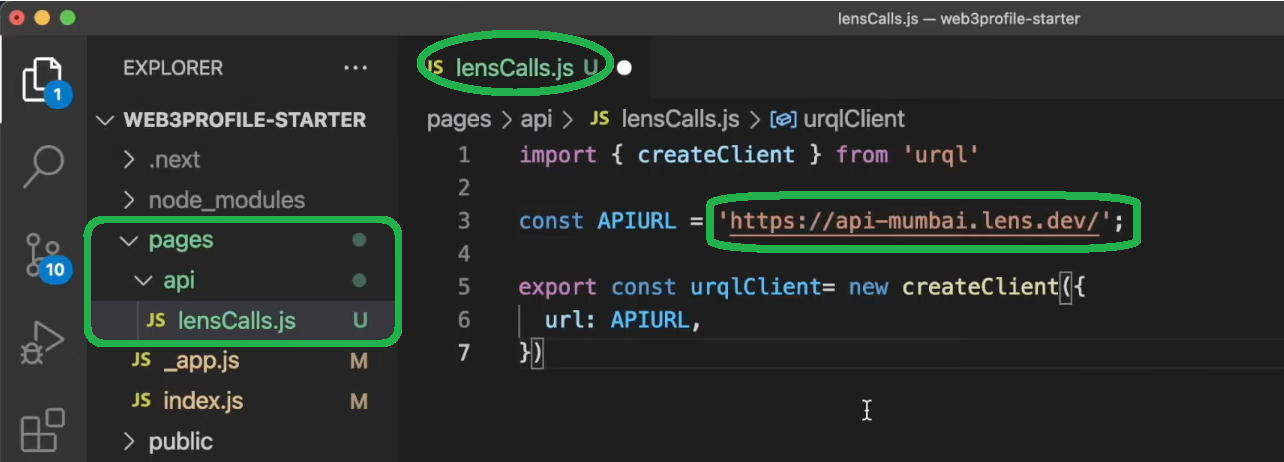
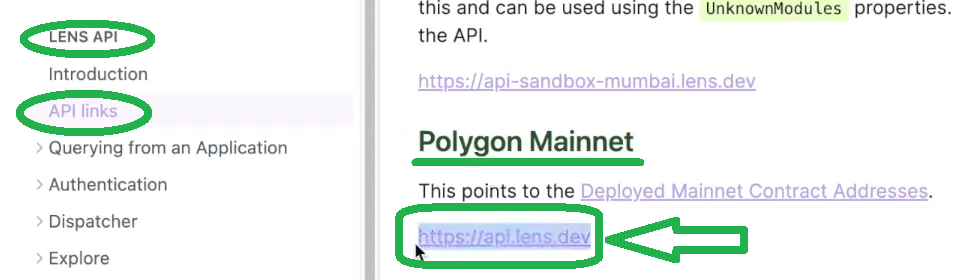
As you may see within the picture above, the copied code focuses on the Polygon testnet (Mumbai). Nevertheless, in the event you recall our demo, you recognize our dapp runs on the Polygon mainnet (the Matic mainnet). As such, we have to change the above-marked “HTTPS” accordingly. Therefore, we return to Lens’ docs and duplicate that deal with. We are able to discover it within the “API hyperlinks” part:
With the right deal with in place, we wish to deal with querying profiles. Therefore, we use the “Get profile” part of the Lens docs. There we are able to discover the code wanted to question profiles. Then, we merely copy it:

Subsequent, we return to the “lensCalls.js” file. There, we should first export our question utilizing this line of code:
Export const Profile= ‘

‘
Then, we paste the copied “Get by profile id” strains of code inside the only citation marks above. Furthermore, the copied code focuses on the “0x01” profile ID. As such, we have to know the ID of different profiles we wish to deal with. For instance, let’s change the profile ID to “0x09“:

Our Dapp’s Frontend
Open the “index.js” file, which covers our dapp’s frontend as demonstrated in its preliminary stage. To fetch an precise decentralized social media profile, we have to add the right code. As such, scroll right down to the underside of the “index.js” file and use the next strains of code:
export async perform getServerSideProps() {
  const response = await consumer.question(Profile).toPromise();
Nevertheless, to make the above question perform, we additionally must import “urqlClient” and “Profile“. Thus, we add this line of code on the prime of the “index.js” file:
import { consumer, Profile } from "./api/lensCalls";
We are able to then additionally add a correct “return” to the “getServerSideProps” perform:
  return {
    props: { profile: response?.knowledge.profile, nftArray: nftArray, myNFT: myNFT },
  };
Furthermore, to get the above return, we have to add “profile” to our “House” element and likewise log that for comfort:

The above strains of code present us with all the main points for a selected person ID. As such, we are able to now populate the mandatory fields of our dapp’s frontend. Thus, we have to deal with tweaking the content material of the “House” element by changing default values.
First, we change the default banner by changing the present deal with subsequent to “src” with “{profile.coverPicture.authentic.url}“. For extra particulars, use the video under, beginning at 8:50.
Moreover, we do the identical for the profile picture by utilizing “{profile.image.authentic.url}“. Then, do the identical for the person identify, deal with, and bio. Right here, we change default values with “{profile.identify}“, “{profile.deal with}“, and “{profile.bio}“. Lastly, we should additionally be sure that the numbers of “followers” and “following” are correctly populated. Therefore, we change the default values with “{profile.stats.totalFollowers}” and “{profile.stats.totalFollowing}”. Right here’s the end result for “0x09“:

Taking a Decentralized Social Media Profile Dapp to the Subsequent Degree
Trying on the screenshot above, you may see that with the above-implemented tweaks, our dapp collects and populates all person particulars. Nevertheless, you can too see that the “I’m Following” web page continues to be empty. That’s as a result of our dapp will not be fetching customers’ NFTs. Luckily, the fetched particulars which might be contained in the person object embrace the customers’ pockets addresses (9:55):

As such, we are able to use the ability of Moralis’ Web3 API to make use of that deal with and fetch all of the NFTs owned by it. As a way to get hold of this energy, you should full the preliminary Moralis setup.
Acquiring Your Moralis Web3 API Key
If you happen to haven’t created your free Moralis account but, achieve this now. You need to use the “create your free Moralis account” hyperlink within the intro or go to the Moralis homepage. Upon getting your Moralis account up and working, you may entry your Moralis dashboard. That is the place you’ll see the “Web3 APIs” tab within the facet menu:

After clicking the above menu possibility, you’ll land on the “Web3 APIs” web page. There, you should use the “copy” icon to get your Moralis Web3 API key:
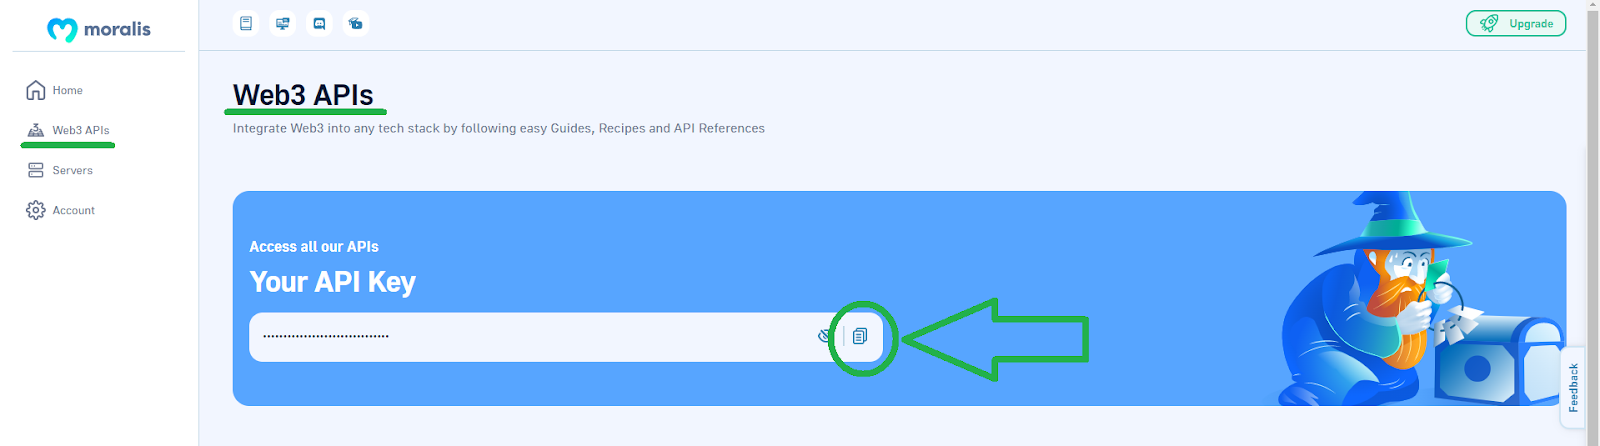
Lastly, return to VSC and paste the above-copied key contained in the “.env.native.instance” file. Nonetheless, additionally be certain to rename the “.env.native.instance” to “env.native”:

Making Moralis API Calls
Now that you’ve your Moralis Web3 API in place, you may observe our lead as we begin making Moralis API calls. To do that, we have to return to the “index.js” file and first import the Moralis SDK. Therefore, we add the next line of code on the prime of the file:
import Moralis from "moralis";
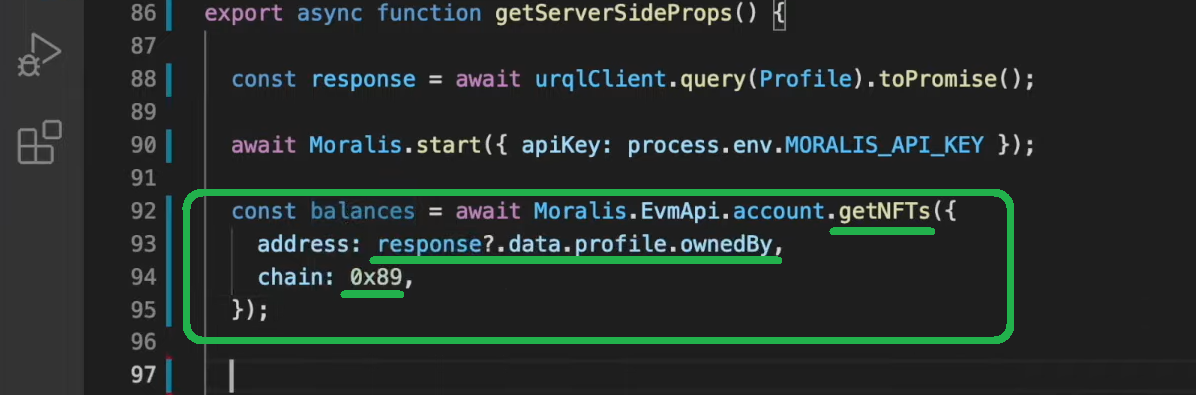
Then, we scroll right down to the “getServerSideProps” perform. Inside that perform, we’ll deal with including API calls above “return” (11:04). Nevertheless, we first initialize Moralis:

Subsequent, we merely use the Moralis documentation to see what’s the most effective answer it gives to question accounts’ NFTs. We discover that the “getNFTs” endpoint will do the trick. All this endpoint requires is an deal with and a sequence. Luckily, we’ve got each of those parameters – the above “ownedBy” deal with and the Polygon mainnet chain ID (“0x89″). As such, we simply copy the strains of code from the Moralis documentation and change the 2 parameters with correct values:
Displaying Solely Lens Protocol NFTs
Subsequent, we wish to show solely the Lens Protocol NFTs on the “I’m Following” web page. As such, we have to implement the strains of code that may do the right filtering. For an in depth walkthrough, use the video under, beginning at 12:10. In the end, these are the strains of code we use:
  let nftArray = [];
  let nfts = balances?.knowledge.end result;

  for (let i = 0; i < nfts.size; i++) {
    if (nfts[i].metadata !== null) {
      if (
        "animation_url" in JSON.parse(nfts[i].metadata) &&
        JSON.parse(nfts[i].metadata).animation_url !== null &&
        JSON.parse(nfts[i].metadata).animation_url.contains(".lens")
      ) {
        nftArray.push(JSON.parse(nfts[i].metadata).animation_url);
      }
    }
  }
As well as, we should additionally add “nftArray” to the “House” element.
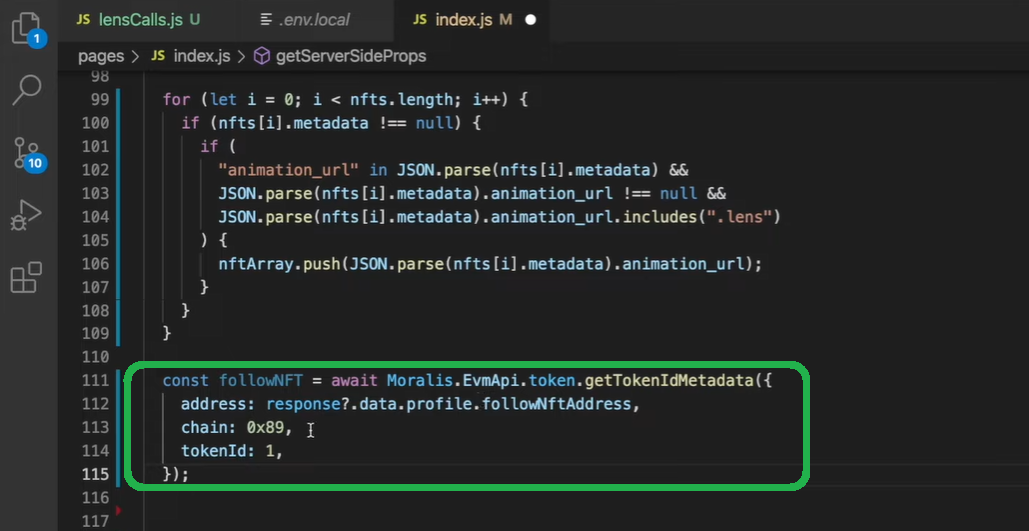
Shifting on, we additionally wish to show NFTs customers get by following that account on the “Comply with Me” web page. That is the place we’ll use the “getTokenMetadata” Moralis API endpoint (14:16):
For particulars on how you can current the “Comply with Me” NFTs as introduced within the demo, use the video under (15:27).
Final however not least, you additionally wish to activate the “Comply with Me” button. That is the place we hand you over to our in-house skilled’s succesful arms. He’ll information you thru this closing stage of constructing a decentralized social media profile dapp within the video under (16:17).
The best way to Construct a Decentralized Social Media Profile – Abstract
We coated fairly a distance in at this time’s article. Nevertheless, in the event you adopted our lead and the video above, you had an opportunity to create your individual occasion of a decentralized social media profile dapp in lower than 20 minutes. In fact, that was doable since you didn’t have to start out from scratch. As an alternative, you used our starter code and simply included Web3 backend performance. The latter was simple, because of Moralis’ and Lens Protocol’s docs. Alongside the best way, you additionally obtained your Moralis Web3 API key, which gave you entry to the last word Web3 API. Moreover, you used “getNFTs” and “getTokenMetadata“.
If you happen to loved at this time’s tutorial, you must discover the Moralis YouTube channel and the Moralis weblog for Web3. The tutorials there fluctuate from probably the most primary ones to extra superior feats. As such, you may decide those that fit your present abilities. Nevertheless, because of Moralis, your Web2 dev abilities are all you want. Moreover, since Moralis is all about cross-platform interoperability, you may be a part of the Web3 revolution using acquainted instruments. ReactJS, NextJS, Firebase, Supabase, Unity, and different platforms may be your ticket to start out creating killer dapps. It’s additionally price stating that Moralis helps all main programmable chains. Consequently, you get to future-proof your dapps.
Final however not least, you might also wish to go full-time crypto as quickly as doable. That is the place Moralis Academy could make all of the distinction. By turning into blockchain licensed, you’ll drastically improve your probability of touchdown a wonderful crypto job very quickly.